Showing posts with label Designin' December. Show all posts

Saturday, 6 January 2018

My Top 5 Hits and Misses of 2017

I’m once again linking in with Crafting a Rainbow’s Top 5 of the Year. So here’s my top 5 - both hits and misses in this post. They are roughly in order from the start of the year, rather than being in favourite order. I've included a link to the original blog post which will have details of pattern used and more details of construction etc. I've used different photos - I think the actual blog post has better photos but for some reason I couldn't pick them up today. I had to cut down my labels as there were way too many characters.

Top 5 Hits

1 Orange padded gilet for my grandson


In February, I made a padded gilet in class and asked for the pattern to be sized to fit my grandson. He liked it and it did fit. It’s too small now of course - he has grown so much in the last year! I’ve included it here because I learned such a lot making it. I have some fabrics for new ones for him and his brother but would need to identify a suitable commercial pattern. I'd use microfleece for the lining next time around and bought some in a  lovely lime green. I don't think I ever blogged a photo of the completed garment. An earlier post where I tried it on him for fit is here

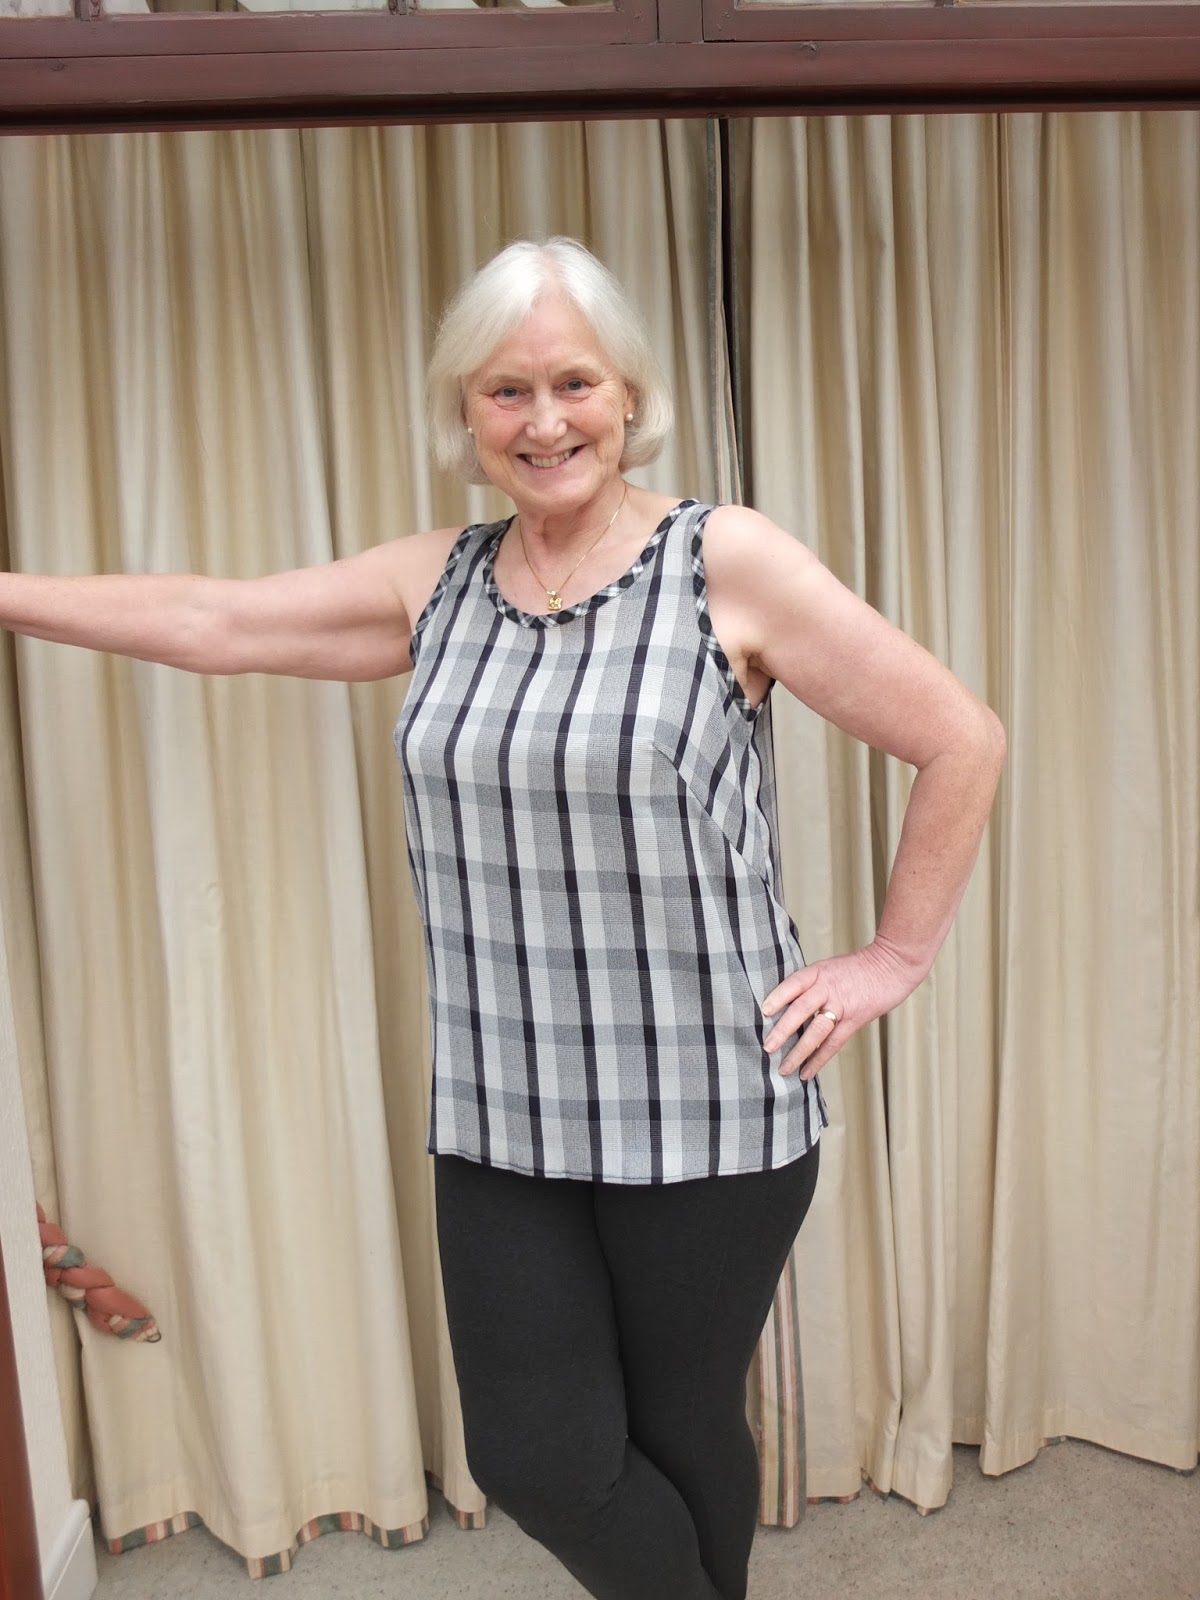
2 Check self-drafted tank


In March, I made a simple sleeveless top using a block I had made. Armholes and neckline bound with contrasting, visible, bias binding.

I like this top and wear it regularly - but I would choose a different fabric next time around as this is a bit ‘spiky’. I would make it in a natural fabric - this is polyester.

I’ve included despite not being 100% happy with it as it looks good and taught me a lot. This was my first venture into using a print on a print (contrasting tartan bias strips). I loved the result.

Blogged here.

3 Nettie bodysuit


Nettie worn with trousers and a cardigan. Long sleeves next time.


In the summer, as part of my class on stretch fabrics, which ended in July, I made a very successful Nettie bodysuit. As this was done in class, I followed class instructions rather than pattern instructions and made a couple of modifications. I intend to make more but haven’t got around to it as yet. I would want to add sleeves to the next one.

Blogged here.

4 Murder Mystery weekend garments

Under this one heading, I’m going to include 3 separate garments, all of which were made for our murder mystery weekend in November

  • Yellow jeans for David (in photo below). David likes these and has worn them since and intends to go on doing so. I previously made him jeans from my own pattern (part of another course) but this was from a commercial pattern, which made it easier for me. I made a couple of tweaks and would alter more next time around. Blogged here.


  • My colourful jumpsuit (in photo above). My son-in-law loved this and I wore it again over Christmas, especially for him!! Actually, I love the jumpsuit - it’s just that there aren’t many places I can wear this bright a fabric! However, I will make up another more ‘sober’ one! I don't often wear my own handmade garments as I'm so critical about finish and fit. Blogged here.
  • My ‘flower power’ dress. I love it. I would make the smaller size next time, though. It was comfy, cosy and warm with plenty of space for Christmas pudding eating! I guess I would do the sleeves as per pattern though as these aren't very practical for working around the house! Blogged here (with better photos).


5 Red Silk Dress for Helen


I absolutely have to include Helen’s red silk dress even though it’s less than two weeks since I gave it to her!!  I know this will be worn and worn and worn, like its RTW predecessor. She loves it and it fits. This is, incidentally, my entry into Designin' December, conceived and run by Linda of Nice Dress Thanks I made It!. There is currently voting on her blog and on IG. Blogged here. This link is to the 5th of a 5 part blog! Previous posts were about developing the pattern, toiles etc.

Others
I have had a few successful makes, both garments and craft type makes but the ones above are my edit.
Top 5 Misses/Failures

1 Bias Cowl Top for my Mother


You can see that it's falling off the shoulders

The first has to be the bias cut top I made for my mother’s birthday in January 2017. I had made the same top for me for the PR Sewing Bee (but didn’t pass beyond the second round) and as my mother loves a cowl neck and I had some fabric that she gave me, I thought this would be a good idea. The fabric was fine.

My mother told me the top was lovely etc. Some months later, I had the opportunity to see her wearing it - what a disaster! She told me she hadn’t wanted to say…
The fit was awful. I recently suggested I remodel/remake but I think she has got rid of the top.

I should say, my mother has lost a considerable amount of weight (weight that she can’t afford to lose) so that has contributed. Also, she has a marked ‘dowager’s hump’ (I hate that term!), which I did try to take into account when I made the top.

So it’s not the pattern, or the fabric but fit that’s the problem here. Issue - fit. Blogged here - but obviously needs updated to reflect the fact that it didn't actually fit her!

2 Two UFOs which I completed but which aren't a success:


The first is the lace cardigan I made in February 2017, photo above. I just don’t like it. It had been a UFO and perhaps should have stayed that way! I modified the pattern from the original so can’t really comment on the pattern.  Issue - simple dislike. I find it too 'floppy' and insubstantial. Blogged here.


The next was also in February, above - another UFO. This time a cotton skirt. It just doesn’t work as it clings.  I did try to wear it as I like the fabric and felt the skirt fitted but was put off by the clinging. It isn’t lined but needs to be because of this. Again, the pattern is fine, fabric fine, but lining needed and probably fit tweaked further. Issue - need lining with this fabric. I may well get around to doing this as summer approaches. blogged here.

3 My Merry May MAGAM Top, sadly


I loved the pattern on the fabric. I wear a lot of cardigan type jackets.

In June, I made a top from the same pattern as my successful sleeveless tank. The fabric choice was poor, however much I loved the pattern. Snags and runs appeared in the fabric (rips that is, not colour runs)  and despite trying hard to ignore them, I couldn’t. It was binned. Issue - fabric choice. Blogged here. You can see it without the cardigan on the blog.

4 A checked skirt which gave me migraine


My eyes crossed as I tried to sew with this fabric. I gave away what I had left (quite a bit)


In April, I made a skirt. It was finished but I didn’t like the fit and tried to modify. I also didn’t like the fabric. Never worn - and not just because summer was coming up. Issues - fabric choice (the pattern on the fabric even more than the fabric though it was too heavyweight) and fit. Blogged here. There are much better photos on the post

5 Grainline Morris Blazer


My Grainline Morris blazer. Least said the better!! I will, however, try again as I think the biggest issue here was fabric choice. Issues - fit and I think I would like to line it. Blogged here

There are other failures, too, some of which didn't get to the stage of taking a photo and certainly weren't blogged. Forget about them, Anne!

Others - UFOs or WIPs

  1. I have a Linton tweed Chanel-type jacket almost completed. I just have the lining to hand sew. I might do this as we catch up with the Star Wars series. David got movies 1 - 6 for Christmas. We have previously seen them, starting when the first came out in 1977 but it will be useful to see in story chronological order. This is certainly a WIP - and nearly finished.
  2. I started but didn't complete culottes for myself. I may or may not complete them - I do like the fabric but culottes might well be out again. Issue - time available. This is a UFO.
  3. My interminable trouser toiles did get to block stage but I haven’t made them up as yet. I plan to make up in navy wool and navy gaberdine (?)
  4. My bodice and skirt/dress  toiles were not completed to my fit satisfaction. Lots of work here! I will tackle again in the new year.
  5. I have another jacket at toile stage ready to make up. It’s definitely on the back burner. UFO.
  6. I plan to make up a Grainline Morris blazer in lightweight boiled wool. I think this could be a useful and versatile jacket - if I get the fit right.
  7. There are others….
2018 Plans

I will be putting up my 2018 plans in a separate post

Friday, 29 December 2017

Helen's red silk dress is finished! Red silk dress part 5. Designin' December entry.

The finished dress, taken indoors with flash, yesterday
Original Designer Dress Inspiration

I posted about this nearly a year ago! Part 1, part 2, part 3 and part 4 - so this is part 5! Briefly, Helen had an RTW red silk dress that she loved and was on its last legs even then - though she continues to wear it to this day! (I started writing this earlier in the month - edited to say the dress finally died on Christmas Day this year. Great timing!) I made a pattern from her dress and made up a toile in green. Helen liked the toile and regularly wears that dress still. It was meant as a wearable toile, though, and wasn’t completed to the finest standards. I  practised the pocket which was the main reason for the toile.

This is Helen wearing the original designer dress
A photo of the green toile on Missy

Rather belatedly, I decided to ask Helen if this had been a designer dress, expecting the answer ‘no’. In fact, her dress was by Markus Lupfer, bought from Net a Porter in a sale in 2011 for £90. The cost per wear is virtually zero as she has literally worn this dress to death, which is why I am recreating it - as, admittedly, has been on the cards for a year. In previous posts (linked above) I show the dress on Helen and some of its wear problems (worse now as she is still wearing it a year on; edited - see above that the dress has finally expired) and a toile I made to test my pattern of it. This means, though, that I can participate in Linda of Nicedressthanksimadeit’s Designin’ December challenge with this copy of a designer dress. However, I cannot participate in MAGAM, which is linking with Designin’ December as the dress is not for me. The only change from the original is for fit. Helen is 6' and needed the waist dropped by about 1" (I can't remember the exact amount - that will no doubt be on my posts), however, she was happy with the length and asked for the skirt to be shortened by the amount I had lengthened the bodice

Photos of the original dress from website:


I bought red sandwashed silk months ago and had originally planned to make the dress at that time as a very late Christmas 2016 present but life gets in the way! Then I planned to make it for Helen’s birthday at the end of November, but I didn’t manage that either.
I confess that there was a very large part of fear in this! I had drawn the pattern pieces to cut out with the fabric in a single layer but was still scared. I asked Rory’s advice re laying out the fabric.

The original dress lacks any stabilisation or interfacing but this one needs to have some inserted ‘invisibly’ to allow any support for the poppets. Oh, and that was another issue - the poppets I used on the green dress didn’t stay poppeted, Helen told me.

So roll forward to the beginning of December. I looked out the pattern and asked Rory to check it for true-ness (is that a word?). There were a couple of minor changes needed. I hadn’t been entirely happy with the pocket placement on the green dress (not to mention they are lopsided imo) so spent some time drawing out a better placement while keeping the essence of what Helen wants as per original pocket.

I had taken advice from Rory on how best to cut out my fabric - I was scared to do it and had been putting it off and off and off. I also read about how to cut silk. Rory strongly advised against trying the starch trick. I had made Helen’s wedding dress which was sandwashed silk crepe  but a much heavier weight and relatively well behaved. This fabric is a different beast!!

I’ll gloss over the next bit! Despite my care and help from David, my cutting (rotary cutter and mat) is far from perfect and the front hem looked like the rocky road to Dublin. I didn’t have enough fabric to redo. In any case, I wasn’t sure if I would get it any better a second time!

I spent a long time carefully marking the pocket placement on the dress.

Because the pockets cross the side seam and it was previously difficult to sew on once the dress was made up, I decided to make the front plus pockets sewn short off the seam, joined front to back and continue the pocket stitching over the side seam, as I did with the trial dress.

I decided to start with the back of the dress. The bodice is in 4 parts, princess seams. I sewed these up and then pressed  and then overlocked and pressed seams to one side as per original and top stitched. I thought it was looking good but the topstitched princess seams appear twisted or puckered, apparently this is called ‘roping’. Still, the original was like this I seem to remember, so I carried on. Rory said there is little I can do about this. The next step was attaching the back skirt, which I carried out without any hitches.

I then attached the casing on top of the waist seam by edge stitching. Admittedly not at the first attempt! I wasted some fabric here. Again the ends weren’t attached at that stage as they also go to the front.

The pockets caused me a lot of grief. I found I couldn’t remember exactly how I went about doing them. They are cargo type pockets with flaps and poppets and are a main feature of the dress (or I certainly wouldn’t have done them!) I tried to cut out the gusset part using the silk on the bias but it would not cooperate! I spoke to Rory who suggested that I had previously used straight grain and that bias would be tricky. So I cut out on the straight grain. I was originally hoping that I could use the bias cut strips I had cut for the pocket, but didn't use, for the bias binding around neck and armholes but that didn’t work out.

The original pockets have no stabilisation but this is required and I added to the last dress but this time around, I couldn’t quite work out how I did it so that Helen wouldn’t see it!

I had used tailor’s tacks to mark the pocket placement but I wasn’t  sure this was good enough so I thread traced. I was still not sure this would work as the fabric is so shifty!


Pocket position marked on dress front (similar on back - rest of pocket)
I wasn't sleeping very well at that stage. Instead of counting sheep, I would go over dressmaking techniques and try to solve the problems I was facing. I’m not sure it got me to sleep but I did sometimes solve problems! Or at least, find dressmaking solutions. I realised that I had to fit an interfaced facing to the top of the pocket. I know Helen is not keen on that, but needs must! Anyway, the pocket flap would largely cover this. Further, I realised that I would have to finish the exposed fabric edges inside the pocket (by overlocking) as this silk frays a lot. Lastly, I planned my bias edging.

In sewing bee the next day I received confirmation from Rory that my thinking was okay. She recognised that I was procrastinating because of fear and reiterated that there was no need. So I went ahead and created my box/cargo pockets ‘perfectly’. Yes, there were a couple of issues - I attached the facing to the wrong side of the pockets but decided to keep it that way as both had been done and understitched and the difference between 'wrong side' and 'right side' isn't noticeable, at least to me!. Rory suggested that I bag the top of the gusset with the facing and demonstrated how to do that. This makes for a neater finish, less likely to fray. Last time around I was most unhappy about this particular element. This also meant that I didn't need to overlock, after all, which would have been bulkier.

In class, I finished my pockets to the point of needing edge stitching, ready to attach to the dress.

I showed Rory my rather sine-wave-like hem and she said not to worry as the dress would drop anyway, especially with heavy pockets attached to it. I placed it on Missy (see other posts - the model I made for Helen when I was making her wedding dress) for a few days before completing the hem


Pockets basted on dress front - see the squiggly bottom cut line


Pockets, front of dress

  • In class, I had already attached the strip for the cargo/gusset pocket to the pocket on all sides bar the diagonal opening. The diagonal opening was backed with interfaced facing and understitched. This facing concealed some of the possible raw edges
  • I then pressed the seams, folded carefully on the edge and pressed and basted the edges together. I ended up doing a lot of hand tacking. It takes time but saves me from making mistakes so it's worth it.
  • Along the diagonal fold, I stitched at ¼”. I found this surprisingly difficult! I had to make several attempts. It's fortunate that the bits at the start are concealed by the flap!
  • Then around the seam line of the main pocket bag, I edge stitched with my needle set to the maximum offset ‘5’ around all sides.
  • The loose side, to be attached to the dress, was overlocked and I stitched a marking line of stitching at 1 cm, the seam allowance. I then folded and pressed along the line and, yes, hand basted in place.
  • Now I was glad that I had marked and thread traced the position for the pockets on the dress!
  • I pinned the pocket in place, hand basted and sewed to the front of the dress, stopping well short of the side seams. Again I used an edge stitch at 5.
  • They seem even so I stitched up the side seams avoiding the pockets and the waist casing of course!! Then I pressed and overlocked the raw edges together and folded and pressed to the back. I think a French seam would be nice but the original has overlocked edges.
After I sewed up the seams, I attached the pocket to the back of the dress in the same way as I had to the front. In addition, I attached the waistband casing to the front across the seam. I realised that I should have attached the pocket flaps too, but I didn’t at that stage.

The pocket flaps are two layers of silk, one interfaced, sandwiched together and the whole edge stitched. In addition, I overlocked the raw edges which are attached to the dress.  I marked the poppet position. I flattened the dress as much as possible to see where the pocket edge lay. Although I had marked this previously, it wasn’t exactly the same. I put the pocket down wrong side up with the overlocked edge along the line of the pocket opening. I pinned and tacked and left it overnight, ready to stitch the pocket flap to the dress, turn over the flap in place and edge stitch.

Well, nothing is as easy as it seems! I managed to sew the first flap on successfully, but the second wasn’t right - I then found I’d caught the dress in with my stitching (I didn’t notice any change in the stitching). So I unpicked the second flap. Fortunately the needle marks eventually disappeared! I tried again. The two sides aren’t absolutely identical but I was worried about pulling out the stitching too often. A lesson learned here - although I had marked the points where I wanted to attach, they weren’t good enough.

Also, the gusset parts of the pockets appear puckered. Rory recommended a good press but clearly, although I practised, my choices of tension, stitch length, foot pressure etc weren’t perfect. Also, I didn’t use my dual feed at this point because of the foot I was using. Lesson learned.

Bias edgings
Although the bias binding was already cut for the armholes and neckline, I didn't have enough - fortunately I still had a piece of fabric left and was able to cut another strip. I folded the strips in two, sewed at 1 cm (⅜”) to the armholes and neckline, pressed, understitched, trimmed, pressed, topstitched. Help! Despite trying to be careful, I obviously stretched the bias. The neckline wasn’t lying properly - so this was something else I needed to ask advice about. Fortunately I still had one sewing bee left before Christmas where I could seek advice.

Belt
I also realised that I hadn’t cut the waist tie/belt which is pretty long and thought I might have to use elastic in the centre and fabric at the end as I might not have sufficient fabric left. However, I succeeded in cutting two strips to allow a long enough belt. The join won't show as it is inside the casing. No problems making the tie up. I couldn’t remember if the original belt had edge stitching - I asked Helen and it doesn’t.

End stages

Before I went to class, I decided to wash the dress again as a couple of my markers were showing (as far as I can see they washed out okay). I hoped that washing it might help the neckline lie flatter - forlorn hope, I fear. I asked Rory about that baggy neckline (could kick myself!). It was a bit better after washing (not pressed) and Rory said to use a cloth (I used silk organza) plus plenty of steam and press well. It was a lot better after that.

The dress was now all but finished. I had Missy wear it to see how much the hem dropped. The answer was quite a bit! I took the dress but not Missy to sewing bee (the last one before Christmas; my last chance for help with this dress) and put it on one of the models there to give me an idea of how the hem lay. Rory helped me level it. After that, at home, I overlocked the edges, pinned and tacked the 1” hem in place, pressed it and top stitched in place.

And of course, I still had to add the poppets. Helen was unhappy with the poppets on the toile so I did some research and asked questions and was given a recommendation - I had to send off to the States for these so I hope they are genuinely better! David helped me apply the poppets. No major problems.

I’ve learned that even if you have made a design previously, and even if it is your own pattern,there are still going to be tweaks and changes required. I don’t mean to the sizing as I really have no opportunity to test that out beyond learning that Helen is happy with the fit of the green dress, but rather the way of creating certain elements.

Final result

I thought the dress looked pretty good. Final press then I photographed it on Missy in case I wouldn't get photos on Helen. Helen braved the cold outside for these photos, complete with Christmas socks as it was too cold to take them off.


I gave it to Helen for her Christmas - we were having a late Christmas celebration on 27th, in Cambridge, hosted by my oldest daughter. It was lovely to see all 3 daughters, 2 sons-in-law and 2 grandsons.

Helen's husband thought the dress was identical to the original. Helen tried it on the next day and even braved the icy weather outside to allow photos. Her comments were that it fitted better than the original (I had made some changes to original fit, mainly dropping the waist by 1”), that she had forgotten how nice the silk originally felt and that it was ‘perfect’. She had stopped using the pockets on the original and doesn't actually intend to use the pockets on this - but she was pleased to learn about the interfacing and felt that these poppets already felt much better and more secure.

Helen would love a wardrobe full of this dress in different colours. I asked if she wouldn't tire of it and she thought not. I'm a glutton for punishment I think! I offered to make a bottle green silk version. I confess I had offered even before Christmas! Helen has said that with each subsequent dress (!!!???), I can lengthen it a little to account for her maturing tastes as she gets older! She said that it would then eventually be at a length I would consider acceptable.

For my Christmas from David I got an edge stitching foot #10D suitable for use with my dual feed and I hope that will help me achieve a non-roped seam finish.

We came back home early, last night instead of today, because of weather warnings for today. It's a winter white wonderland outside.

I'm not going out today so can get some posts together. I have also linked here to previous posts so you can if you wish read about the earlier parts of the journey including pattern development.

How Do You Read Blogs?

It's a while since I've posted a blog,  lots of reasons. I'm thinking of starting again. However,  I used to read the blogs I fo...