Showing posts with label New look 6407. Show all posts

Saturday, 19 December 2015

Top 5 Hits, Misses, Reflections of 2015 and Goals for 2016


Top 5 of 2015

I decided to look at hits and misses from this last year, as championed by Gillian of Crafting a Rainbow. Thank you, Gillian! The idea was to post the top 5 in each category. I wasn't altogether sure that I had a total of 5 items from the whole year,  far less 5 in any one of these areas. Indeed I've only reviewed 9 items on PR  the year; that's only new items made from scratch. There are some things that were such wadders that they didn't make it as far as blogging or in some cases past toile stage and these aren't included. Not a lot of sewing, you'd be right in thinking. I was,  I admit,  shocked!  After all,  I started sewing to make myself garments that fit - and I started doing sewing classes to learn how to make those garments - and I started pattern cutting classes to learn how to make the patterns for those garments, to make sure they fitted!


A lot of my time has been spent in course work, doing samples and in developing patterns for Helen's wedding. As a result, as I have so little,  I'm combining all the sections in one post.


It's interesting that my successful items are mainly for other people. I enjoy sewing for others (by that I mean family).  It's easier to fit someone else rather than yourself - and especially when that person doesn't have the same figure anomalies creating fitting difficulties.


Hits


1.Skirt for my youngest daughter Helen. Style 1981.


She tells me she wears it often, it appears to fit well and I was pleased to be able to salvage my mother's fabric.


2 Kimono for Helen. New Look 6217

Rear view to show it twirl


She wears this to death or at least did during the summer. Loves it. It was easy to make,  too.


3 McCall's 6844 for me


I've worn this regularly. I like the colour as it's useful. Next time,  though,  and there will be a next time, I'll make the straight version rather than the peplum version. Maybe in navy.


4 Jeans for husband.

Jeans in his favourite green
These were far from perfect but DH wears them regularly, so that counts as a success. They were self drafted and I think that was a step too far; I would have been better starting with a commercial pattern


I learned a lot of techniques in my jeans making class and in making these and feel more confident about making more jeans. I have more of the same fabric to make another pair,  perfecting the fit issues. I wouldn't use my drafted pattern,  though - I've since bought the Kwik Sew men's jeans pattern and will use that. Is have to go back to toile stage again,  of course.


5 Does this count as number 5? By far my most successful garments this year,  that get worn ALL the time are RTW garments that I have altered to fit. I didn't really enjoy altering things as often it seems it would be easier to start from scratch! However, I have a great sense of achievement and satisfaction to produce a wearable garment from something that wasn't. My altering skills have increased a lot. There are lots of future candidates.


Some of these items were new,  never worn that needed fit alterations. Others were items that had developed faults - the commonest was that a seam hasn't been overlocked properly and a hole had appeared. One top, though, had developed an actual hole in the fabric. My repair and disguise isn't great and I don't think I'll be wearing that out of the house.


I feel that RTW is a misnomer as they're not,  for me at least. Off the peg, okay.


There isn't a ‘proper’ number 5. I have some successful wedding related toiles, successful class samples and some successful craft items, and if course my very successful remodelling of my small dressmaking model, Missy, for Helen but I guess these don't count here.

Misses


1 Liberty print dress. Butterick 5951

Inside of dress
Just - no!

I didn't like anything about this dress. The style didn't work; I had problems with altering and sewing the darts to look good after trying to alter the fit and the colour was just not me. It has gone! I also gave away the rest of the beautiful fabric - lovely touch and feel that is, not the colour or pattern. I'm not a Liberty print type of gal - I don't like little bitty floral prints (on me) - I have,  however,  recently bought a couple of Liberty geometric prints. The fabric is beautiful to touch and in handle and I think the pattern is more me,  while,  true,  being a pattern rather than plain.


2 Blue Capstan dress Simplicity 1418

The dress was too small to put on my model

I was pleased with this dress which I made to practice some techniques. I intended it for Helen and used her usual pattern size and alterations - but it was much too small. I say her usual size - this clearly varies between pattern companies, despite their sizes being quoted on the envelope. The ease obviously varies.  Helen is a RTW 8/10 (UK). i started making items for her using a pattern size 12.  One thing drowns her, one is just right and this is miles too small! Just as well I now have Missy and some decent measurements.  My daughter is planning to donate this dress to a very petite friend.


I like the dress and style and considered it for the starting point of the bridesmaids’ dresses I'm making but am worried about the sizing so it's probably easier to draft from block. Both the bridesmaids need FBAs; I've made them both blocks (slopers) and need to make up and test the toiles (muslins) over Christmas.


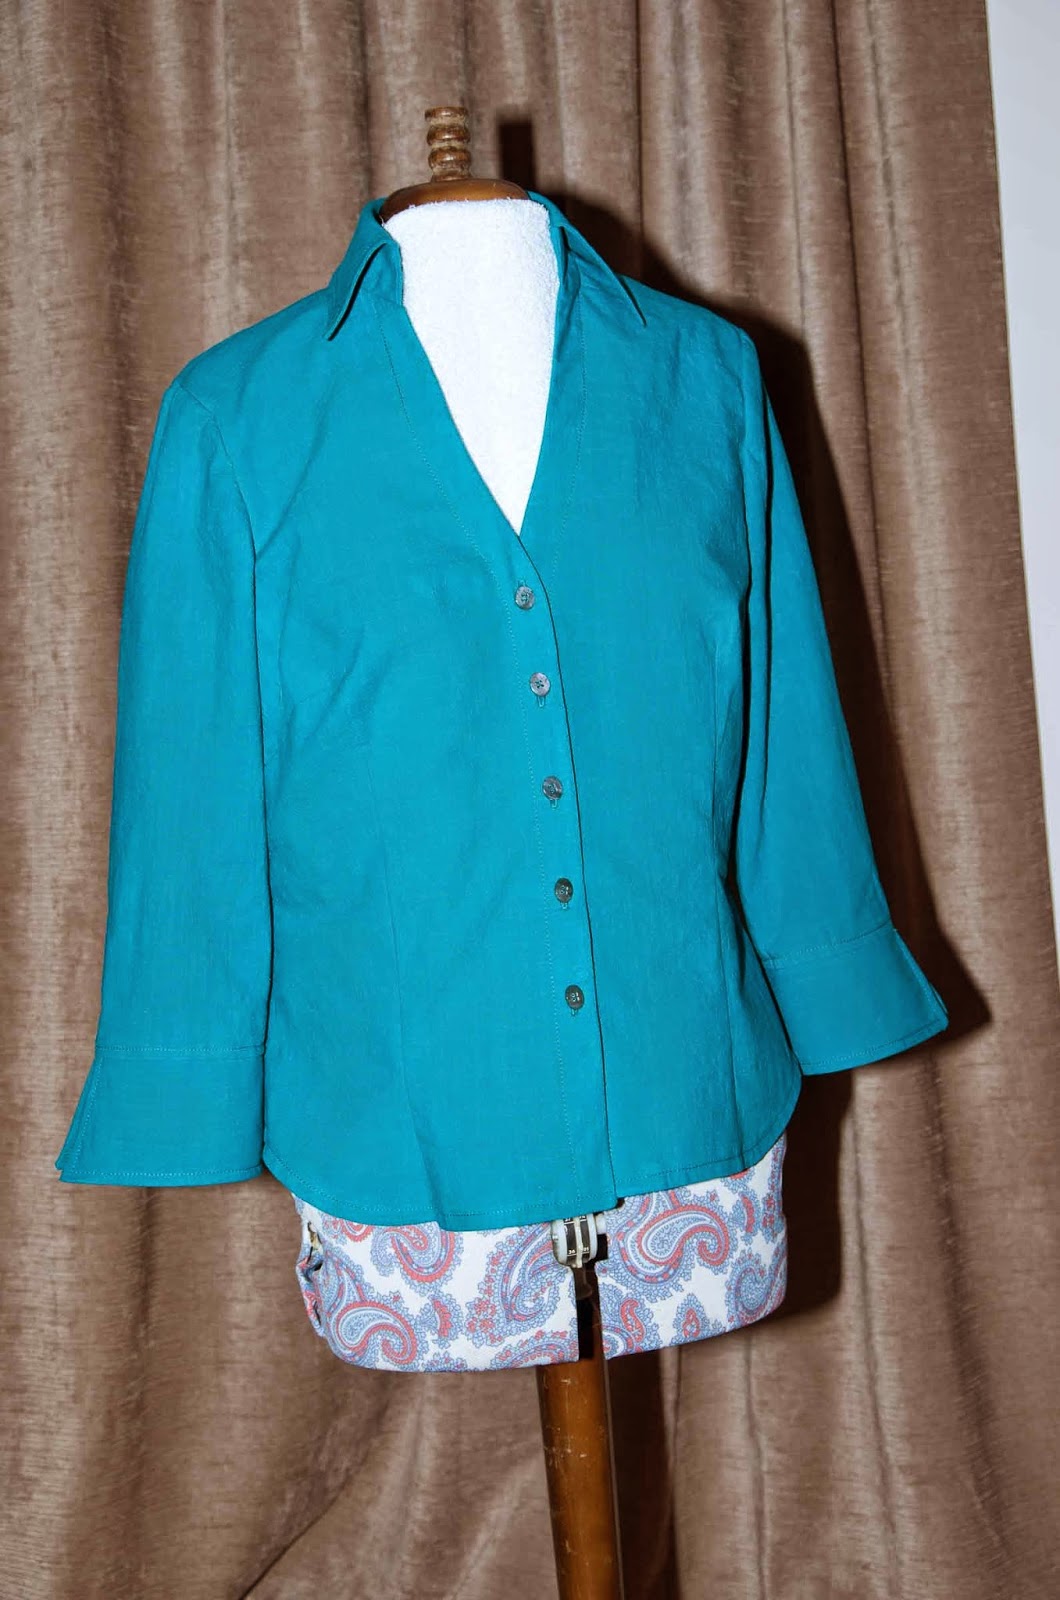
3 Blouses - New Look 6407

I don't like the fabric; it fits better now but still...
I came 2nd in PR competition with this one


I just don't feel comfortable in these blouses so really don't wear them. I guess the fit needs further tweaked. There are fabric issues,  too - I find the blue fabric too thin and lacking in body, I think I'll make a standard shirt style next time instead of the lowered neckline which I don't like despite that being what attracted me to this style in the first place. I've made up practice shirts in class and now feel more confident that I could end up with a really good looking shirt. My burrito yoke was fabulous!  I learned how to insert piping and feel pretty confident about that now, too.


Jury's out!

There's only 1 item left on my list of 9! The jury's out with that.  Vogue 8646. It was the garment I made for my class in the summer and I didn't get it back from marking until the new academic year started in September, so I haven't had the opportunity to wear it.


Reflections


1 Skills


My skills have increased enormously. I feel ready to tackle just about anything.  I'm honoured to have been asked by Helen to make her wedding dress, though I'm terrified too! I'm designing the pattern rather than using a commercial pattern so my pattern cutting skills are useful here,  as are the contacts I've made - I'm getting help and support.


2 College course


9 garments!  Only one really wearable for me!  My sewing has taken a wrong turn! The biggest issue for me is that I feel my college course is not taking me in the right direction and I have to jump through their hoops to meet their requirements which are,  quite simply,  not mine. I don't mind the work. I like an element of structure. It's great to have expert tutors on hand to help.  BUT Pattern cutting,  whether flat or by draping,  appears to have been dropped for the moment at least. Pattern cutting was my main reason for starting my college career!  Last year we also had dressmaking techniques,  which have been covered in terms of shirt making - yokes, cuffs,  plackets,  collars,  which is good but not the area I need at present. Of course, last year ended on a high with me getting distinction in both of the coursers I did (only one course this year). Funding constraints mean that courses have to concentrate on entering this area as a business - well,  just no! Design, okay, but that's as far as go. (I did suggest that in fact I had a company with a very limited clientele consisting only of family!) I'm retired, have no business aspirations and want to make a good job of my hobby. I can't see me returning next year unless things change a lot.


We're only one term into the three term course so things might will change.


3 Fabric


When I started sewing, I quickly built up a fabric stash. A lot of this fabric was bought at a good price - although I didn't like some of it at all,  I thought it would be good for toiles - I make a LOT of toiles! However,  I now find I buy cotton calico specifically to make toiles. Some of the fabrics are polyester ‘suiting’, not suitable for toiles I find now, and very hard on shears, blades and needles. I will never make them into garments for me. Gillian alluded to the need for heavy duty deodorant - well,  yes!  It may be a consequence of ageing or perhaps of illness but I'm finding that I can’t tolerate synthetic or stretch fabrics, a change over recent months. So a major de-stash is coming up.


I'll use natural fabrics next year - probably not exclusively.


One very successful fabric area was getting our tartan woven and since then, getting it printed onto silk. I'll blog about that in due course.


4 Tools


The right tools make the job so much easier!
My stars of 2015:
Clips - great for pinning the bag layers together.
Micro serrated shears - purchased on Black Friday so new,  but fabulous! I saw these recommended for cutting slippery fabrics and am glad I followed the recommendation.
The fabulous pattern weights David made for my birthday. Just that. Fabulous.
Edgestitch and quarter inch with guide feet


5 Unselfish sewing


My husband gets mad when I promise something or other, without having been asked. He says I should be concentrating on myself. This was before I agreed to make the wedding dress etc. However,  I actually enjoy sewing for my family.  It's so much less stressful than sewing for myself! I'm not going to change that.


Goals and plans for 2016


There will be more selfish sewing! First,  though,  I have to get the wedding out of the way!  I won't be blogging about garments for the next six months. Then hopefully I can show off my makes. I might be able to share some of my mob outfit  development - my MOB outfit  is my class project. I need to work on that quite a bit over the Christmas holidays, work on a few samples and develop the pattern. I've been ill, not fully recovered yet,  and have fallen behind.


Wedding


Wedding dress - no further info here!
2 x bridesmaids’ dresses - creating fitting blocks and modifying to create dresses
Waistcoat for groom - using a heavily altered commercial pattern. The third toile is pretty decent.
MOB outfit - design and make. Probably dress and jacket. Dupion silk.


Skills I need to get under my belt:
Working with fine fabrics - satin, lace, tulle, silk etc
Welt pockets (for waistcoat)
Fine narrow hems (?) for dresses above
No doubt there are others!


After wedding


I was successful in altering Missy to fit Helen and need to alter my new model to fit me. Then sewing for me! Trousers and smart casual jackets are on my radar. I've enjoyed making some craft items,  including a bag (will blog after Christmas) and will do some more.


We also want to downsize and move south. Any recommendations, please? We want to be within easy travelling distance, preferably by train, of Cambridge and London. I want to be able to attend courses and exhibitions in London! I'd like the town to have a library, a post office, a doctor's surgery, local shops and decent transport. Maybe a local. Also within easy travelling distance,  a golf course and a sewing bee, not necessarily college course - could go to London for that. Not in London,  though - too expensive. I need something larger than a postage stamp! A house with a granny flat would be ideal.


RTW Fast; MAGAM Challenege
I don't think I will commit to this next year. There are some items that I can buy much more cheaply than I can possibly make - and I'm not talking about disposable fashion here. Tee shirts for example. They don't inspire me to make them,  anyway.  If by some miracle I found a well fitting garment, that I liked, of any description, I would buy it - no hesitation. I don't want to have to turn down a really good bargain, either, as I did this year. If I end up buying my MOB outfit, so be it. I can't sew fast enough to keep up with my garment needs - but I will continue to try. I just can't buy trousers. Or dresses, jackets… (so buying MOB outfit extremely unlikely!). I've bought much less this year and spent less time shopping. I do need to look in shops and try on different styles as part of my design journey.
MAGAM challenge - I love the idea but haven't achieved and maybe shouldn't aspire to this. Will see what happens in the second half of the year.


Health


I've been quite ill. Unfortunately the medication prescribed has disagreed with me, making me feel even more ill; that's stopped as a result of the side effects and they have greatly diminished but next year we'll be looking for some further treatment. I have a minor cold and it's knocked me for six, probably as a result of the depot steroid injection impacting on my immune system.


I was due to be going to the German Christmas markets tomorrow, for a few days,  and have had to cancel as I'm not well enough. I haven't been playing golf - the main part affected by the inflammatory arthritis is left hand. This is a chronic condition. Maybe I won't play golf again?  I've had to ask that question. I hope I can but I have to be prepared if I can't. I need to find ways to exercise (sewing doesn't work for that!) and to get my weight and cholesterol down.


Today I was at our ladies’ golf group Christmas lunch. We are a very select group now - only 8 of us!  I had pheasant for the first time ever. Some of the others had played a few holes before the lunch - in tee-shirts! It's once more unseasonably mild. My car was reading 16 deg C. Interestingly,  that was the temperature one year to the day before Helen's wedding!


Tonight is the Strictly Come Dancing final. I've loved the dresses. I'm not sure who I want to win;  it's pretty close this year,  I think. All down to the public tonight! I'll vote if I feel strongly about one of the couples. Looking forward to an evening watching. I'm posting this in the break between rounds - not as I thought it was going to go!! We'll see at 9pm who is leaving. Oh, and I did vote! I'm excited.


Best wishes for a Merry Christmas and a Happy New Year.


Anne x

Sunday, 6 September 2015

PR Sewing Bee Round 1

It's finished!! There was even time to spare!

Blouse - taken outside today at 6pm  and I wasn't cold.

Back view

Side view

You'll remember that I said I wasn't going to sew in order to blog - that I would be blogging about what I'm sewing? Also that I won't sew something purely to join in a contest or whatever. Unless I need the item and it fits in with my other plans.

I decided to join this contest because the first item was a fitted blouse. I'm in the process of trying to modify my blocks (slopers) ready for my course (intermediate pattern cutting) starting on September 17th. The blocks are my pledge for the Made Up Challenge, and they will be finished and it seemed that it would work nicely to use the bodice block in the process of fitting a blouse.

At least, that was the theory. In practice a week wasn't enough time for me to design a fitted blouse with collar and sleeves from that block, make up and present. The contest was announced on 1st September and closes on 7th September. So in that time, it's necessary to choose pattern,  get materials, make any pattern alterations and make up the blouse,  then take photos and post a review.

The requirements for the contest were that the blouse is fitted with darts or equivalent; that it had to have a set in sleeve,  that it had to have closures and could not be made from knit fabric. Collar optional.

Last year,  I entered the PR Fitted Blouse contest. I was pretty pleased with my effort. I've put on a bit of weight since then and I was fearful that I'd have to alter the princess seams. I could have made in a larger cup size,  of course. That pattern came in cup sizes but I had to make other adjustments to length and to bust apex position. I decided against this pattern as I didn't need another blouse like this one.
I like the look of it here, but I haven't really worn it 

The darts were further altered after this photo to look better and fit better

Well, what more do you want?

Also,  my basic block has a waist dart and a bust dart. So I decided that the blouse I made more recently for the PR beginner contest would be a more suitable starting point as it also has a bust dart and a waist dart. That was New Look 6407.

There were a few issues with the blouse I made. I altered the bust darts after I made it up and they weren't even,  though neither am I! I wasn't happy with the dart position. The sleeves were too short. The top button was too high, I realised when I reassessed the fit, so that the top of the band didn't lie perfectly.

I knew that if I repeated that blouse and used piping again,  this could possibly do reasonably in the contest,  maybe getting me through to the second round. However,  I have no need of a second blouse like that one.


Same blouse, different version


When I made that blouse,  I resolved to improve my collars. I felt there could be a big improvement in the stand insertion. I was going to be doing that in my non- certificate sewing class but the course requirements for my two certificate sewing classes meant that all my time was spent completing my portfolios.

So in the end I decided to do a different view of this blouse. Short sleeves,  collar stand but no collar. Though it was the stand that gave me the problems.

I had some blue lightweight cotton chambray and felt that there would be sufficient for the short sleeve version. I had blue thread, even blue overlocking thread and interfacing. The only thing I didn't have was specific buttons but I do have a stash so should be able to find something suitable. No piping, trims, embroidery etc.

First step - I used my pink piped blouse as a muslin to assess fit.

Second step - alter pattern. I had already previously done a full bust adjustment and lengthened pattern and raised front neckline. Now I needed to alter dart position, length and angle. I used my block to check key areas, but not to cut the pattern.  I had modified the sleeves in my previous blouse for a full biceps and so did the same with the pattern for the short sleeves.

Third step - cut out fabric, which had been pre-washed, and interfacing.

Next - I made up the front and back and joined at the shoulders then tried on to assess for fit. Following this,  I further altered the bust darts, one rear dart and one side seam.

I tried to research collar stand insertion but didn't come up with anything suitable. I decided I didn't have time to go any further with this research and I needed to try to follow the pattern's instructions. I very carefully transferred all markings,  making sure of accuracy and symmetry.

Nevertheless,  I found this extremely difficult,  largely because the facing was longer than the point to which I had to stitch it. I had it in and out a few times. The pattern didn't specify which piece was the collar stand and which piece was the facing and I think I chose wrongly! It looks reasonably play in the end - better than last time and I have a better idea of how to go about it the next time. This time,  I finished by hand sewing rather than using a row of machine stitching.

I didn't have any problems setting in the sleeves except I did have some fullness because of my changes so that had to be dealt with. The sleeves I chose apparently wouldn't have had to be eased in if I hadn't made the changes I did.

Then understitching to bands,  topstitching and edgestitching.
Hem. In the end I decided to overlock raw edge and turn up once.
Buttonholes. I altered spacing for 5. I knew to start lower down on band than I had last time.
Buttons. Luckily I found some suitable buttons in my stash. Sewed on using new button foot. That made it much faster.
Finished.
I had to rush to get some photos before it got dark and write up review. I'm busy all day tomorrow, the last day of the contest, so I had to jump to it.

Some issues that have come up:
I thought the fabric I used previously was too thick but this fabric was floppy and lacked body. This definitely needs a crisper fabric. I'm also not particularly fond of the shade of blue on me - I think I like more intense colours better.
I found out that my overlock thread melts and creates little black balls. It's presumably polyester without any cotton coating. It's supposed to be a good brand, though. I had used my iron at cotton setting to press seam, so had to drop the temperature
I had a few problems with getting the tensions correct for my edge finishes. I did overlock all edges, using same colour thread.
Part way through making one  of the buttonholes something happened and things seized up. I eventually got it to work again after resetting. I'm still not sure what the problem was. I had to take out quite a bit of stitching, which is not easy when it's a buttonhole.

I've seen some of the fitted blouses entered into the contest and mine is so simple in comparison. I simply wouldn't have had time to do anything more adventurous. I might have considered doing French seams which I've never tried,  and the inside would have looked nicer but I didn't feel that this was the right time to try - I need to try when I have time. I doubt I'll get through to the next round - unless you vote for me when the voting opens!
View of back - inside, as required by contest

View of side - inside - optional view

View of front, inside - as required by contest

So,  in conclusion,  this is a simple short sleeved fitted cotton blouse that will get worn with trousers or jeans. Now that autumn is here,  most likely with a cardigan, although today belied that. The hips are a bit tight as I forgot to reread my own review and add a bit there! The pattern actually comes out with much less ease than you'd expect. However, I'd further increase waist shaping in the next version.


Friday, 29 May 2015

Finished Blouse New Look 6407; more computer issues arghhh!

I finally managed to finish my blouse! New Look 6407. I've posted about it previously.


In my last post, I had successfully managed to attach piping to BOTH front edges, so running out of piping in the process.
 
I’d had a bit of difficulty attaching the piping.
First, I had to change my machine needle to a microtex needle as I was running into problems with stitch quality and tangling and I reckoned this was due to sewing through two layers of cotton and two layers of piping, plus, eventually, some of the cord too. Fortunately, this seemed to solve the problem
I used preformed piping and the stitching to hold the piping together was so close to the cord that I couldn’t cover this using my narrow zipper foot when sewing the front and facing together. I ordered a foot for my machine, thinking this would help, but it didn’t as the groove was much too large, really for upholstery piping not this fine garment mini piping, so the piping wasn’t held in place properly. Eventually, in desperation, I decided to use my edgestitch foot, using the stitching I made using the zipper foot as a guide and moving the needle over further. This worked well. This problem wouldn’t have arisen with self made piping which I had originally planned to use.

 
I managed to attach the piping around the collar seam, curving the original fairly sharp points to the collar to make the process easier. I assembled the collar as per instructions on the pattern sheet and it looked pretty good, I thought. I didn’t do any understitching (and didn’t cut undercollar smaller) because I used piping.
 

Apparently, I should have attached the collar to the blouse neckline before I started placing piping on front edges (though these were easier to do and I had wanted practice) and I found I had attached too long a section to the front, so had to remove it. No problem, though. However, I had huge problems attaching the collar and getting it to look neat and even. I had that collar in and out on a few occasions and eventually gave up as I was afraid I’d stretch everything out of shape. The collar is not perfect, the main issue being on the inside. I’m sure there must be a better way to construct a collar! I didn’t have access to my tutor for advice as this is mid-term holiday week (and I missed the week before because of my golfing duties in the Lake District and a funeral I attended). I will do another blouse in class to see if I am advised on a better way to finish professionally. Meantime, though, I am entering this blouse in PR’s beginners’ contest. At least everyone can be assured that it was all my own work!

After the collar was attached to the best of my ability, the facings had to be attached. This was no problem now that I had worked out how to deal with the piping. Part of my issue with the finish in the blouse, however, is these facings, which, it seems to me, are used to cover less than tidy work! I’m really not keen on them. I did do the topstitching required by the pattern instructions at 1 inch from the edge. I chose to use matching rather than contrasting thread as I thought the deep pink would be too much.
 

Because my collar ends were now curved rather than pointy, I also curved the cuffs and bottom of blouse front.
We had a bank holiday weekend last weekend and the fabric shop where I bought my piping was closed on Bank Holiday Monday. Luckily, it was open on Tuesday and still had the same piping available. I bought a further 2 metres, though really I didn’t need that much - then I thought I had bought sufficient firts time, so better to be safe than sorry!
I washed the new piping and was then able to carry on.

I decided to insert the piping between the cuff and the sleeve, rather than around the cuff.

 
The cuff was already  constructed by this time - I didn’t topstitch the edges as per pattern instructions because I was using piping and didn’t want everything to be too busy, but in retrospect wonder whether I should have done so. I had to sew the sleeve seams together before I could add the cuffs - this made it slightly more difficult to insert the piping but I was becoming an expert piping inserter by now!
 
Now, I had to insert the sleeves into the armholes - set in sleeves. I have had a demonstration of this and have done it before and managed without too much of a problem. My sleeve width had been increased because of my large biceps and during muslin fitting, I had to add an additional allowance to the back of the sleeve cap, but I was still using the original armhole. This meant, unfortunately, that the marks I had tried to transfer so carefully weren’t in the correct places. I think I managed to do a reasonable job, though.
 
Nearly finished!
 
The last time I did buttonholes, I had problems because of uneven thickness across the area where the buttonhole foot had to sit and I was very concerned that this would be the case here - I had 5 layers at the piping side, including interfacing,  and only 3 at the other. I did some practice on spare fabric made up the same way with piping etc. I managed to make the buttonholes. I did mark out carefully beforehand. I wasn’t able to use the buttonhole guide from the pattern as I had altered the length of the front band, and the buttons I eventually chose were a little bigger than recommended. I made up my own buttonhole band, using 1 extra button, 6 instead of 5, and will be able to use this again. I feel that buttonholes are one of the least professional arts of the blouse - I must find a better way to deal with them. Perhaps one of those chisel cutters would help?
 
So, I finished the blouse last night.

Between some of the steps, I decided to draft out my contest entry and PR review. I used Google Drive on my PC - this was late on Wednesday night. On Thursday, I went to access this on my tablet, as I realised I’d forgotten to say I had changed the shape of the collar - and it wasn’t there! To cut a long and sad story short, my PC was extremely ill. I could switch it on but it wouldn’t do anything and I had no access to the Internet - obviously this must have started the night before as my Google doc wasn’t on Drive. With lots of help from DH, I managed to access important documents on the hard drive and save them to a USB stick; although I do back up to an external drive, it looked as though this wasn't up-to-date. DH disabled the faulty Internet connection (we still don’t know what the problem is). I wasn’t able to go back to a restore point as this didn’t work. After he disabled the Internet connection, I found the programs on the PC worked better and faster than they had done for ages. Now I don’t know whether some of the problems I had previously with uploading to blogger were due to this rather than other issues.
 
Recently, I bought a new laptop and a new copy of Microsoft Office to go on it. Today, DH took photos of me in my blouse, between heavy rain and hail showers, and I decided it would be best to use the laptop rather than my tablet to write this blog post and re-do my PR review and entry notes. To cut another long story short, it seems that my copy of Office may not be genuine as Microsoft did not recognise the product key. I have contacted the company I bought it from for a refund or correction and meantime used Google Drive Docs on my laptop.

Then, I couldn't pick up the photos DH put onto our shared drive on our network - still can't - don't know why. So I've had them passed to me on a USB stick. I hadn't used one of those for ages and then had to use 2 on different computers in one day!
 
Anyway, I rather like the blouse and think I’m likely to wear it!


Sunday, 10 May 2015

The Sorry Tale of Three and a Half Blouse Muslins

I'm making a blouse. This was on my plans earlier in the year: I wanted to make a garment using excellent technique in the last term of the year and Lyn, my sewing tutor, suggested a blouse.

Then, I decided to enter the PR competition for beginners. One of the criteria is that you have you use a technique that's new for you. I originally thought I'd use French seams but on the discussion board it was suggested that was usually for finer material; I'm using medium weight cotton. In addition,  there was discussion about the need for seam finishes, at all. There was a reminder that seams are utilitarian things and that many finishes add unnecessary bulk, when usually the inside of a garment like this isn't seen. I thought about it.

I then thought about felling the seams as per men's wear. Some other contributors dislike this type of seam finish. It's not usually found in a women's blouse. I was a bit concerned about how it would look on the outside in a blouse,  rather than a shirt, and how easy or difficult it would be to do over bust dart ends. I wasn't sure I'd like the extra line of stitching on the outside.

In the end,  I decided I would plain seam and finish the allowances using my overlocker. The fabric is cotton and frays so I feel it does need a seam finish. Overlocking may be commonplace in RTW  but that won't deter me (I haven't yet achieved the standard of cheaper end RTW, after all) and I think this is the finish I'll use. I'll use for the seam finishing, not to construct my seams, though - I prefer my sewing machine for that. I'll press the seams open.

I decided my 'new to me technique' would be to insert piping in the seam between bodice and facing and between sleeve and cuff. I've received lots of very helpful advice via the competition discussion board. I think PR is a wonderful resource with very helpful sewers willing to advise.


I've made this particular blouse before - for my oldest daughter. She wasn't around when I was making it, as she lives nearly 250 miles from me,  so there was no opportunity to fit it properly. I did try to make adjustments - mainly for her large bra cup size in a slight frame. I've posted about it previously;  suffice it to say when I saw it in her I wasn't happy - well with anything,  really. There was insufficient room for her bust, waist dart position was in the wrong place by quite a bit etc.

I thought these were probably fairly simple fit issues - is there ever such a thing?
I struggled with the collar; I followed the instructions to the letter,  I believe.  The finish outside was acceptable but I thought it was very messy inside. I need to check out various collar tutorials. I need to achieve a better collar finish.

Initial changes on pattern:
I lowered bust dart as my apex was quite a bit lower.  I did this by adding 2" to the length between the armhole and the bust dart.
I had to do this front and back.
In retrospect, while I needed the extra overall length, I needed less than half that at that position. Had I made a smaller change in the first place,  I think my subsequent changes would have been easier. My final apex position isn't much lower than the original as I had to raise it again. I also had to raise the waist position in front and more on the back.

First Toile:
The whole thing was too tight and I took out all the vertical darts, which felt much better but was much less shapely of course. DH felt that shaping was required and pinned some smaller and longer darts for me. He recognised some problems but wasn't sure what to do about them.
My husband very much disliked the bust darts - he felt they started much too low at the side. Indeed, they were almost like French darts,  except they're attractive and intended and these weren't.

Second toile:
I asked Lyn at class to look at my first muslin/toile (I suppose really to check that DH was making reasonable changes!) but I forgot to take it to class. I did have the pattern (I hadn't transferred the changed info to it) so I made up a new muslin incorporating the changes to the dart lengths as far as I could remember, or could work out, and I rotated the bust dart so it was less vertical.

I have a sway back or at least my back length is relatively short for a tall person like me, though longer than the norm, together with a rather large derriere, so my waist darts had to be altered. The area of maximum dart intake had to be raised (equivalent to shortening bodice but no waist seam here). In addition,  the darts were too far lateral and had to be brought in by over an inch - plus, they had to be extended quite a bit up towards my shoulder blades (3 - 4"),  and shortened so they stopped short of the hem. DH hasn't moved lateral position but had worked out the rest.

In addition to my previous changes, Lyn suggested adding an additional seam allowance ie 1.5cm/⅝" to the sides as it was rather tight. Lyn could see what my husband disliked about the bust darts and suggested moving the dart even more towards the horizontal. Further, I thought I needed a bit extra room in the bust area and deepened the dart slightly at the same time. Unfortunately, I forgot to add that extra length to the side seam - I only noticed when stitching toile number 3. It wasn't a full FBA, but maybe I'd have been better doing that! Or I've just read Louise Cutting's cheat FBA and if I'd read that before doing my changes, I think this could have worked well.

I had also set in sleeve version 2 (number 1 was far too tight) and this one was a good bit wider over the biceps - I added 1.5cm/⅝" to each side,  but didn't alter the sleeve head. I had severe restriction moving arms forward and we decided that the back armhole was too wide. Taking a fraction off improved that. I wasn't sure if I should add what I'd taken off the bodice to the sleeve but at the time Lynn suggesting waiting to see how it turned out when made up.


Third toile:
So, at home,  I stitched up toile number 3 with one side of the 'band' attached to each front bodice to get a better idea of finished fit.
I detested the fabric I used,  which I bought cheaply for toile making. It moved and squirmed and the needles didn't like it one bit, as they made a crunching noise when going through it (I think it's polyester and quite silky)  and there are a number of snags in the fabric from the seam stitching. Not worth it - I prefer to pay more for a better quality fabric. I reckon it has probably destroyed my needle after just a few seams.


What I found:
There was now enough overall width at the hip.
I still didn't think there was enough space for my bust.
I couldn't see the back but thought it was probably okay.
The back side seams were longer than the front. I checked the pattern just to make sure it wasn't due to slippery cutting but it was there too - I forgot to lengthen by the amount I'd increased the bust dart. So I realised I needed to lengthen the front.

There was some gaping in the front armholes - I thought this might be an indication of a need for more FBA.  The fold formed at the a armscye was pointing right to my apex. This confirmed what I was thinking.

The front vertical darts seemed much too far out. This,  I think,  was now more obvious because of the addition of the 'band'. I  looked at the instructions again,  because what was labelled 'centre front ' didn't seem to be central. I had been thinking 'band' but actually it's not - it's a facing which turns under. (I had forgotten) So in fact,  turning it under,  and stitching where centre front would be made the bust darts lie in a better position, but then it seemed tighter across the bust and lower hips.

On Thursday past at class I asked Lyn to look at the fit again. This is allowed, as far as I understand, just so long as she doesn't do any of the work,  which she won't do,  of course.

I had already decided that I needed more bust space so had made a Full Bust Adjustment to the pattern at home the night before and moved the waist darts slightly. I took the opportunity to raise the pattern bust apex as I thought it was now too low. When I drew up the pattern,  I took the opportunity to ensure that the front length matched the back length at the side. However,  I got Lyn to look at the muslin I had made before that correction. At first she thought the changes I had made worked well,  despite me having said about the FBA but as I moved she agreed it looked tight. I went ahead and cut out a new front piece with the FBA and sewed this in place. One advantage of the FBA was that it gave just a little extra space at the hips.


Toile 3.5
So I then cut out a new front piece (muslin three and a half!) and attached that. Then I sewed on the facing.
Lyn agreed it looked much better.
Only two more changes were made at this point
Further shorten bust dart by a half inch
I wanted to raise neckline slightly - by 1 inch.
These changes have all been transferred to the pattern. I also cut out a new facing piece.

Then I set in the sleeve piece from the previous muslin. Reaching forward showed it was too tight, still. I needed to add extra to the sleeve rather than the bodice,  and have now done so. I've decided that enough is enough as far as the muslins are concerned and next I'll do in fashion fabric. I think,  though,  that I'll add extra across the whole of the sleeve head. It's easier to cut back than add.

The pattern was by this time such a mess that I transferred everything over to pattern cross and dot paper. I found that I'd forgotten my tracing/ carbon paper and borrowed some from another student. Not all tracing paper is created equal!  I used my tracing wheel and the tracing paper to transfer all markings but had great difficulty reading the marks which were in pale yellow.
New tracing of front bodice, with new facing piece attached.
 
My fabric is pink linen-look cotton.

 
The colour reminds me of the beautiful blossom that is now falling as pink snow across the lawn.


I was going to make bias binding (something else I've never done) and enclose fine cord  - in other words,  make my own piping.  I was torn between a darker pink cotton polyester fabric and a striped seersucker type fabric with stretch, both from my stash. My decision was made for me - I couldn't buy fine enough cord for my own piping as everything I found it was for cushions,  but the fabric store had ready made piping in dark pink. So that's what I'm going to use.
Pink cotton linen look fabric with dark pink small piping
 
 
It's a bit out of focus, but here's my inspiration for the contrast colours.

I have a fair bit of practice to do,  but first things first.

Next,  I will make up in my pink cotton. Ideally,  I will cut this out at home as I can use my rotary cutter and mat , which I find so much easier than shears. I'm not sure I'll manage to do much more than cut out,  though.  We'll see.

I'm pretty busy at the moment with county vets' golf committee related work. Last week was the silver championship over three days but dreadful rain and flooding closed the course we were using on day one, resulting in lots of extra work and an extra day had to be added. The championship was successfully concluded just before another bout of dreadful rain. The extra day caused difficulty with those qualifying from day one due to other commitments - our captain had to postpone her ferry taking her on a cycling trip to Holland for an extra 24 hours,  not so good when she was just going for a long weekend.

Tomorrow is the bronze championship,  in which I'm playing as well as having committee duties. It's only over one day, though.  Fingers crossed, as last year it was washed out and had to be rearranged a few weeks later. This is more difficult than it sounds especially when the field is in excess of a hundred.

I'll have to leave early to get to my evening class. (Unless I'm likely to win a prize of course!) Tomorrow we'll find out if the garment construction techniques class is going ahead in an acceptable fashion. I suspect not, as the room had already been modified to seat 20 and only one tutor is involved. Decision time approaches!


How Do You Read Blogs?

It's a while since I've posted a blog,  lots of reasons. I'm thinking of starting again. However,  I used to read the blogs I fo...