Showing posts with label Morris blazer. Show all posts

Saturday, 6 January 2018

My Top 5 Hits and Misses of 2017

I’m once again linking in with Crafting a Rainbow’s Top 5 of the Year. So here’s my top 5 - both hits and misses in this post. They are roughly in order from the start of the year, rather than being in favourite order. I've included a link to the original blog post which will have details of pattern used and more details of construction etc. I've used different photos - I think the actual blog post has better photos but for some reason I couldn't pick them up today. I had to cut down my labels as there were way too many characters.

Top 5 Hits

1 Orange padded gilet for my grandson


In February, I made a padded gilet in class and asked for the pattern to be sized to fit my grandson. He liked it and it did fit. It’s too small now of course - he has grown so much in the last year! I’ve included it here because I learned such a lot making it. I have some fabrics for new ones for him and his brother but would need to identify a suitable commercial pattern. I'd use microfleece for the lining next time around and bought some in a  lovely lime green. I don't think I ever blogged a photo of the completed garment. An earlier post where I tried it on him for fit is here

2 Check self-drafted tank


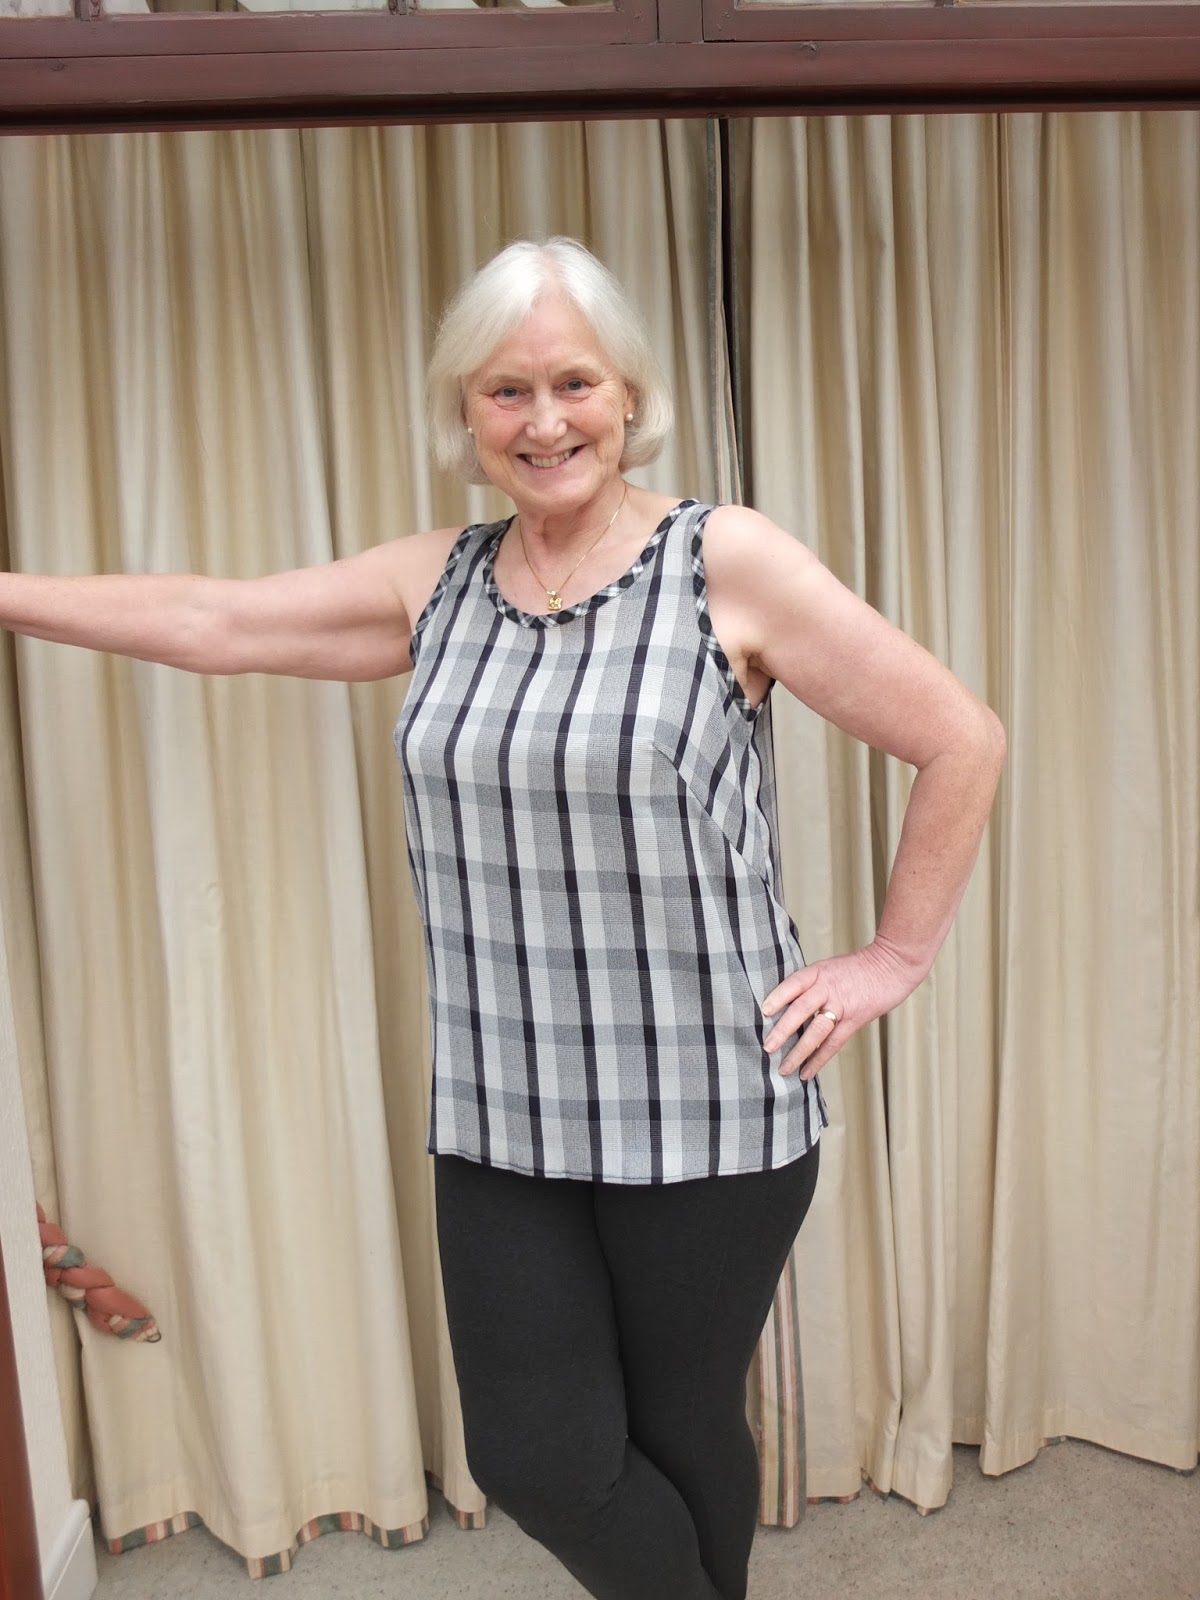
In March, I made a simple sleeveless top using a block I had made. Armholes and neckline bound with contrasting, visible, bias binding.

I like this top and wear it regularly - but I would choose a different fabric next time around as this is a bit ‘spiky’. I would make it in a natural fabric - this is polyester.

I’ve included despite not being 100% happy with it as it looks good and taught me a lot. This was my first venture into using a print on a print (contrasting tartan bias strips). I loved the result.

Blogged here.

3 Nettie bodysuit


Nettie worn with trousers and a cardigan. Long sleeves next time.


In the summer, as part of my class on stretch fabrics, which ended in July, I made a very successful Nettie bodysuit. As this was done in class, I followed class instructions rather than pattern instructions and made a couple of modifications. I intend to make more but haven’t got around to it as yet. I would want to add sleeves to the next one.

Blogged here.

4 Murder Mystery weekend garments

Under this one heading, I’m going to include 3 separate garments, all of which were made for our murder mystery weekend in November

  • Yellow jeans for David (in photo below). David likes these and has worn them since and intends to go on doing so. I previously made him jeans from my own pattern (part of another course) but this was from a commercial pattern, which made it easier for me. I made a couple of tweaks and would alter more next time around. Blogged here.


  • My colourful jumpsuit (in photo above). My son-in-law loved this and I wore it again over Christmas, especially for him!! Actually, I love the jumpsuit - it’s just that there aren’t many places I can wear this bright a fabric! However, I will make up another more ‘sober’ one! I don't often wear my own handmade garments as I'm so critical about finish and fit. Blogged here.
  • My ‘flower power’ dress. I love it. I would make the smaller size next time, though. It was comfy, cosy and warm with plenty of space for Christmas pudding eating! I guess I would do the sleeves as per pattern though as these aren't very practical for working around the house! Blogged here (with better photos).


5 Red Silk Dress for Helen


I absolutely have to include Helen’s red silk dress even though it’s less than two weeks since I gave it to her!!  I know this will be worn and worn and worn, like its RTW predecessor. She loves it and it fits. This is, incidentally, my entry into Designin' December, conceived and run by Linda of Nice Dress Thanks I made It!. There is currently voting on her blog and on IG. Blogged here. This link is to the 5th of a 5 part blog! Previous posts were about developing the pattern, toiles etc.

Others
I have had a few successful makes, both garments and craft type makes but the ones above are my edit.
Top 5 Misses/Failures

1 Bias Cowl Top for my Mother


You can see that it's falling off the shoulders

The first has to be the bias cut top I made for my mother’s birthday in January 2017. I had made the same top for me for the PR Sewing Bee (but didn’t pass beyond the second round) and as my mother loves a cowl neck and I had some fabric that she gave me, I thought this would be a good idea. The fabric was fine.

My mother told me the top was lovely etc. Some months later, I had the opportunity to see her wearing it - what a disaster! She told me she hadn’t wanted to say…
The fit was awful. I recently suggested I remodel/remake but I think she has got rid of the top.

I should say, my mother has lost a considerable amount of weight (weight that she can’t afford to lose) so that has contributed. Also, she has a marked ‘dowager’s hump’ (I hate that term!), which I did try to take into account when I made the top.

So it’s not the pattern, or the fabric but fit that’s the problem here. Issue - fit. Blogged here - but obviously needs updated to reflect the fact that it didn't actually fit her!

2 Two UFOs which I completed but which aren't a success:


The first is the lace cardigan I made in February 2017, photo above. I just don’t like it. It had been a UFO and perhaps should have stayed that way! I modified the pattern from the original so can’t really comment on the pattern.  Issue - simple dislike. I find it too 'floppy' and insubstantial. Blogged here.


The next was also in February, above - another UFO. This time a cotton skirt. It just doesn’t work as it clings.  I did try to wear it as I like the fabric and felt the skirt fitted but was put off by the clinging. It isn’t lined but needs to be because of this. Again, the pattern is fine, fabric fine, but lining needed and probably fit tweaked further. Issue - need lining with this fabric. I may well get around to doing this as summer approaches. blogged here.

3 My Merry May MAGAM Top, sadly


I loved the pattern on the fabric. I wear a lot of cardigan type jackets.

In June, I made a top from the same pattern as my successful sleeveless tank. The fabric choice was poor, however much I loved the pattern. Snags and runs appeared in the fabric (rips that is, not colour runs)  and despite trying hard to ignore them, I couldn’t. It was binned. Issue - fabric choice. Blogged here. You can see it without the cardigan on the blog.

4 A checked skirt which gave me migraine


My eyes crossed as I tried to sew with this fabric. I gave away what I had left (quite a bit)


In April, I made a skirt. It was finished but I didn’t like the fit and tried to modify. I also didn’t like the fabric. Never worn - and not just because summer was coming up. Issues - fabric choice (the pattern on the fabric even more than the fabric though it was too heavyweight) and fit. Blogged here. There are much better photos on the post

5 Grainline Morris Blazer


My Grainline Morris blazer. Least said the better!! I will, however, try again as I think the biggest issue here was fabric choice. Issues - fit and I think I would like to line it. Blogged here

There are other failures, too, some of which didn't get to the stage of taking a photo and certainly weren't blogged. Forget about them, Anne!

Others - UFOs or WIPs

  1. I have a Linton tweed Chanel-type jacket almost completed. I just have the lining to hand sew. I might do this as we catch up with the Star Wars series. David got movies 1 - 6 for Christmas. We have previously seen them, starting when the first came out in 1977 but it will be useful to see in story chronological order. This is certainly a WIP - and nearly finished.
  2. I started but didn't complete culottes for myself. I may or may not complete them - I do like the fabric but culottes might well be out again. Issue - time available. This is a UFO.
  3. My interminable trouser toiles did get to block stage but I haven’t made them up as yet. I plan to make up in navy wool and navy gaberdine (?)
  4. My bodice and skirt/dress  toiles were not completed to my fit satisfaction. Lots of work here! I will tackle again in the new year.
  5. I have another jacket at toile stage ready to make up. It’s definitely on the back burner. UFO.
  6. I plan to make up a Grainline Morris blazer in lightweight boiled wool. I think this could be a useful and versatile jacket - if I get the fit right.
  7. There are others….
2018 Plans

I will be putting up my 2018 plans in a separate post

Monday, 9 October 2017

Grainline Morris blazer - 'finished' and abandoned

I can't remember if I posted anything about the Grainline Morris blazer I was making. I haven't been posting for ages and my memory isn't that good! I started this blazer months ago, perhaps a full year ago or more!  So to briefly recap:
  • I followed instructions to do a FBA. This meant that my final blazer would have a dart whereas the original did not. Grainline is for a smaller cup size
  • I made up a toile but the fabric wasn't suitable so this wasn't very helpful. However, I needed a bit extra in the biceps area.
  • I lengthened the jacket length (though it turned out by too much)
  • I thought I had found suitable fabric and started to make the blazer. However the armholes and sleeves were far from right. I modified these as per tutor advice. I added to side seams under arms on bodice and sleeve and the sleeve cap was narrowed. I was fitted with it on.
  • Using the alterations suggested,  I started to make the blazer again and this time a bit shorter though still longer than the original. The fit wasn't bad, I thought.

I quickly realised I had a few problems. I loved the colour of my fabric but the fabric itself was spongy and really quite nasty,  clicking too readily - and clinging so that it wouldn't be possible to wear it over any kind of sleeve. I originally thought it was a ponte but it's actually a rather cheap scuba. It was difficult though not impossible to press and neither sewing machine (despite trying different needles etc) nor overlocker liked it.

I had to make up new facings because of my adjustments but that wasn't a great problem though I could certainly improve on what I achieved, particularly at the junction of hem and fronts.

So today I was ready to complete the blazer. The outer part was sewn and sleeves were set in.  Facings were attached apart from sleeve facings which I did today. I didn't like it. Colour lovely but the jacket dragged as I put it on to try it. I feel it needs a lining. That's the fabric rather than the style though I think.

Nevertheless I decided to finish but I made a mistake. The original instructions have you understitch the hem only. The front and collar are pressed so that the junction with the facing is at the edge and then the jacket is topstitched. As my fabric was so springy I decided to understitch the lot. I trimmed and graded all the seams and understitched. However I forgot to change the understitching to the other side at the collar break. I didn't even realise until it was pointed out. As it was going to be difficult to remove the stitching and as there were already a couple of nasty clicks very visible on the collar, I quickly decided this was another toile! You may see this on the photos. I'm not taking any specifically to show this.

I did some quick and dirty topstitching which certainly wouldn't have been satisfactory on a proper garment. I was using a class machine and I'm sure the wrong needle. My stitching was short,  long,  skipping. A mess.

I ‘finished’ the jacket.
But:
  • Wrong fabric
  • Difficult to judge fit as clings to shoulder area and sits lopsided
  • I need to improve how facings are attached to jacket at free edge.
  • i think its too wide at shoulders
  • I need to follow instructions or get my modification to instructions correct!

As well as quick and dirty topstitching, the jacket has quick and dirty pressing!

Too wide at the shoulders is the least of the problems


The blazer might be satisfactory in a different fabric. It needs more body. It's for stable stretch.  I'm thinking maybe boiled wool. Anyway, this is a summer jacket really. I'm not thinking of redoing it for now as I have a host of other projects on the go all of which are now more urgent than this one -  posts to come. Briefly: Chanel-type jacket quilting (for Saturday coming), costumes x4 for murder mystery weekend and silk dress for Helen for birthday all by end of November. Wish me luck! This jacket is back at the end of the queue; there are other UFOs in it too.

Friday, 27 January 2017

Perfecting pattern for Helen's red silk dress; part 4. Getting rid of UFOs. Weight loss update

Altering Pattern Pieces

It might seem premature to start working on the pattern for Helen's red silk dress before I've had feedback about how the green toile fits.


While making the toile I was aware of issues which needed to be addressed. Even if the size is otherwise perfect and that's unlikely.

Cutting single layer - making full size pattern pieces

This is the biggy for me. The difficulties I had with the back were due to me cutting on the fold and the fabric slipping. I have already redrawn the back skirt as one full skirt piece, though I will have to modify and I will be redrawing the front of the dress as one full piece, too. I don't need to alter the back bodice pieces, unless I just do another piece to help with fabric layout. I haven't yet done the front.


Princess seams


In the final dress, the seams will be overlocked together pressed to one side and top stitched as in the original. They are not French seamed, though with a fine silk that would presumably be possible. Helen wants me to identically mimic the original so I’ll overlock and stitch over the overlocking. I need to buy some better colour overlocker threads. Note to self - put on my to do/to buy list


The first issue was the way the princess seams had to be folded on the back bodice of the dress. One side is rather curved,  the other is straight and Dan pointed out that the seam wouldn't lie in the direction of the curved seam. I therefore trued up the seams to allow them to lie in the direction they wanted to. A few minor changes but which should improve the sewing experience. I hadn’t realised this. I always find it fascinating the little tips I pick up which aren’t given consciously, really, but are part of the experience my tutors have.


Armhole


I also had to true the back armhole,  shaving a little off the area where the princess seam meets the armhole. I had to trim this area on the toile. There had been a small projection in this area,  as a consequence of the way the seams were trying to lie.


I carefully smoothed out the front armhole curve after folding out the dart. I had done this previously but I felt the edge was raggy.  It's better now.


I'm not doing these in order of completion.


Dress length


The sides of the dress were a good bit shorter than the front in particular but also the back.  Doing the toile, I trimmed the front after measuring from the floor. I wasn't sure how to make changes to the pattern and asked Dan's advice. She advised adding to the side seam to smooth out what is effectively a dip at that point. This would give me more leeway. The hem would still need to be evened in the same way as for the toile on the final dress. I haven't actually done that as yet - I'll do it when I redraw the pattern pieces.


External band at waist


I decided to slightly lengthen the band at the waistband - by 3 cms but haven't redrawn the pattern piece yet.


Pocket, pocket flap, poppets


Most of my time in class was spent on the pocket and this has been redrawn.


First,  I marked on the pattern front where the pocket was to go. This was pocket size without seam allowances. I attached pattern front and back at the side seams and continued the pocket across the seam. There will be a lot of drill holes marking corners  etc. I will also make card versions.

The two pieces are not stuck together here and have slipped slightly. 


After discussion with Rory and examination of the toile,  we concluded that there had to be additional support behind the poppets or they would tear out almost instantly. You'll remember the original dress doesn't have this and Helen doesn't want it. However,  the original dress has torn in that area. I don't  want to put a lot of effort into something which will tear so readily. I'll discuss with Helen.


Anyway,  I concluded I wanted to put an interfaced facing piece onto the pocket edge and the area where the poppets attach. Just a couple of cms wide but it should make all the difference. I will overlock so that there isn't extra bulk and move the facing away from the side seams where several layers come together.


Rory also helped me with the proper placement of the pocket flap and with the placement of the poppets.  Once I had it explained what the principles were,  I was able to fine tune this myself.


In class,  I also drew up the facing for the pocket. That's not in the photo for some reason.


I will redraw all pieces onto fresh paper and make cardboard templates for the pockets and the flaps to help make the seam allowances even.

I have ordered some suitable snaps and a Snapsetter (as recommended by Seamstress Erin). They are coming from the US, I believe, so will take a little while. We weren't very happy with the system we used though it did work.


Inside the toile pocket there are some raw edges and I need to think more carefully how to ensure this doesn't happen. Dan  also advised me on how to attach the flap in a better manner. One side on the toile is unsatisfactory.


The toile,  of course, was designed to help me with fit and with construction. I'm now much clearer about how to construct the final garment. Writing this, though, I realise I haven't completely worked out all issues (I'm thinking of bias binding at neck and armhole edges) but at least I'm getting there.


I waited before posting the toile as I needed to let Rory see it. Helen has now received it, says she loves it, has sent me a (poor) photo and intends to wear it to work today (Friday 27th January) and out for a birthday celebration tonight - presumably an after works drink. I didn't specify the problems I saw - and I guess if Helen doesn't see them, or doesn't care, well that's fine. I can't tell from the photo whether it fits well or needs any further modification.

I may as well wait now until I get feedback before completing the pattern modifications.

Broken Foot Control

At the sewing bee yesterday, I dropped my foot control getting it out of my sewing machine bag (I like to take my own sewing machine). We're a little cramped, to say the least. As it hit the floor, the control broke into 3 pieces - top, bottom and a spring. My tutor put it together apparently ok but unfortunately it was stuck and couldn't be used. I spent the rest of the class using the foot free start/stop control which I don't really like - I prefer the foot pedal and the knee lift as this gives me greater use of my hands.

My husband was reluctant to pull it apart although he didn't think it was broken. I saw a bit of plastic which I thought had sheared but he pointed out that it couldn't be as otherwise the pedal wouldn't ever have been able to move. I phoned my machine dealer, expecting to have to go and possibly replace the pedal, but he gave us instructions over the phone and the pedal is now working. At least I hope it is - I haven't tried it in earnest but it is moving freely. It seems that this is a fairly common issue.


Another Hack for Joanne? Postponed

I need to take a break from Helen's dress for a while. I want to make a couple of things for myself and Joanne, who is visiting at the moment, has asked me to hack a top she likes but which doesn't fit well - bust gathers gather on top of the bust instead of underneath, the length is pulled up at the front and feels too short. I have a couple of patterns with some similarities and I'd prefer to start there rather than with another full blown hack. I plan to use the pattern of the bodice for Joanne's bridesmaids dress to help with sizing, though as Dan pointed out that is for woven whereas this  top is stretch. Unfortunately, Joanne forgot to leave the top when she left to go back and so I think I'll leave that for a bit - we'll be visiting in 3 weeks.

UFOs


I thought perhaps a slightly snazzier image would make me feel better about these!

The first thing I do for myself will be a really simple UFO. I’ve decided I either complete the UFOs lying around or they go out - they are just taking up space both physically and emotionally. I’ve already abandoned a couple of UFO projects so I feel I have made real progress! I had decided to enter the PR UFO contest but as I have abandoned every project bar one I’ve picked up so far, that may not happen! I guess I can see why I abandoned these projects.

Abandoned projects

Simplicity 1156 - I suspect this is abandoned forever
Although Dan pinned this tighter, making the dress more satisfactory than it was prior to that, sorry it just doesn't work for me. I still find it frumpy and the length is not right - it is too short at the back, longer at the front, and overall just not an attractive length - I couldn't even the dress by trimming from the front (the dress is already hemmed) as overall I would prefer it longer. I also took off the bias binding around the neck and armholes (I can't remember why!!) so too much to do, anyway. This fabric will be discarded after I mark the changes from Dan's fitting onto my pattern - in case.
I've shown the skinny pattern version rather than the one on me, which is elsewhere on this blog, regrettably!
If you want you could search for it

Vogue 1082 skirt
There is just too much to do and as I am losing weight, it doesn't seem worth modifying the fit at this stage. I will wait until autumn as it's more a cool weather skirt in any case. The fabric I used is a summer weight cotton but I don't feel it suits the skirt. This really would be more of a toile for fit. I do like this skirt very much.

The skirt has been partially sewn up, basted and taken apart again - a mess of fabric pieces and threads

Sewing case
I didn't understand the instructions and didn't have all the materials I needed at the time - the interfacing was difficult to get (I have it now). I just don't need it at this stage.

Thread catcher.
Again, I didn't understand the instructions. It will have to wait - too much to do. This is not technically a UFO as I hadn't really started. I would like one but there are alternatives.

Trousers McCall's 6901
They are a million miles away with fit so not at this stage. The fabric will be discarded. actually, I probably won't use the pattern again, either.
No - I refuse to post the version I have; besides it's in pieces!

I also have trousers that I was going to hack. They had a tear so I had actually taken them apart and cut them up. Unfortunately I don't know if they would be anywhere close to fitting me now! Undecided what to do as yet.

Rory is going to drape me for a trouser block, hopefully starting next week or shortly thereafter. She originally asked me for my'best fitting pattern'. Sorry, there isn't one!

I am also going to another pattern hack class with Dan.

Postponed projects

The dress I hacked at Dan's last class, intended possibly as a MOB outfit for one of the events.

This is me in the original dress. The hacked version is plain grey
No photo of my version. The lining is great and fits really well but the outside needs work. I can't yet decide whether to take this garment with me to the new pattern hack class. Makes sense, doesn't it? In a way. On the other hand, something new that would fit in with my more immediate plans - a jacket or trousers would work better.

This wouldn't technically count as a UFO for the PR contest anyway as I will have to modify the outside layer of the dress which will probably mean re-cutting. The pattern certainly needs trued.You need to have cut out all the main pieces prior to October and I haven't. I'd like to finish this dress but I'm not in a hurry.

UFOs I will hopefully complete

Lace cardigan - more details in another post. Needs a fastening and the sleeves shortened.

Pattern envelope, now gone

This is from March 2016. Nearly done, just need to stitch hems on sleeves now -
sleeves looks short in photo but they are way too long

Skirt McCall's 3830 - more details in another post
The original was too big, taken in to too small, needs modified to intermediate state! Doable.

The fabric
These two would count as UFOs for the PR contest

The other UFOs that I have, which wouldn't count for the PR UFO contest are the two jackets I'm making but put off over Christmas and until now. They don't count because I haven't cut out the main fabric, just toile fabric and probably I was still working on them after the latest date, anyway. They will get done, soonish.
McCall's 6172 - just about ready to cut into main fabric. Boiled wool.


Grainline Morris Blazer - will be in lightweight boiled wool I suspect. nearly ready to go
Weight loss update

I was Slimmer of the Month for January with a weight loss of 12 lbs. 4 lbs this week despite Joanne being here - but I wasn't slimmer of the week as someone had lost 6 lbs and another had lost 5 lbs!! I thought 4 was impressive. The only time I ever lost more was when I was ill.

I'd like to carry on losing 2 lbs per week for a bit. 2 lbs this coming week would take me to 1 stone lost. That would be great.

Monday, 31 October 2016

A productive week and a visit to South Shields market for fabric

I've been surprisingly productive this week.

I've read a couple of blog posts about wasting what you have,  not wearing or using clothes you have made for yourself because perhaps of minor faults which mean you can't bear to wear it. I recognised that description.

We've been sorting out some things (in the course of which I've been gathering together my stash fabric which had been in different places - I couldn't believe I had so much!).  David brought me a large blue IKEA bag of what he thought was fabric for me to sort through. In fact, it turned out to be Joanne's stuff, which I assume she had left behind by mistake during one of her moves. There were some garments clearly hers including unworn items, still with labels plus sheets, duvet covers and a jacket. Also in there were some items I had made. As this has been in the garage, I did a lot of washing.

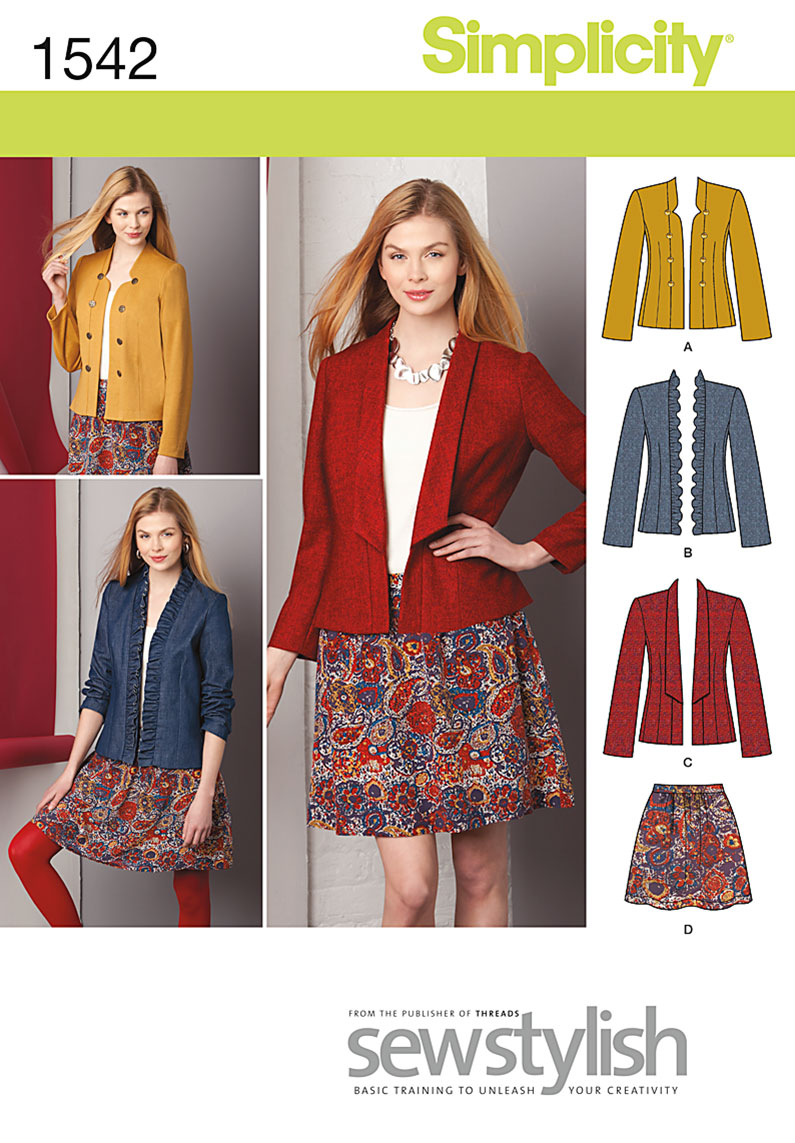
Simplicity 1542 for Joanne

There were two skirts I had made for Joanne. These were made before I had a blog, (January 2014) so no blog post. The photo here is not of the skirt I found - I had made 3 skirts in all. One was perfectly okay - a cotton skirt in a maroon patterned cotton with a waistband. 
It was too late to take a photo of the skirt. This is the fabric
I made the other quickly and did a simple casing with elastic as a waistband but I found that the elastic had twisted. I stretched the elastic to the length of the casing and stitched through the fabric and elastic in two rows. The elastic should be secure now.  That didn't take long. I think the skirt is much more functional now.

I really lie the jacket - but this project was skirt only


This is similar to the maroon skirt I found


You can just see the black elasticated waist skirt in the background, before my quick alteration

Pyjama Jacket using McCall's 4979

Also in there was a pyjama jacket that I made for myself originally (also January 2014) using this pattern and a yellow brushed cotton to tome in with the spotted yellow lightweight cotton I used for the trousers and top. I didn't review the jacket on PR so I don't have a photo from then. I did review the pyjamas, with me wearing them, but that's not for today! (If you really want to see me wearing them, you'll have to look for yourself on my PR projects!!) Here are the pyjamas:


I can't remember if I gave the jacket to Joanne after she borrowed it. The facing was not attached to the jacket and seemed determined to turn exposing the interfacing side.
Even after I washed and ironed these, the facing wanted to turn
In addition, this was one of my early makes and the shoulder and armhole seams were unfinished and fraying somewhat.
Shoulder/armhole seam - fraying fabric


The side seams were overlocked. I don't think I had a working overlocker at the time so assume I did this in the once monthly sewing class that I attended at the time, before I found my current more local classes. That was certainly where I made the pyjamas - trousers and bias top with shoe string straps and toning jacket. Everyone made the same pyjamas as a class project. I remember being scared of the overlocker but we were all ‘forced’ to use it.  I got over my fear but at the time I still had no idea how to determine seam width on an overlocker.

I decided to unpick the top of the armhole at the shoulder seam. This allowed me to get into and overlock the edges of the shoulder seams, changing to a set of threads a close as possible to the fabric shade.  I also overlock finished the armholes as much as possible - I didn't deconstruct enough to do this 100%. I then resewed the shoulder/armhole seam.  


Shoulder seams and armhole seam now overlocked. Much tidier.
Rough edging at neckline seam hidden by facing (top of photo)
The facing had been understitched etc so I certainly didn't plan to unpick that to get every last part of shoulder seam edge overlocked. No matter, this would be covered by the facing. I decided to top stitch the facing to hold it down. The thread I used is not the same thread as I used previously but it's fine for this project. The two top stitching rows certainly don't match. Nevertheless, I think it does look better, but more importantly I think this has improved both the function and the longevity of the pyjama jacket. Less ironing required too. Do the young iron?


The original row of topstitching at edge of jacket and new row at side of buttons, holding facing down. This follows edge all the way around at an even distance

Joanne is welcome to the jacket but if she doesn't want it, then I'll reclaim it as lounge wear. 

M&S Top alteration

Not a great photo but the best I could do tonight
Next was a sweatshirt top I bought quite cheaply. The sizing was rather strange which is why I think it was so markedly reduced (M&S). I bought a top 2 sizes bigger than my usual size in M&S but this just fitted me in the arms and at the bottom hip band. However, it was huge at the side seams. I pinned out the excess fabric, though not as much as I would have liked as I was constrained by not wanting to alter the armhole. So zero at the top of the side seam, quickly changing to a 1" plus reduction, staying at that for a while and then tapering out to zero again for the hip band which I didn't want to unpick. I first basted to try it out and asked David to check. He pinned it tighter but the sides were uneven so I stayed looser rather than tighter to match them up. I then sewed the new seam on the sewing machine and finished off by overlocking in white thread, cutting off the excess fabric. Result is not perfect but perfectly satisfactory and a top I will have no hesitation in wearing.
The removed part, against a scale.

Concord Tee toile and AGM preparation


This is a dress made with the fabric I used as my latest toile for the Concord tee. 
I've just tonight discovered that this is a Pont de Roma fabric


I made a new Concord tee toile with some of the fabric I found, leftover from a previous make, using the bigger bust size pattern. I'm still not happy with the fit, so I'm not finishing it completely and will ask for advice about it next week. It's not yet photographed as I want to alter further first.

Edited to add -  I took to class tonight and I got advice to alter the sleeve and to take in part of the fullness across the back - that is, more fullness. I've more to say on this but I'll wait until I post a specific post.

Unfortunately, I'll miss my Thursday sewing bee because of our Vets’ AGM; I'm secretary so I've got to be there! I've got 95% of what I need ready for that. It's taken quite a while so I'm glad to get the back of that broken. That's something else I've been very productive doing this week.

Preparing to make a Morris Blazer

I chose some stash fabric to make a Morris blazer, found a source for stretch lining and printed out and taped the PDF pattern, read some helpful reviews on PR and watched the sew along tutorial. I will have to make some changes for fit but it seems a fairly straightforward make. Not all the reviews are positive, in fact some far from it. I'm not sure when I'll start that. It's probably the wrong season now. I've wanted a casual stretch fabric blazer for a while. The fabric I've chosen is striped - is that too difficult to use, do you think?

Edited to add - I also took this to class tonight, as I needed to do a full bust adjustment. There are no darts on this blazer. Dan gave me some advice. Advice on the site ends up adding a side bust dart, so I'm not so sure that a stripe will be ideal. Rotating the dart just didn't work.


Some new fabrics and cataloguing the old

I carried on washing fabric. Stash and new. I had a delivery of fabric for specific purposes but I've only so far washed one, a bright yellow cotton twill intended as cargo pants for one sil. 
This doesn't begin to show the colour, I'm afraid

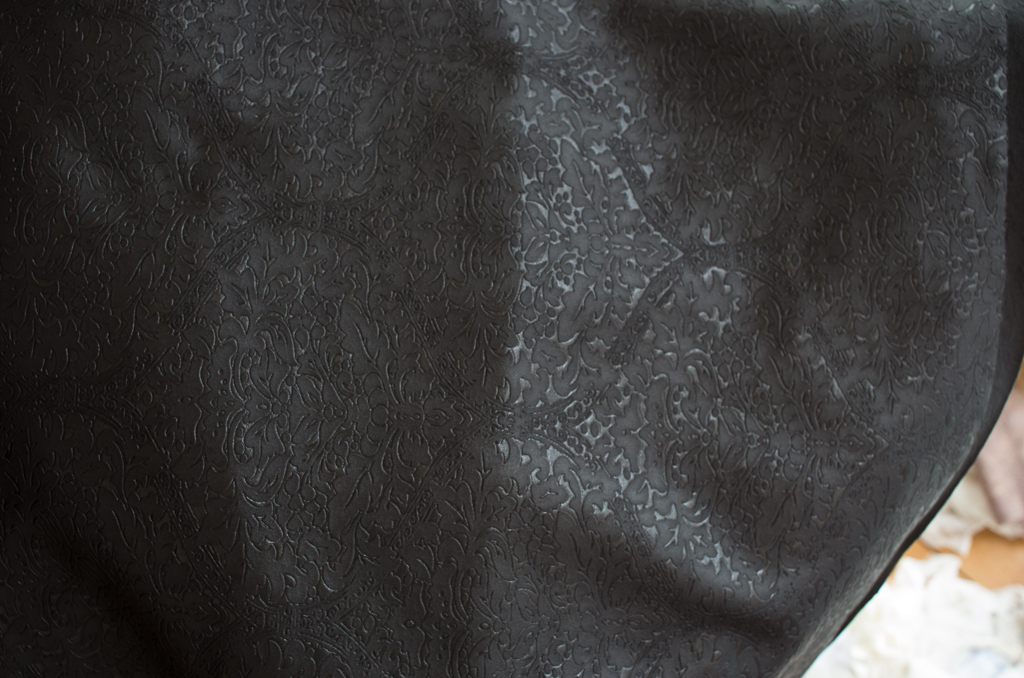
Another, not yet washed,  is a quilted self patterned fairly heavy jersey. I originally had this in mind for a kimono for Joanne's Christmas if I can't find a more exciting and suitable fabric, but I'm not sure this will work - it's too heavy and spongy, but I really like it. It's black, so not really my colour (though I think it would make a nice Morris blazer!)

I really like this. It's a black rather than the dark grey showing here
I didn't do much proper tidying of my sewing cave this week so that's still to do - I certainly can't leave it much longer! I've decided that I can't face cataloguing each piece of fabric but I've divided into boxes by type (wool;  stretch; woven;  linings and interfacing;  crafts) and hope a simple title will suffice for the present.

South Shields - market and library

For over 20 years, I worked in South Shields but never visited the market.  I didn't sew in those days, of course, as I didn't take up dressmaking until after I retired . I was aware that there was fabric at the market on a Saturday but even after taking up sewing I didn't visit as I played golf on a Saturday. So one of the unexpected side effects of not playing golf at the moment was that I could visit the market. I knew that I had already bought from one set of fabric vendors as they attend the Chester le Street market,  which I had visited. I heard that one of the regulars in Shields was giving up so I realised I had to visit sooner rather than later.

The lady, who is running down and buying less but not giving up just yet, has been there for 30 years and previously had a brick and mortar store. I had heard she had some ethnic fabrics and hoped to pick up some fabric suitable for making Joanne a kimono for Christmas. I didn't find what I expected, some African wax prints,  but I did pick up some fabric (I'm afraid! Or am I?).  For Joanne I found a black based floral-patterned Chinese silk. 
This is a Chinese silk (not pure silk)

I also bought turquoise dragonfly Chinese silk, for Alison - she loves dragonflies and her favourite colour is turquoise, so I couldn't resist it. She doesn't like kimonos so to be honest I'm not sure what I'm going to make with it! Probably a dress. I asked her what she might like and she surprisingly responded a long open cardigan,  so not unlike a kimono really. 


Turquoise. Dragonflies. Dan suggested a chinese top - don't know how to spell it. Q'pai?


I did buy a couple of other little bits but I'll talk about them another time. There's only so much I can admit to you at any one time! David approved the purchases so that's okay. No secrets from him!


A mounted lace

A fairly thick rather stable knit with lace added

A pleather (?)

Earlier in the week, I got a delivery of fabric, including some brushed cotton for making a shirt for David. Not surprisingly, it's a green-based plaid, which David chose himself. I'm hoping I have a suitable shirt pattern.  


Again, the colour is not right despite waiting until daylight to take photo.It's a lovely fabric.
I had originally thought I'd make a shacket but we've now decided on a shirt after all.  One of the other stalls in the Shields market consists of a small square of tables where the vendors stand apparently trapped in the middle. They sell interfacing, trimmings, thread, zips and buttons galore, with no room to move. I bought some buttons for David's shirt. I think the buttons look good with the fabric. I hadn't taken the fabric so wasn't able to buy thread but have some that is excellent for the buttons, though I think I need a darker shade for all the topstitching.


Last week, The Word, South Shields’ new library and The National Centre for the Written Word, opened and so we went in for a coffee, overlooking the Tyne. We also went up to the viewing area for a better view.  They have an exhibition area - a Ridley Scott exhibition is on at present, until May, I believe. In two weeks time they have a Gothic for Girls event with fashion and story so I may visit that. It's a great building. It has some fabulous areas inside.

Fabric and Haberdashery in Blaydon

We have had a broken shade on a triple pendant light fitting for some considerable time which we have been unable to replace, either just the shade or all 3 shades. We have looked all over and searched on the internet to no avail. It's one of a pair, one upstairs and one downstairs. We finally decided we'd need to replace the whole fitting. Last week we noticed a new lighting store so decided to visit on the way home today. This is in a store called the Curtain Store in Blaydon. I used to shop there when it was an old dingy warehouse used as a remnant warehouse by its sister store around the corner. As well as home ware and curtain fabric, I bought some cheap fabrics I used for  dressmaking toiles. That closed for refitting and is now a lovely store with cafe and toilets etc. We didn't buy lights - but they do now have a whole dressmaking and haberdashery section! I didn't buy anything but I know where it is!  They did have some fabric I liked but I had already bought enough.  I can show some control!

Domestic DIY - fridge problem

We were on our way to Maplin. Our tall larder fridge appeared to die - it was flashing and giving audible warnings and not keeping temperature. David searched online and came up with our problem as a common issue.  The replacement circuit board is £189 (ex labour) but the likely culprit capacitors are much cheaper and David is very handy. We got the capacitors from Maplin but then when he dismantled the fridge to replace them, found that our board is somewhat different from the ones described in the tutorials (for want of a better word) David found. We've ordered a likely replacement. In the meantime, the fridge is working again - apparently these capacitors are 'self-healing' so we've possibly bought a respite. If /When the fridge plays up again and the new capacitor ext doesn't work, we may consider a new fridge to get the guarantee. We can buy a fridge for not much more than the cost of the circuit board, but a replacement fridge of the same type is over £600. Is it worth getting the circuit board replaced when necessary? Mmm.


Tailoring Class and McCall's jacket tissue fitting

I've mentioned my tailoring class in passing, really. This coming week I think we're starting to work on our personal blocks. I decided to cut out and tissue fit a Palmer Pletsch jacket McCall's 6172. I used the high bust measurement to choose my size, as advised, despite my HB-FB difference being just 2", as I always need an FBA. I don't need a narrow back or broad back adjustment, I don't think, anyway - David was helping me with the fitting. I do need a 2.25" FBA and I'm in the process of doing that and then will enlarge arm by 1.5". Then I need to check to see what's that's done to hip room and bust position. They may need altered. They do on the tissue at the moment but I think I need to wait see. I do plan a toile. I know that PP feel that you can go straight from tissue fitting to adjusting on your fashion fabric, but I'm not happy with that concept.

Edited to add - Rory had a look at the humongous FBA I ended up doing on the tissue. She tissue fitted it and felt that it was okay but needed some work at the shoulder which she felt would be better done in calico. So that's my plan - I'd like to ge tit cut out before the tailoring class on Wednesday.

(Written Sunday)

I was taken by surprise by it being so dark so early today, thanks to the clock change. I haven't got the photos I wanted to take for this post, which has been written in dribs and drabs. I'm busy tomorrow  but  I might sneak in some photos before I go out tomorrow morning or in the evening after  I come back from the Sewing Bee.. (Edited to add - yes, they're there!)

Halloween tomorrow. We bought some goodies for possible guisers. We weren't brought up on Trick or Treat, which is getting more common here. I did have Halloween parties as a child and dressed up - we dooked for apples, tried to eat candy apples blindfolded etc. A long time ago!! I'm not at all sure about the 'trick' part of it - does that include egging houses if the householder doesn't provide money? Sounds unpleasant. The guisers who tend to come to our house are young children accompanied in the background by  a parent or older sibling. An occasional much older group, but we haven't had issues with them. We have had our house egged, twice. Not because we refused to provide - it wasn't even Halloween and we didn't see the people involved. Like ringing a doorbell and running away, but much nastier. 

Edited to add - we had a number of pleasant guisers. Usually wishing a Happy Halloween. Children. Dan was late for class tonight - she got her car egged. First time she's ever been the victim of egging.


How Do You Read Blogs?

It's a while since I've posted a blog,  lots of reasons. I'm thinking of starting again. However,  I used to read the blogs I fo...