Thursday, 8 September 2016

A Surrogate Model and a Deadline Made

You will no doubt remember that I made a pair of shorts for Joanne,  hacked from a disintegrating RTW pair that she had worn to death.  I didn't get them made in time for her birthday, 3rd week in August, but posted them off shortly afterwards and wrote a post here and a review on PR.

The new shorts - lace edging (shown two layered here0
 
Original damaged RTW shorts

What with helping my mother move and my plans to enter the Simplicity Sewing Challenge plus a busy golf season with a major deadline Thursday 8th September for which I had a very large printing job, I had no intentions of entering the PR Sewing Bee.  Just a week to make something?  Maybe something that wasn't my style?  No thanks. But then the challenge was posted - a pair of shorts! I just had to make another pair for Joanne!
The latest version, hanging on a hanger

Time differences and an all day into the evening golf match meant that I didn't find out about the challenge until late on Thursday 1 SeptemberThe closing date for this contest was 11.59pm EST on Wednesday 7th September. That's probably about 5am on Thursday morning here. So I didn't have much time (for me - for others it might be no problem!).

On Friday 2nd September, I decided to enter it, making another pair of shorts for Joanne. I haven't seen her in the ones I made, other than a pretty bad photo, but she says they fit and she loves them. Okay then. 
Photo of Joanne wearing the previous shorts I made
I first tried to seek clarification  on the forum that these counted as shorts and therefore meet the contest criteria. The consensus was that they did. I had previously called them culottes, not allowed in contest, but these had a number of specific criteria and mine were not culottes.

Same day, I went to Dainty Supplies in Washington (Tyne and Wear not DC) and bought single georgette in black and guipure lace in black. 
I wanted to use the top lace but there wasn't enough
This new georgette was much thinner and drapier than the double georgette I used last time, which was a very nice fabric available in a range of colours. I didn't have time to buy again. Anyway,  although I'd like to make in a different colour, I don't know of a stockist of coloured lace. I'm sure there must be one. I saw a black lace in Dainty I loved (the top one in photo above) but it was the end of the role and there wasn't enough, though I bought it just in case. I bought the only other suitable lace they had which turned out to be identical to the one I'd  used previously (in the shop,  I thought it was different). They didn't have a lovely flexible lightweight invisible zip so I had to make do with an ordinary one.

I got home and washed my fabric and lace.

I looked out my pattern pieces (easier said than done!!)  and slightly tidied my sewing room aka dining room. I cut out pieces in the later evening once the fabric was dry.
 

 Here I met my first problem!  Trying to be frugal with the fabric, I didn't notice I was cutting out over a slash. Two front pieces had to be redone. I interfaced the facing of the shaped waistband.  I sewed the pockets on the front and then interfaced the left back piece ready for zip insertion. I melted the fabric of this piece while fusing the interfacing and ruined my brand new ironing cover! It was really too late to carry on. Don't sew when tired!
Melted fabric

My brand new ironing board cover!

Saturday 3rd September and Sunday 4th September, I was in Scotland helping my mother. No sewing. When I got back late on Sunday I was really too tired to start. I did some of the golf printing  preparation

Monday 5th September - busy part of day and sewing bee in the evening. I spent ages looking for a lost back - realising eventually this was the one I'd melted but I hadn't re-cut! Re-cut it. No problem with making up lining this time, got the opening on the correct side! I have major problems with that. I overlocked the edges of all pieces to minimise fraying, except the crotch seam which I sewed together and then overlocked the two sides together, on the lining only. 

I found that despite having only made these shorts a couple of weeks previously, I didn't find it that easy. My unpicker saw a lot of business. I took to the sewing bee to continue working on it. Dan felt this fabric was closer to the original RTW than the double georgette, but I know which one I prefer!  I found it helpful to look at my toile from the previous time to help me with the steps. I asked Dan if she would model the shorts for a live model photo of the toile fitted. It did and she agreed. When I returned home I had to work on the golf stuff.

I had arranged to post to my daughter who had set up with a friend to take a photo when the shorts arrived. That meant I had to post special delivery on Tuesday and hope and pray her shifts would allow her to be in when they arrived, she wasn't busy,  the friend would be available etc. The more I thought about it, I reckoned it wouldn't work. I was rather a long way from finishing on Monday and the shorts would really need to be posted by 3.30 pm on Tuesday.

David suggested I may as well finish them anyway as Joanne would want them but forget about the sewing bee.

Tuesday 6th September - golf committee meeting in morning and busy in evening. I managed to finish the in-seam pockets and insert the zip. 

I'm trying to show the pocket in front of the zip here

and here

First side of zip pinned next to pocket, onto back pocket piece, pinned but not yet tacked

My short pieces did not have pocket extensions - this was the pocket shape


I decided to insert the lace at this stage. I sewed the lace right side to fabric right side, facing in towards legs, using my edge stitch foot to position the stitching carefully. 
Lace tacked right side of lace to right side of fabric, facing towards legs. Funny colour!

Using edge stitch foot to sew on lace

Lining layer is added here - this shows sewing along the original stitching, fabric side up

Understitching the lace
The inside of the lace edging showing the understitching
I had just enough lace and no more!  I stitched the lace at the junction by hand. I then positioned the lining to sandwich the lace between the lining and lace and sewed along my previous stitching line and then understitched. The first leg was easy but the second leg was slightly trickier because of the crotch. Overall, still easier than the way I did it last time which involved turning through the zip opening in the lining 

I really struggled with the waistband. I'm not sure why I have this problem but I find it difficult to get waistbands opening on the correct side and not be the wrong way out. My first waistband didn't work,  yep,  cut wrong way around. I made up a new waistband,  this time interfacing both sides and sewed on to shorts.  Bedtime.
My curved waistband
Way past last posting date for Joanne! Plan B now in operation!

Wednesday 7th September (D-Day) - I was due to have been busy most of day playing in my medal but woke up so sore and stiff I didn't play, fortunately for these shorts, if not for my handicap.  I had the first session of my new tailoring course in the evening and I had to get my major printing job done for Thursday. 

I found that my waistband of Tuesday night was also wrong! I'm still not sure what the problem was, believe it or not. The side seam was in the wrong place that is not matching the side seam on the shorts  so I thought I had sewed on inside out or rather made the wrong side the right side (I had a definite right side and wrong side as I had understitched) but that wasn't it. I must have put the underlap on the wrong side, though I didn't pick that up before I unpicked it. Anyway, I decided the outside had been changed too much by the interfacing and unpicked the whole band, made a new front without interfacing and made up a new waistband.  This time it went in okay. It looked much better than the interfaced outside. I must try to source some better, finer, black fusible interfacing for future projects. I simply overlocked the inside as I had run out of patience with this.

After this, it was plain sailing. Hand stitched the lining to the zip tape; sewed on waistband fastenings.
Showing zip, waistband inside and fastenings. You can see that I have simply overlocked the inside of the waistband

Finished!
I took the shorts to my tailoring class and Dan kindly modelled them for me to take the required photo on a live model (I had already taken the other necessary photos and saved in a review as a work in progress), despite the fact that I was late and she had forgotten to tkae leggings to wear under the shorts. She is not a shorts person and didn't want to show her knees. Joanne is quite a bit taller than Dan so the shorts are rather longer on her than Joanne. I should say that Dan sportingly agreed to be identified in this blog post.


In class we were doing jetted pockets as part of jacket construction. More of the class at a later date.

I had a lot of difficulty putting in the review to PR. It seems that saving a contest entry as a WIP (a review of a piece of work in progress) leads to problems. It took me ages but I got there. I even managed to get my pre-AGM printing done for distribution on Thursday.

Today there was a major problem with our Internet server - not just us,  a big area was affected but this was fixed fairly quickly. However my PC is no longer working to link to the internet. Fortunately I got my linking and printing done last night! I'm trying to upload this post from my phone. I have some photos from construction on my phone (unedited) and I downloaded the 5 photos from my PR onto my phone here. So here goes! I managed to do some but then found that the problem was probably with my browser - I'm now on my PC with a different browser and not having the same problem. Whew!

Conclusion
I entered this contest only because I had recently made shorts for Joanne and was going to repeat them, anyway. After telling her I was doing this,  at this stage, I felt I had to carry it through. The timing was all wrong but I got them made. They look good - at first glance,  identical to the previous pair I made. David posted them off to Joanne for me today.

Fingers crossed for progression to Round 2!
My hope is that I will get through to Round 2 of the PR Sewing Bee this year.  I entered last year but was eliminated in the first round. Fingers crossed! I'll find out at the beginning of next week. Assuming I get through, which is a huge assumption considering all the wonderful entries, I will only go forward if I reasonably feel I can.

Sewing for Children Contest
Voting is still underway. Please vote for me!! I certainly don't expect to win but would like to come in the top half. Results should be out in a couple of days


Simplicity Sewing Challenge
As far as the Simplicity Sewing Challenge is concerned, I'd hoped to start that tomorrow (Friday) but now I'm going to my mother's for two days, so perhaps I might get to start on Sunday! I'm very busy for the rest of the month but still hope to achieve this. I should do, really, just as long as I'm not too much of a perfectionist and instead follow the mantra 'finished is better than perfect' or something like that, the implication being that I can spend so much time trying to perfect I don't get it done and lose my sewjo into the bargain. That's so true in my case. Rory has spent ages trying to get me to be faster, to just 'do it', to allow creativity to flow. I fear she's fighting a losing battle, but I'm trying and entry into these contests helps with that.

Friday, 26 August 2016

Entering the Simplicity Sewing Challenge - Part 1

As usual, time has run away with me. I was watching the Olympics and I had to finish both Joanne's culottes and Jack's shirt for their birthdays in the middle of August (didn't manage to finish either in time!).  Then I was going away for a few days,  camping, then helping my mother move. So a very busy time.


I saw this Simplicity Sewing Challenge advertised and decided I'd do it as I liked the dress. My sewjo hadn't returned and this seemed like a bit of a challenge, complete with deadline,  but for something I'd wear, to spur me into activity.


I thought I had until the end of September for this challenge but noticed tonight (Monday 22nd August),  to my horror, when I was showing the info to Dan, that the poster said end of August. I emailed Simplicity for clarification when I got home. Simplicity responded quickly and I had a satisfactory reply at breakfast time next morning. The deadline was extended to 30th September. Thank goodness! I simply wouldn't have been able to finish by the end of August.


We cancelled the camping trip as neither David nor I were very well which gave me a few days to sew.  I hoped that would be enough time for my challenge (and finishing Jack's shirt!). I planned out how I might achieve this and although I now have a month, I think I'll follow the same plan. Over a longer period of time, allowing some golf, housework etc too!


So my challenge is Simplicity 1458,  an Amazing Fit seamed princess shift dress. I like this dress as I think I will suit the style.  

This is the envelope for the smaller size range

I do like the ines
It's similar to McCall's 6028, which I like a lot,


I loved the look of this

Great lines

I entered this into PR's Little White Dress contest. 3 stylings - daytime here

This is more of an evening look

Dress in the unadorned state


and to the Mother of the bride dress that I didn't get around to making!. The princess seams allow a lot of flexibility in fitting. I can add extra space just where my derriere needs it! I certainly needed to add in this area on my most recent toile when I was trying to modify the MOB dress. On the other hand, this dress has A-line flares below the hip line so I may not need to adjust as much as I do with a sheath dress.

Those of you who know my blog will know that I am tall, a plus sized pear shape, a bit of a perfectionist and usually make multiple toiles. I don't have time for that. So I plan to follow the Amazing Fit pattern method more closely than usual! But not to the letter.


I chose the larger size range (20W-28W)as I thought this might mean that fewer pattern adjustments are needed, although I fit into the top of the smaller size range,  too. I note that the larger size range has a longer back length but I'm not sure about bust apex position. Standard cup size in the smaller size range is B but it seems to be C in the larger range. The pattern has cup sizes, so that's a bonus. I'm hoping starting with a size 20 won't be too big at the upper bust area. When you read some suggestions regarding sizing by upper bust measurement, my size would be 18. On the other hand, I am 'big boned' and 5'11" so the larger size might be ok.


Plan:
  • Cut out tissue based on my high bust measurement (or size 20) but using multi size to accommodate my larger hips.
  • Use pattern recommendations to choose bust cup size (the pattern is multi sized)
  • Use pattern recommendations to choose curvy or average for hips (certainly not slim!)
  • Pin tissue together and try on.
  • Likely changes needed
    • Bust apex position (may need lowered)
    • Waistline position (may need lowered/lengthened)
    • Waistline position (may need altered for forward tilt)
    • Hip shape (full high hip)
    • More space for derriere (not a sway back alteration)
    • Skirt length - may need to be longer
  • Based on alterations made to tissue,  cut out and try on a toile. I plan to insert piping so I need to get the fit sorted before I do that. The pattern method doesn't actually include a toile so an extra stage but I think worth it.
  • Adjust toile and adjust pattern pieces
  • Cut out final dress with larger seam allowances as per Amazing Fit method


I have sufficient calico for a toile and David will help me with the tissue fitting
I will use double crepe for the dress and single crepe for the piping. I need to buy some black cord for the piping filling. These are the fabrics I had intended for the MOB dress.

I'm not sure about a full lining at this stage.The pattern doesn't specify a full lining but I added one to McCall's 6028 and liked that. Unlike many people,  I quite like facings, so I have a decision to make. I'm much less keen on a bias tape finish to neck and armscye edges. I tried it out on my previous toile for a modified 6028 (MOB dress) and while it was okay I didn't like it as much as either facings or a full lining,  both of which I've done.


Can I do it in time? I hope so! At least I have a month now not just 3 days! Well, 3 weeks, really , as I'll be away for around a week from Monday, helping out my mother. I feel really guilty that I didn't help her enough first time she moved, due to the wedding sewing (is that a factor in her not settling?), so she has to come first this time! At least because we downsized last time, there is less to deal with.

My next planned post will have details of fitting a toile. Hopefully in about 2 weeks time. Really the final making takes least time - I find that all my time is taken up in fitting.

Thursday, 25 August 2016

A shirt for my grandson. Burda 9419

A shirt for my grandson


Front of shirt with collar down

Front of shirt with collar up to show contrasting under collar

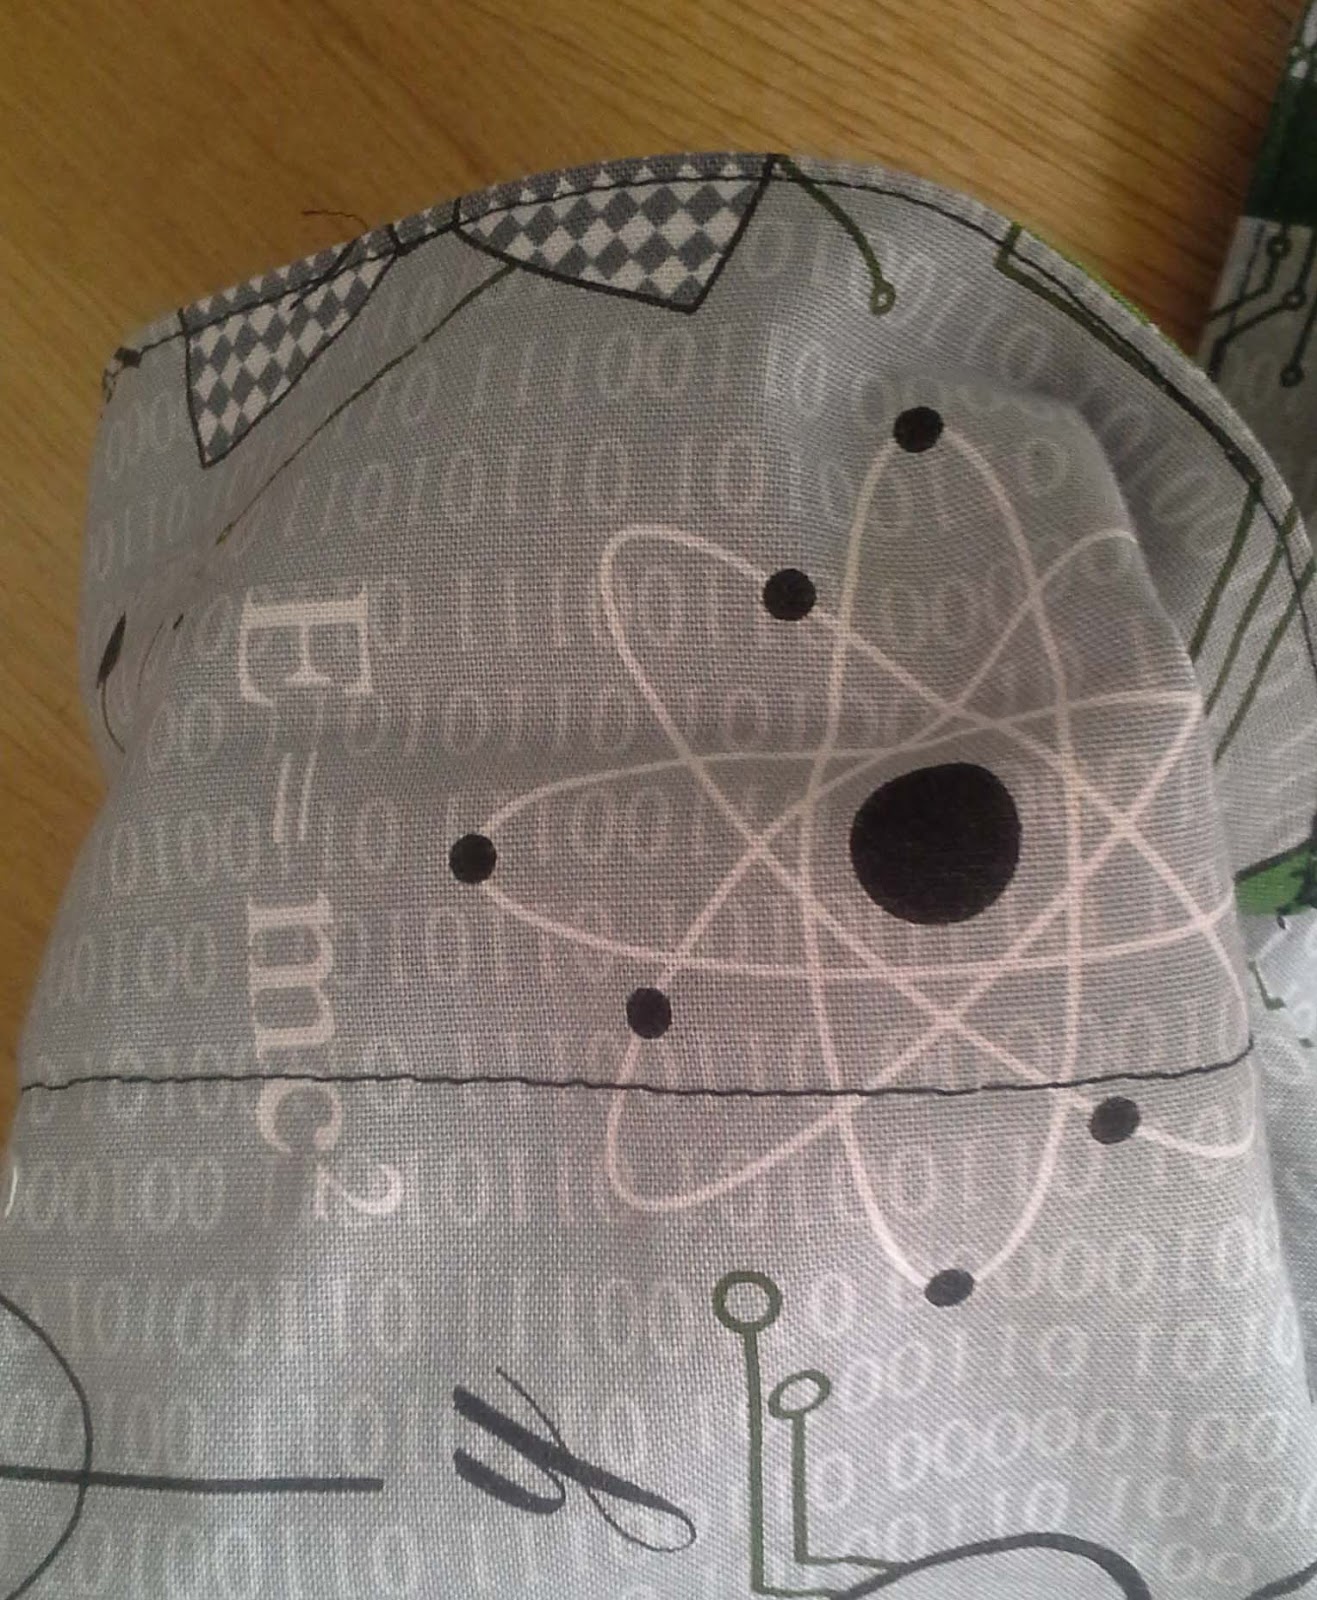
Last year I saw that Deepika from PR had made a shirt. I think it was her, anyway. I absolutely loved the fabric and decided to buy some and make a shirt for Jack. The fabrics are Robert Kaufman/Sarah Johnston Mod Geek #14563 and #14565 


I had some difficulty locating the fabric which I eventually bought from the US - even with import duty,  VAT and postage it was cheaper than I could source in the UK.  I bought 2 yards of the main fabric and 1 yard of the contrast. I'd hoped to get a shirt for Ben out of it too but there is probably not enough (Ben and Jack both growing and mistakes - see later)

I didn't get around to the shirt until this year. I bought a Burda  kids pattern 9419 and decided to go for it. I had Jack's birthday and the PR children's wear contest to spur me on! Jack turned 7 last week (no, didn't make it in time). I saw him a couple of weeks before that and had an age 9 toile in plain calico for him to try on. It was a good fit. Really too good, though, and I decided to go with age 10. He's growing like a weed. He's very tall for his age and his width is in proportion so the shirt width was fine.

I love the fabric but it is a little bulky. Perhaps this is quilting cotton rather than garment cotton? It's certainly not shirting cotton. I pre-washed and tumble dried the fabric - I wouldn't tumble dry but my daughter could well do. It has a nice handle and actually doesn't fray too much.

I traced out size 10. I left myself too much to do and too little time to achieve what I had hoped for. I had to finish Joanne's culottes (part of her birthday present the day after Jack's) and that took a lot longer than I thought. I got them posted though and could start on the shirt. I then intended to take it down with me when we visited to camp with them for a few days, which would have been on Tuesday past but we pulled out as neither if us is very well at the moment.

I very carefully pattern matched the front pieces. No major problems in cutting out main or contrast fabric or with the interfacing. I worked as suggested by the pattern - except I used the clean finish method for yoke insertion (aka burrito method) using my course notes from last year. I used a clean finish method for the pocket too.  I used the pattern instructions for the collar and stand but would have been better using my course notes for that too, possibly. Both the collar and stand were interfaced on both sides.

Inside of shirt to show clean sewn contrast yoke and under collar


This also shows contrast internal yoke

I had made a miscalculation! My perfect matching was perfect - if the shirt was edge to edge and not buttoned! I had failed to take into account the overlap!  I cut out another right side front, using see-through tracing paper to help with the pattern matching. I had enough fabric but perhaps not enough now for a shirt for Ben.

Otherwise, no problems, really. My collar didn't fit as well as I'd hoped, not sure why. I had to adjust the stand on the hoof. Jack doesn't use a top button so I wasn't going to make one. The fabric was bulky here and the placket and stand weren't flush with each other despite several attempts at adjusting. However, because we didn't go on holiday, I was able to go to my sewing bee and Rory helped me adjust further and it looked a lot better after the fabric was trimmed further to make it less bulky. Following the pattern instructions, I sewed the back of the collar to the  shirt but Rory feels the other way around is better. I unpicked the top stitching (not the whole collar) and redid with a narrower collar width on the inside as it was somewhat wide beyond the top stitching.

Detail of collar stand


I overlocked the side seams together and top stitched on the right side to hold down the overlocking and provide a decorative finish. I used black thread throughout as I thought this provided a nice contrast and unified the pieces.


Side seams - stitched, overlocked together and then top stitched on right side. Wrong side

Right side of side seams showing top stitiching

I have a rather large stash of buttons but couldn't find any to suit so had to buy some. I did have some very nice buttons which were really just too small only around 9mm. I decided to use black buttons and black buttonhole stitching as I think this will fit in best with the design. I couldn't do the buttonholes as I didn't have the buttons so sewed in a different order from the pattern instructions. 

I had difficulty sourcing the buttons locally. My local John Lewis had run out of black shirt buttons - but these were 15mm in any case, and a little large. I managed to get some 13mm buttons, loose, in Fenwick. I didn’t want to buy online unless I really had to as I wanted to see them for size - in any case, I did look online and didn’t see much, really, in black. I’d really have preferred atomic orbital buttons!

After getting the buttons,  I made the buttonholes and sewed on the buttons. The collar buttonhole was still a bit tricky and took two attempts. The buttons are a good size for the placket but I think this size is rather large for the collar. Jack won't button it, though, so I won't change it.

Sleeve bands. During my toile, I accidentally sewed these on upside down and then had problems stitching. Fortunately, I worked out what I had done wrong and I stitched these this time without problem.

Sleeve band

View of sleeve before band turned up

Back - collar down
Back - collar up to show under collar

Detail of back, showing yoke, loop, collar stand and under collar
I started on the hem. Please note that my self facings were already top stitched down. This is important as I then followed my course notes to finish this edge - and we hadn’t stitched them by that time. I sewed, trimmed and turned and realised that I had done this completely wrong! This was a big mistake and I thought I would have to redo the hem shorter than previously. At the sewing bee,  however, I clarified that another option was to unpick the top stitching, open out the fabric and bag the bottom. It looks much nicer. Because I had trimmed the fabric, it was a little trickier but not too much. However, I wasn't too happy with the hem. Being relatively wide, as the pattern used a 1.5cm seam allowance, the hem didn't lie as smoothly as it should have at the curves. I therefore took it out, narrowed the fabric by trimming off on the overlocker and re-hemmed with a narrower hem, which I then top stitched.


Overall, I like the shirt. This is the first I have made with a shirt collar with stand other than the practice course garment.  I hope Jack will like it too.

Because we didn't go camping, that allowed me to ask advice about the hem and the bulky collar stand front. My shirt is much better now than it was. I probably won't get a photo of Jack in the shirt in time for the PR contest, as they don't return from holiday until next week, but that's not essential to enter.

I could have rushed the changes to the shirt but I felt it more essential to tidy my sewing room (AKA dining room) - I’m afraid it was a dreadful mess and as yet is only a little better! Also, I'm still a bit unwell. 

Wednesday 9.30 pm

I've finished the shirt! I think it looks great. I'll post it tomorrow after taking some photos which I'll put in blog. If I'm lucky, I'll get a photo of Jack wearing it before the end of the month which is last date for entry for the PR Sewing for Children contest.

I see now that there are things I could have done better or rather differently - by not following the pattern instructions in some cases.

# I sewed the pocket on differently, to give a clean finish to the top
# I sewed the yoke on differently, using the clean finish (burrito) method
# I sewed the bottom of the plackets differently to give a clean finish
# I used a narrower hem allowance on the hem. I think that if I do this again I would use a narrower hem allowance all over. Even the collar here had a full 1.5 cm seam allowance which is way more than is needed.
# I wish I had completely followed my course collar instructions as I see now that the result could have been better, giving a cleaner inside which is important when the collar is being left open.
I'm not going to be hard on  myself, though - this is a perfectly wearable and presentable shirt. I like it.

Tuesday, 23 August 2016

Shorts/culottes copied from RTW finished.

I have a new internet connection which seems a lot faster than my previous one. Hurrah!! It wasn’t purely speed that decided us to change but rather a combination of very slow speed, useless customer service and service fallout. Hopefully things will be better with  our new provider. At least we have been able to change over apparently without problem. David previously had a 31 character password which irritated the kids no end but our new one is shorter, so they’ll be pleased when they learn that. By the way, the Russians are now ignoring my blog, as predicted, so my viewing numbers are back to their usual.
The shorts I made


It's easier to see detail in this photo

I’m having a rest after our evening meal and thought I’d connect up my laptop with the new connection and start drafting my next blog post. So this will be bitsy as I add sections.


I’m making shorts from an RTW pair for Joanne as posted last time.
Original RTW shorts


I had made a toile for Joanne to try for fit but realised that I had concerns about construction, so started another toile.


The problem for me is that I was using two layers of fabric (georgette in this case). However, at the hem, lace is inserted between the layers and the side pockets are also between the layers. One side pocket also has the zip inside. I struggled with the idea of using the fabric and a self underlining - but it wasn’t really this as there is the need for separating the fabric. I also wasn’t sure I could just use the fabric as a lining.


I decided to practice the zip in the side seam pocket. I started using the fabric for the front of the shorts doubled. I was using the tutorial I linked to previously - but of course this was for single fabric.

I took to class but unfortunately, Rory got the wrong idea about what I was trying to achieve - she thought I wanted an inseam pocket with a zipped closure. I had nearly completed that (beautifully) including invisible zipper when I realised I was going down the wrong route. I was doing this with the fabric backed by self fabric.


Ultimately, we decided I really needed to do this as a separate inserted lining rather than as a backed fabric.


So I went ahead and constructed a whole outside with the exception of the waistband.


Comments:


Rory advised a different way of constructing the pocket compared to the tutorial I was using (and had printed out and taken to the class). She felt that cutting the seam allowance under the pocket into the seam line was okay for cotton but not for georgette as there was a great risk of fraying. She advised creating a box.


I attached the front pocket piece to the front of the shorts, using the boxed method as advised by Rory.
I then attached one side of the invisible zip as close as possible to the pocket edge but obviously needed to avoid catching the pocket edges.


I attached the other side of the zip to the back. I have to be more careful with the real thing and have more match points, as I ended up with a discrepancy in length at the side seam. It appeared that the application of the zip to the front where the pocket was had really drawn that part up.


My pocket was a little small as the marks I had made disappeared. So I guessed.  Wrongly. Again I need to be more careful with these.


I was pretty pleased with the result despite this.


Open zip; case in pocket; zip stops at waist seam (waistband not attached here)
Closed zip; case in pocket

My original intention was to copy the RTW shorts and have the zip extending right up through the waistband (which sits below the natural waist) to the top. That wasn’t what I practised though! I know that with the bridesmaid dress for Joanne which had that type of finish, there was a lot of strain at the junction between skirt  and waistband .  I've asked Joanne if she would be okay with me stopping the zip at the waistline seam and having a more standard buttoning waistband but she hasn’t replied as I type here. (She never did reply as she was okay with it; just as well as I had gone ahead)


I have cut out the main pattern pieces now and tomorrow will start to make up the final garment.


I took some photos of the made up toile to show the pocket.


Next installment!


Today I posted the shorts to Joanne. I'm pretty pleased with them and hope they fit. She likes the photo I sent her. I think they're a reasonable substitute for the original.
Poor photo - strange angle - but I don't have them anymore to retake the photo. They were actually upside-down and I rotated photo to put them the right way up which is weird to say the least!


Some details:


I made up the outside, including side invisible zip and in-seam pockets. I did use more match points and so my ends matched. I worried about the fabric fraying so overlocked all the edges.


Zip. I used interfacing in the zip area. I did use a 10 inch invisible zip stopping at the waist seam (which is below natural waistline). I didn't have any major problems. I didn't find the georgette too difficult to deal with; it's pretty stable. At a later date, I did have to trim the end of the zip as it stuck out a bit. That helped.


Pockets - I used two layers of the georgette. I trimmed and understitched the pocket edges. The top of the pocket bags is caught into waistline seam


Lace - I attached the lace to the right side of the fabric. The edge of the lace was extremely narrow and I couldn't actually stitch along it - I found it easier to use my edgestitch foot and stitch to one side. I finished the lace at the inseam. I pressed up the small hem to allow a better edge when I came to add the other layer.

Finished item showing right and wrong side of hem. You can see understitching on lining side. The lace is caught between the two bagged layers of fabric.


Lining - my lining was cut from the same pieces as the outside but I made some changes to seam allowances. (I won't go into the fact that I sewed wrong pieces together,  trimming etc and having to redo as best I could)


Bagged lining.
I fitted the lining inside the outside fabric and made sure I had matched all points. I then worked it how to attach lining at lace edge (right sides together,  lace inside) and basted then stitches using the previous stitching line as guide. I used the basting to make sure I had sewn it together properly before committing to the machine. I hadn't yet attached at the zip or along the waistline so bagging was possible, though I did get confused at times. This was quite tricky. I understitched to try to keep the lace from turning under or flipping out. I wasn't able to understitch the whole seam


I then smoothed out lining, basted at waist and zip. Everything looked okay so I committed to stitching.

See photo above.


Waistband
This was a contoured waistband in two pieces, interfaced on one side, with a side fastening. The original had an invisible zip padding through right up to the upper edge.  Rory asked me how I intended to close and following discussion,  I decided to ditch in the ditch from the right side; the back edge of the waistband was overlocked and caught down by this stitching. I added an underlap to the back and finished the front flush with the side seam. At this stage I was thinking of a button and buttonhole but I ended up using a skirt fastening and a large poppet. I'm not sure why, just seemed right at the time.
Left side of shorts from front showing waistband, waistband fastenings, plus zip and pocket
Zip finish
I handstitched the lining to the zipper tape. Other than the closure and all my tacking,  this was my only hand sewing.


I was now finished!  The culottes look pretty good. I washed them again,  dried, quickly photographed and popped into the post for Joanne,  though they won't get picked up until Monday so she should get on Tuesday. One condition of me making the shirts was that she'd let me use a photo of her wearing them in my blog. We'll see.


New techniques learned
1 Zip in in-seam pocket.   I'd use this again - it's not too difficult. I think it wit look nicer in a fabric with more body,  like cotton. The zip is quite heavy for two layers of georgette.  
2 Inserting a bagged lining in pants and of course inserting lace within hem seam


I'll add a photo of Joanne wearing them if she sends one at a later date.
I like them, am rather pleased with what I achieved and now just hope they fit her. The first toile did fit so fingers crossed!

Edited to add photo. I'm surprised that these look much closer to the natural waist than I expected but she appears to like them so that's good. It's difficult for Joanne to photograph these without help, indoors, especially when they're black. This is from a Whats App photo on her phone so I reckon that technology is pretty good!


How Do You Read Blogs?

It's a while since I've posted a blog,  lots of reasons. I'm thinking of starting again. However,  I used to read the blogs I fo...