Saturday, 6 January 2018

My Top 5 Hits and Misses of 2017

I’m once again linking in with Crafting a Rainbow’s Top 5 of the Year. So here’s my top 5 - both hits and misses in this post. They are roughly in order from the start of the year, rather than being in favourite order. I've included a link to the original blog post which will have details of pattern used and more details of construction etc. I've used different photos - I think the actual blog post has better photos but for some reason I couldn't pick them up today. I had to cut down my labels as there were way too many characters.

Top 5 Hits

1 Orange padded gilet for my grandson


In February, I made a padded gilet in class and asked for the pattern to be sized to fit my grandson. He liked it and it did fit. It’s too small now of course - he has grown so much in the last year! I’ve included it here because I learned such a lot making it. I have some fabrics for new ones for him and his brother but would need to identify a suitable commercial pattern. I'd use microfleece for the lining next time around and bought some in a  lovely lime green. I don't think I ever blogged a photo of the completed garment. An earlier post where I tried it on him for fit is here. 

2 Check self-drafted tank
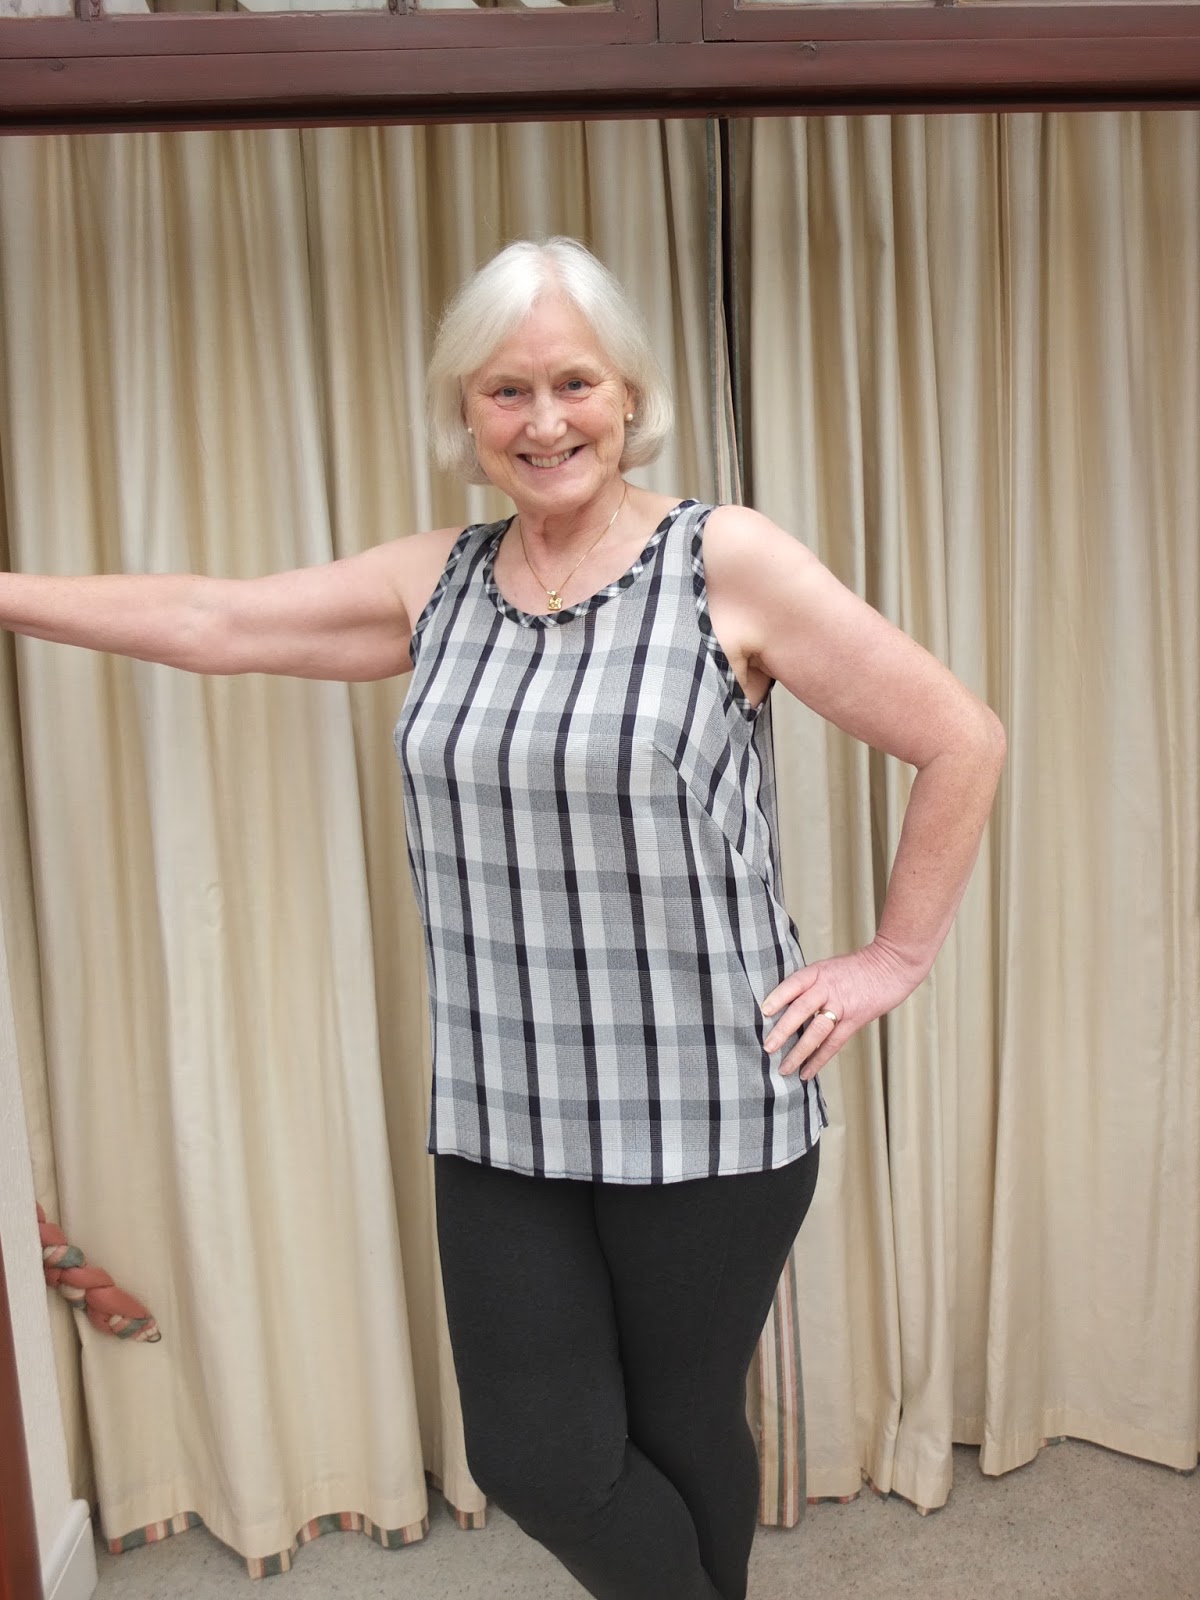


In March, I made a simple sleeveless top using a block I had made. Armholes and neckline bound with contrasting, visible, bias binding.

I like this top and wear it regularly - but I would choose a different fabric next time around as this is a bit ‘spiky’. I would make it in a natural fabric - this is polyester.

I’ve included despite not being 100% happy with it as it looks good and taught me a lot. This was my first venture into using a print on a print (contrasting tartan bias strips). I loved the result.

Blogged here.

3 Nettie bodysuit


Nettie worn with trousers and a cardigan. Long sleeves next time.


In the summer, as part of my class on stretch fabrics, which ended in July, I made a very successful Nettie bodysuit. As this was done in class, I followed class instructions rather than pattern instructions and made a couple of modifications. I intend to make more but haven’t got around to it as yet. I would want to add sleeves to the next one.

Blogged here.

4 Murder Mystery weekend garments

Under this one heading, I’m going to include 3 separate garments, all of which were made for our murder mystery weekend in November

  • Yellow jeans for David (in photo below). David likes these and has worn them since and intends to go on doing so. I previously made him jeans from my own pattern (part of another course) but this was from a commercial pattern, which made it easier for me. I made a couple of tweaks and would alter more next time around. Blogged here.


  • My colourful jumpsuit (in photo above). My son-in-law loved this and I wore it again over Christmas, especially for him!! Actually, I love the jumpsuit - it’s just that there aren’t many places I can wear this bright a fabric! However, I will make up another more ‘sober’ one! I don't often wear my own handmade garments as I'm so critical about finish and fit. Blogged here.
  • My ‘flower power’ dress. I love it. I would make the smaller size next time, though. It was comfy, cosy and warm with plenty of space for Christmas pudding eating! I guess I would do the sleeves as per pattern though as these aren't very practical for working around the house! Blogged here (with better photos).


5 Red Silk Dress for Helen


I absolutely have to include Helen’s red silk dress even though it’s less than two weeks since I gave it to her!!  I know this will be worn and worn and worn, like its RTW predecessor. She loves it and it fits. This is, incidentally, my entry into Designin' December, conceived and run by Linda of Nice Dress Thanks I made It!. There is currently voting on her blog and on IG. Blogged here. This link is to the 5th of a 5 part blog! Previous posts were about developing the pattern, toiles etc.

Others
I have had a few successful makes, both garments and craft type makes but the ones above are my edit.
Top 5 Misses/Failures

1 Bias Cowl Top for my Mother


You can see that it's falling off the shoulders

The first has to be the bias cut top I made for my mother’s birthday in January 2017. I had made the same top for me for the PR Sewing Bee (but didn’t pass beyond the second round) and as my mother loves a cowl neck and I had some fabric that she gave me, I thought this would be a good idea. The fabric was fine.

My mother told me the top was lovely etc. Some months later, I had the opportunity to see her wearing it - what a disaster! She told me she hadn’t wanted to say…
The fit was awful. I recently suggested I remodel/remake but I think she has got rid of the top.

I should say, my mother has lost a considerable amount of weight (weight that she can’t afford to lose) so that has contributed. Also, she has a marked ‘dowager’s hump’ (I hate that term!), which I did try to take into account when I made the top.

So it’s not the pattern, or the fabric but fit that’s the problem here. Issue - fit. Blogged here - but obviously needs updated to reflect the fact that it didn't actually fit her!

2 Two UFOs which I completed but which aren't a success:


The first is the lace cardigan I made in February 2017, photo above. I just don’t like it. It had been a UFO and perhaps should have stayed that way! I modified the pattern from the original so can’t really comment on the pattern.  Issue - simple dislike. I find it too 'floppy' and insubstantial. Blogged here.


The next was also in February, above - another UFO. This time a cotton skirt. It just doesn’t work as it clings.  I did try to wear it as I like the fabric and felt the skirt fitted but was put off by the clinging. It isn’t lined but needs to be because of this. Again, the pattern is fine, fabric fine, but lining needed and probably fit tweaked further. Issue - need lining with this fabric. I may well get around to doing this as summer approaches. blogged here.

3 My Merry May MAGAM Top, sadly


I loved the pattern on the fabric. I wear a lot of cardigan type jackets.

In June, I made a top from the same pattern as my successful sleeveless tank. The fabric choice was poor, however much I loved the pattern. Snags and runs appeared in the fabric (rips that is, not colour runs)  and despite trying hard to ignore them, I couldn’t. It was binned. Issue - fabric choice. Blogged here. You can see it without the cardigan on the blog.

4 A checked skirt which gave me migraine


My eyes crossed as I tried to sew with this fabric. I gave away what I had left (quite a bit)


In April, I made a skirt. It was finished but I didn’t like the fit and tried to modify. I also didn’t like the fabric. Never worn - and not just because summer was coming up. Issues - fabric choice (the pattern on the fabric even more than the fabric though it was too heavyweight) and fit. Blogged here. There are much better photos on the post

5 Grainline Morris Blazer


My Grainline Morris blazer. Least said the better!! I will, however, try again as I think the biggest issue here was fabric choice. Issues - fit and I think I would like to line it. Blogged here. 

There are other failures, too, some of which didn't get to the stage of taking a photo and certainly weren't blogged. Forget about them, Anne!

Others - UFOs or WIPs

  1. I have a Linton tweed Chanel-type jacket almost completed. I just have the lining to hand sew. I might do this as we catch up with the Star Wars series. David got movies 1 - 6 for Christmas. We have previously seen them, starting when the first came out in 1977 but it will be useful to see in story chronological order. This is certainly a WIP - and nearly finished.
  2. I started but didn't complete culottes for myself. I may or may not complete them - I do like the fabric but culottes might well be out again. Issue - time available. This is a UFO.
  3. My interminable trouser toiles did get to block stage but I haven’t made them up as yet. I plan to make up in navy wool and navy gaberdine (?)
  4. My bodice and skirt/dress  toiles were not completed to my fit satisfaction. Lots of work here! I will tackle again in the new year.
  5. I have another jacket at toile stage ready to make up. It’s definitely on the back burner. UFO.
  6. I plan to make up a Grainline Morris blazer in lightweight boiled wool. I think this could be a useful and versatile jacket - if I get the fit right.
  7. There are others….
2018 Plans

I will be putting up my 2018 plans in a separate post

Friday, 5 January 2018

My First Knitting Project in Many Years!

I think it must have been in April at the Edinburgh Knitting and Stitching Show (not sure about that! It could have been Harrogate in November 2016.) that I purchased a knitting kit - a hand knitting pattern and the yarn to make it up plus button and poppet from The Wool Shop Leeds. The yarn is Mode/Serenity chunky. I have a lot left over.


It’s a long time since I did any knitting and I started slowly as my hands can get very sore.

When I first started knitting this time, I found I was a bit uneven. I hoped that would  improve with practice and I think it did.

I did the tension piece as advised - and discovered that I needed to be a bit tighter, so went down a needle size. That was perfect. My required tension was 14 stitches and 19 rows to 10 cm. It measured spot on. I didn't want it too tight and the size I chose gave 6 inches of ease at the bust - the size smaller was only 2 inches so I didn't think that was enough.


I knitted the pieces fairly quickly, really, without many problems. I did have to undo a portion as it was too long for the other side. I rapidly remembered how to measure knitting!!

I had some problems doing the sleeve bands and neckline - the former more so than the latter as they were done first. I had to pick up stitches from the edges (after back and front were sewn together at the shoulder) and knit several rows of moss stitch. I could NOT get the number of stitches picked up to the exact number required by the pattern. In the end, I did my best.

I was less worried about having the exact number of stitches for the collar. However, I do need to learn how to do this properly! There were a few bits where I felt that the hole in the knitting junction was too big so I filled in with a hand stitch - it obviously means that I wasn't doing the picking up correctly, I guess. Any advice on that? Can you point me to a resource?


After the collar was completed, I had to sew up the waistcoat sides. I found this more difficult than I remembered! I think my next attempt will be better. I remember that sewing up was never my greatest skill! I need to find a good resource to help me work out the best way to do this. Any recommendations?

Then I had to sew on the button and place a poppet behind it. These were supplied in the kit. The poppet is plastic and I'm finding it difficult to fasten it when the gilet is worn. Once fastened, it stays in place. I may replace with a large metal poppet.

Then I blocked the completed piece. How best to block a completed garment? The blocking was recommended after the completion of the garment, not for each piece. I laid the gilet out flat, covered with wet tea towel, patted in place and allowed to dry. This seemed to work well.

Issues

  • I need to practice, probably, to even up my knitting
  • My knitting is slow and I cannot watch TV at the same time. I need a better method. Is continental knitting a better option - I’m not sure what it is but I have seen people extol its virtues.
  • When you do stocking stitch, do you have a knit stitch at the end of EVERY row? I did that and feel it complicated the making up of the waistcoat as it ends up with a definite edge stitch
  • I'm not at all skilled with picking up stitches.
  • I need to learn a good way of sewing up. (I was tempted to use my sewing machine)
  • I need to learn the best way to block
  • I need to learn to read the pattern sizes before I start

Then came the time to try it on. I didn't like it at all as the shoulders were much too wide. I'm not narrow shouldered but the back was also too wide.

I realised I had never seen this garment worn. I saw a completed gilet on the show stall. The pattern as a picture printed on it with a dressmaker's model wearing the gilet and on closer examination, I see that the shoulders are probably meant to be oversized. That doesn't make me like it though!

Only now did I work out that the shoulder length given, even before the bands were attached was massive! I hadn't thought to do this in advance - and I wasn't sure how the garment shoulders were being created. I can now get an idea of how wide they are but I don't think I'd have been able to do so earlier, before starting the gilet. Maybe I'm just making excuses!

I then measured my knitting tension on the final garment and found it was now 13.5 stitches and 19 rows to 10 cms. This means my tension is slightly too loose and the garment has ended up wider than it should have. Measuring confirmed that. The length is exactly correct. I'm assuming that it is more important to get width correct as it's easier to correct for length? Though on some occasions, a particular number of rows is specified. If I went down another size of needle, my row measurement would not be correct. Any suggestions? I assume that the most difficult thing to do would be to get me to knit to the correct tension!

If this had been a toile in woven fabric, I would now have marked where I wanted the shoulders to come to and trimmed off the excess. I asked on Instagram whether it was possible to cut and sew, by which I meant a very similar process - cut off the excess fabric and either sew on a band knitted separately or pick the stitches up to knit the bands. I think the limiting factor could be that this is chunky knitting and while overlocking was suggested, Karen's overlocker wasn't able to cope with the thickness when she tried something similar.


The majority thought it was okay and didn't need changed. I was advised to put it away and reassess when I am more divorced from it. Others thought I need to rip it out and redo the top portion. That's a lot of ripping out! Off would come the collar, the sleeve bands and half of the knitting back and front. Hours of work. My husband falls into this category though he also suggested just dumping it, which I'm not prepared to do - the yarn was quite expensive in my view. He's opposed to the idea of cutting off the excess.

Trying to mark and cutting off the excess through the shoulders to front and back would avoid all that re-knitting and would avoid having to take the collar off. Obviously the stitches would need to be secured. That's where overlocking the ends comes in, Is there another method? I don't have the experience with hand knitting (I only ever followed a pattern) to know how I would then pick up and knit the stitches for the bands - or do I knit separately and sew on afterwards? Do I have anything to lose? I have 2 full balls of yarn left (I bought 1 extra in case I needed to lengthen and had 1 left over).

Whatever I do, if I end up ripping out and intending to re-knit, this would be changing the style of the gilet and I would have to work out how to reduce the number of stitches at the shoulder - I reckon I need a minimum of 4 stitches fewer on each shoulder - that's  2.85 cms (1.15 inches) or more given my tension issue ( less on each shoulder and even then it would still be oversized but not so much so.

Also, if a re-knit from armhole up - do I use a size smaller needle or just go down a couple of sizes?

I'm really at a loss here. I want to be able to wear it as it is but I really cannot! Not at the moment, anyway

I am planning (as I have been since before Helen’s wedding) to get out my knitting machine and start using it. I wasn’t too bad in the mid 80s when I was using it. My machine (Toyota plus ribber)  is long since obsolete and it isn't now possible to buy needles for it - I do have a few spare but not many. As I have committed to Goodbye Valentino’s 2018 RTW Fast, any jumpers I need must be knitted by me - they cannot be purchased. So that’s an impetus. Just before Helen’s wedding, I did get it out and David renovated it so I hope it is all ready to go. I just haven't had a chance in that time.

I bought another pattern plus yarn (not a kit) at the same show - also for chunky yarn - and I will start that in the near future but I'll take into account lessons learned from this one.

Sunday, 31 December 2017

Peruvian Purses - a little extra

I saw a cute little purse on Emmaandhermachine's  Instagram. She had received the kit as a gift and told me where it had come from (Craft and Cotton) I liked it, thought it would make a good stocking filler for one of the girls and bought a kit and a spare set of fittings - the fittings are the most crucial part of it.


I took photos of the two purse together but can't find them!! This is my first. I should have put a scale next to them

The kit came in 3 choices - printed canvas (?I'm not sure canvas is the most appropriate
term) type fabric, black faux leather and red faux leather. I really liked the fabric shown on the website so went for that.


The kit arrived quickly. The front of the purse is in the fabric, the back in black faux leather. There is no interfacing. There was a set of instructions, the pattern for the back and the front and the hardware in the pack.

I’m not a crafter as most people who read this will know. However, even I managed to finish this pretty quickly although a couple of things puzzled me. Firstly, there was no indication of the size of the seam allowance around the purse - I guessed at 1/4”. Dan pointed out that the finished length of the purse would match that of the hardware. I went for ¼”. Secondly, I couldn’t for the life of me work out how to get the hardware into the purse properly. With some help from Dan and encouragement from others who were watching, it was achieved.

The scariest bit was cutting through the fabric for the magnetic catch!

The purse is small - smaller than I realised it would be and I’m not sure how useful it will be. Nevertheless, it was a fun thing to make.

I made another with the spare set of fittings. Two of the girls got them for Christmas as a little extra. The one I gave to Alison fell apart as she tried to open it so I had to put together again - and show her how to do that in case it happened again. The girls thought they were cute and really liked the fabric (a town scene).

I don’t think, though, that I’ll make any others.

Saturday, 30 December 2017

A 'funny' story? AKA Cashmerette Concord part 3


Well, not that funny tbh!

I have done two previous posts on the Cashmerette Concord tee shirt and was still far from happy with the result. I made another tee incorporating the changes - and still wasn't happy. I was going to throw my attempt as a wadder but my sewing tutor see suggested I persist after making a few changes to the armhole/sleeve area.

The big disadvantage to these changes was that my careful stripe matching was to no avail!

The sleeves were too short so I added a band, which I like. Otherwise pretty standard. My tutor agreed with me when I said that some of the lines at the front suggested I might need a FBA - though I used the G/H cup size (I'm DD) and it certainly didn't feel tight.

Nevertheless, I persisted and finished the tee shirt. In class, I used a coverstitch machine for the first time for the bottom hem and perhaps fortunately for my pocket and my house, I can't see that I need one of these. Maybe also because my result is pretty shoddy! Okay from the outside but not great inside. I like my insides to look good but it's not absolutely critical.

This was months ago. I didn't blog about it. I went on to other things, put it away.


So what's the funny story? This week, I went into my wardrobe, pulled out a tee shirt and wore it all day with no concerns. Only when I took it off at night did I realise this was the Concord tee I had finished but ‘abandoned!’


Lesson here?


None of my RTW tops are perfect - this self criticised top is probably better than most. I know that I'm overly self critical (and know I'm not alone in this) and am trying to change. Not to drop my standards but to accept that things can be ‘good enough’. That's what I was trying to do with my murder mystery outfits (see previous posts) - not putting in more effort than was warranted by a likely once worn garment. In fact I will probably wear them again and I can as they are well constructed; the time I saved was in fitting not in construction. David always planned to wear his yellow jeans again. There are fit issues but he was happy, they were certainly good enough for the event and I'll change for the next pair I make him.


So I resolve to continue to do my best but not to sweat it if things aren't perfect. That's my plans for 2018 and for the red silk dress I'm making Helen at the moment. A future green one might be better. Don't they say you have to make something is it 3 times before it goes smoothly and you get it right? There are also more TNTs  on the cards. I say more but in fact I don't have any as yet!

I hadn't got around to making the necessary changes to the Concord pattern from the last lot of adjustments and hope I can remember what they were - otherwise there won't be any more!


Epilogue
I decided to put the top on for some photos and immediately saw lots of flaws. It IS wearable. I'm not making any changes to it. Note to self - don't be so hard on yourself!

I wore it to sewing class. The tutors agreed that it might not be perfect but what RTW garment was and I would have worn that as a RTW with no concerns. True -  probably.

Today I got rid of a lot of garments that were in the adjustment pile - I was just never going to get around to them. The pile was mainly RTW with various fit issues but included some worn out polo shirts where I had planned to recycle the fabric to make child’s tees and a few me-made items that are not worth any further effort.


I also donated around 60 metres of fabric to my sewing class. Around 45 metres was stretch lining type fabric bought as toile material when I was making Helen’s wedding dress and the rest was upholstery fabric and some fabric left over from makes. I still have all the toiles from the wedding dress - these are next to go.


I’m joining the 2018 RTW Fast, starting 1st January. So anything I don’t have now, I’ll have to make! First on the list and this time I’m determined to finish is of course trousers! My weight has gone up again as I can’t exercise at present due to a flare up but hopefully I’ll start to get it under control after Christmas. I got to the stage of being ready to make up a pair of trousers in fashion fabric but then I ran out of time - hopefully it will still be okay. So - January.


Sorry folks!

Thank you to SewRuthie for pointing out that on my recent posts, the text did not wrap and was therefore unreadable. 

I cut the text and re-inserted.

I hope I have sorted this now - but I still don't know why it happened!!

Friday, 29 December 2017

A kimono for Joanne from Simplicity 1108

I had intended to do some sewing for Joanne for Christmas. She likes the lace edged shorts I’ve made for her, cloned from a RTW pair, and needs more. I’ve made her two pairs so far - they look identical but the fabric on one is nicer than the other. I’ve run out of time to order the nice fabric online and get them made for Christmas so that’s a task for the new year. I decided against using the fabric I bought when I was in Liverpool earlier this year to consider for a pair as I think it’s maybe not a nice enough quality and I don't have time to experiment. Also, it has a pattern and I haven’t discussed with Joanne anything other than plain black ones. (Edited to add that she definitely wants a black pair)

A year past in November I was at Harrogate Knitting and Stitching Show (I didn’t make it this year) and I bought some fabric thinking of a kimono for Joanne. David was with me. We liked this dark flocky fabric which has a very slight stretch but is really quite stable. I bought quite a bit. I can’t remember who we bought it from.


Well, I only this week got around to thinking of it. I had previously made Joanne a kimono but decided to use a different pattern this time  - just to mix it up a little! I didn’t want to use a border. I gave Joanne the choice of the previous kimono pattern or this one via WhatsApp. She chose this pattern in view D but said she’d like it longer. Originally, I had thought of making it a lot longer - around 12” - to match the length of view A but decided this wouldn’t work with the nice curved front. In the end, I only increased the length by 4”. This view also has optional lace around the edges and sleeves but I didn’t do that - if Joanne wants, I could add it later.


This was a fairly speedy make - and I’m sure many of you could make it far faster than I did. In fact, the longest time was in cutting out. I did my best to get pattern elements level and lying in a suitable place. I think there is a very big repeat though many of the large elements seem similar but different from the next one. The pattern is not symmetrical around a midpoint so I tried to take that into account too. It took me a while - yet when you lay the fabric down, it almost disappears so I decided to try to level only the largest element.

One change I did make was to cut the back in one piece rather than have a centre seam. The back seam was straight and I couldn’t see a real need for that seam. Otherwise, I followed the pattern. I used a lengthened view D with the longer sleeves from view C. There is only a back piece, two front pieces and two sleeves. There is no interfacing, no facings, no fastenings. My fabric doesn’t fray but I decided to finish all my seam allowances by overlocking in black thread just to finish off and give the inside a neat appearance.

The edges around the kimono and the sleeves are finished in bias binding, understitched and turned to the wrong side, then topstitched in place. This took me the longest time. I was wishing that I had simply overlocked, turned and topstitched - but I must admit the finish is lovely. I used a commercial bias binding. Actually, does this count as a facing?

So that was another item ticked off my Christmas list. I took photos on my dressmaking model and on me but hoped I would get a photo actually on Joanne.


I saw Joanne a couple of days after Christmas at our late family Christmas celebration in Cambridge. She liked the kimono and the fabric and it appears to fit well. Unfortunately I didn't get a photo as it was too dark and hectic that night and next day when she came round she wasn't wearing it. She says she'll send me a photo. In the meantime it's photos on Madame and on me.


I think the pattern sizing is pretty accurate.


I’ve had the fabric so long that I can actually enter PR’s fabric Stash contest. No chance of winning of course - but there is a random prize. I used 3 metres of fabric.

Notebook covers


Christmas sewing

I didn't really have any plans for Christmas sewing as I was so busy in the run up. I would like to have made myself a dress and Joanne some new shorts but I knew realistically that it wouldn't happen. No point in putting pressure on myself.

A couple of years ago I made wine holders and was considering making one for a Magnum of prosecco. I'd have had  to work out the sizes from scratch - I decided it'd be best just to wrap in Christmas paper!

I actually gave away several metres of Christmas fabric as I knew I wasn't going to use it. That’s on top of the many metres of linings I gave away. I’m really trying to downsize.

However, Alison said she really fancied a silk covered notebook and gave me the link. I bought a notebook from the link and was disappointed with it, largely I think because it was so thin - a school jotter (edited to add that Alison loved it!). As a result, I decided to make some notebook (oh I mean those you write in not a mini computer!) covers and give a covered notebook to each of the girls. For  Alison, I had the choice of a lovely black and turquoise Linton tweed or a Japanese cotton with an owl pattern. For Joanne, I thought I was going to use a black or maybe it's charcoal grey Linton tweed with a silver thread through it. It was lovely but it turned out I didn't have quite enough. I knew there was another piece but my fabric has been put away pre-Christmas so it wasn’t accessible.  I considered using a piece of the red silk from Helen's dress for hers but used a piece of red Linton tweed as that's likely to be more robust. I have quite a few pieces of Linton tweed picked up in one of their mixed remnant/scrap bags. Some are too small (Joanne’s) but the piece for Alison fitted and no more - there was certainly nothing to spare. I bought the fabric for notebooks after seeing some in the Linton tweed shop so perhaps the stars have aligned! Maybe the fabric I used for Alison had originally been intended for that purpose! I pass reasonably close to the Linton Tweed shop fairly often as it’s just off the route I use to visit my mother.

I bought some notebooks, deciding to go for spiral backs as they'll be easier to put in and out of the covers.

I wondered how I would cover them. Some of the tweed frays quite a bit. I looked up a couple of online tutorials. The choice seemed to be to cover like I used to cover school books, cutting a section out for the book spine and folding the rest over and taping it, or perhaps gluing down and then adding a fabric covered cardboard front and back piece - but these aren't reusable. So I went for the other which is basically making a sleeve, with slots to hold the back and front of the book.

My notebook cover is basically the front fabric, interfaced with a fairly stiff interfacing, which I trimmed short of the seam allowances. This is sewn to a lining, right side to right side,  leaving a gap, then turned through and the gap closed. Then I topstitched the whole thing.

The cover was then placed on the book and the flaps turned over. I had hoped I could edgestitch on the machine to secure but this didn't work. In the end I did as Dan thought I would have to - namely slip stitch the flaps by hand.

Overall they look nice, I think.
Alison’s - black and turquoise Linton tweed, lining teal cotton from a shirt I made her years ago
Joanne’s - black fabric with red spots, cotton, lined with a nice red linen. The linen, also left over from a previous project, wasn’t big enough so I pieced it down the spine of the book where it will offer extra protection to the fabric
Helen’s - a finer weight plain red Linton fabric, lined with red spotted pink cotton fabric from Ikea. I thought I had used this fabric for one of the wedding dress toiles for Helen, but that wasn't so.


These fabrics and the interfacing had been in my stash for a long time. Nearly two years or even longer. I’ve decided to enter PR’s Fabric Stash contest with them - well why not? There’s a random prize.


I used 6 pieces of fabric and 3 pieces of interfacing  20” by 10.5” - total 9 pieces of fabric.  My fat eighths were too small. There was a bit of waste due to trimming onto the straight grain etc and cutting away a hem which had been sewn on Helen’s fabric. There appear to be complicated rules for calculating amount of fabric used so I don't know how much this will count as. I think I could call this a yard, though. It’s a bit more but I believe you can’t count the bits of a yard.


At our late family Christmas get together, the notebooks and sleeves went down quite well. Steven has requested an A4 notebook covered in Crab Nebula fabric which week have to print (David led him to that point). David wants one in his tartan.


Talking about David's tartan, Helen still hasn't told me what final shape she wants for her tartan skirt. She recognised this but sensibly realised I was busy with other things. Next year!

How Do You Read Blogs?

It's a while since I've posted a blog,  lots of reasons. I'm thinking of starting again. However,  I used to read the blogs I fo...