Tuesday, 26 February 2019

A hastily finished shirt for GBSB Sew-a-long

I have too many things on the go at the moment. I want to get them finished before I start anything else. That’s the theory. 

One of the things was a blouse cut out before Christmas, using McCall's 7575 version D (I mentioned it in my blog in October!) and pushed aside as my sewing room turned back into a dining room. Although that transformation is temporary and short lived, it takes far longer to recreate my sewing space. So, I’m a long way from being organised even as well as I was before Christmas (and that wasn’t well!)
I chose view D


I have been sewing and doing things - I even have some blog posts written but keep coming up against blocks of various kinds. I will post separately about the knit tank I am making to match the test Blackwood cardigan, which I also altered. I also made a skirt toile and sent it off to Helen. More of that elsewhere.

I watched the first episode of series 5 of The Great British Sewing Bee. I enjoyed it. In many ways, it’s entirely unrepresentative of my sewing as I’m slow. However, alongside GBSB, @sewisfaction is running a sew-a-long each week, with the same theme as the episode. The theme of the first week’s GBSB was cotton - and so too was the theme of the sew-a-long. Sew anything in cotton. It can have been started already. It must be posted online by 3pm GMT on Tuesday (19th February).

This gave me a push towards the shirt/blouse I was going to make before Christmas, but I just didn’t get around to it. The pattern was already altered and the cotton chambray fabric cut out and toiled. I usually do a calico toile but on this occasion decided not to, as I was originally trying to finish before Christmas and was in a hurry. The main reason I put it aside was that I ran into a problem with interfacing. I really liked an interfacing I had, and had used for Helen’s silk dress, and tried to order more online. My order didn't appear. Nor did the replacement order. This was before Christmas, in the Christmas rush, and I gave up at that stage.

I bought some interfacing of the same number from Centre Front Studio (CFS). Here’s the strange thing - it wasn’t the same interfacing at all!! The interfacing from CFS is clearly labelled along the selvedge - and matches the interfacing in the sample book and interfacing I’ve seen since. 
The new interfacing with the correct number on the selvedge

The rather nice original interfacing wrongly labelled (no number on edge)

Packet interfacing came in

My original interfacing came in a branded and labelled packet but is dissimilar. Rory feels that my packet had the wrong interfacing originally but that what I had was much nicer and more expensive. I decided to use the new interfacing.

My sewing room chaos unfortunately led to me having lost two pattern pieces, already cut out, I think, though I can’t be sure. However, these are for the cuff and for the sleeve tabs I can grade up as I have the pattern pieces still for the smaller size range. You never know though - I might still find them!! Fortunately, I have enough fabric left that I can cut out new cuffs and tabs. The other problem I had with waiting was that my marks for the wrong side of fabric had worn off, as had crucial placement dots.

Before the sewing bee on Tuesday, I had already sewn the darts in back and front.

On Wednesday, I cut out the interfacing and fused (except for the cuffs; which had to wait.) and started construction of the burrito yokes. Dan helped me tell which side of the blouse I had deemed ‘right side’

Thursday, in class with Lyn, I continued with the blouse - I started it with her originally, before Christmas.

I think I’ve said before that I like to try to keep projects separate between Dan/Rory and Lyn but it has become quite confusing with too many projects - and when I have a time constraint it isn't possible.

I asked Lyn to advise me on a number of things including hem, bands and collar stand. I wasn't able to actually do the collar in class as things had to be done in the right order before the collar and I didn’t get them done within the class period. However, I got a fair idea of how to move ahead and planned to finish over the weekend. I managed to sew on bands to allow Lyn to demonstrate how the collar stand should go. I was a little worried about this as a) many of my marks faded and b) my neckline isn’t beautifully smooth. I sewed the collar but wasn’t absolutely happy with the curved edges, which Lyn had advised I use a template for. I did try but actually didn’t have the correct materials there so decided to redo at home.

The pattern suggests slip stitching the bands but with Lyn, I decided I would topstitch on both sides of the band. I also decided to topstitch/edgestitch the collar in place.

I tried on the blouse as it was and the fit seemed fine.

Friday - not much time due to other commitments. I folded up the blouse hem using the technique advised in the instructions. Previously I've used overlocking, turn and stitch but this is done the ‘proper’ way. For the ⅝” hem, loosely stitch at ¼”, turn hem to ⅝”  and fold under the ¼” with the stitching to guide, having pulled up the stitching to allow the hem to lie flat. This was the bit that concerned me and why I’ve done the overlocking in the past. Anyway, I managed. I then topstitched - I found this a bit tricky, to follow the distinct curves, and I missed a couple of bits on the inside - a quick slip stitch sorted them.

I finished the bottom and top of the bands. Lyn had given me a better way to do - but I couldn’t quite remember so these are as I’ve done before. I decided to topstitch both sides of the band - or, rather, edgestitch. I think it looks pretty good and wondered whether I should have put top stitching across the yoke - I still could at that stage but decided not to. I also wondered about poppets instead of buttons, thinking that would look good. I’ll have to think about that one. It would make the blouse a lot more casual - and casual is what I have in mind here. Not for today

Saturday
Again only a little sewing. Though this blouse is labelled a three hour blouse so I should've made a whole wardrobe of them by now!

I cut out and interfaced the pieces I didn't have - the tabs and the cuffs. Completed the sewing of the neckband, using a template for the edges

Sleeves
I had originally thought the sleeves were fine but when I tried on the toile, way back before Christmas, I felt they were a little tight. I therefore decided to sew up the sleeves with a slightly narrower hem - ½” instead of ⅝” at the underarm seam. I’ve also lost a little weight so thought that might help. However, these are two piece sleeves. I decided to follow the instructions but do the under seam at ½” but the final seam at the full ⅝” because this was the seam with the placket and button band and I didn’t feel capable of making big changes.

I remember that when I sewed up the toile, I had a machine malfunction and was completely unable to loosen the screw holding my needle in place. I ended up continuing to use the stretch needle that was already in place. I didn't realise at the time, but this did lead to a problem with fabric pulls. I've taken the worst ones to the back. David was able to sort out the problem with the machine at home.

I started all the steps for the sleeves and got as far as putting a button hole in the sleeve tab - and couldn't. I'm not sure what I'm going to do. Just sew in place? That's possible.

Update - I don’t like the sleeve tabs as the fabric rolled up for the sleeve is bulky and the wrong side show. The fabric was too thick for any kind of French seaming. I think I will remove the sleeve tabs altogether if I decide to do anything further to this shirt.

Sunday.

Again, not much stitching. I was beginning to think I might not get it finished.

Further sleeve issues – sleeve head ease.

Before the sleeve is fully stitched together, the cuff, placket and sleeve tab are added. No problem with this. I think my cuff looks pretty good. I still hadn’t managed to get a button hole in the sleeve tab but managed fine on the cuffs. I had added an extra layer of interfacing to the cuffs and I think that helped.

Now to put in place.

The amount of ease in the sleeve head is enormous!!  I ended up easing the sleeve cap all the way from notch to notches - the pattern uses much less. Even so, I had quite a battle getting them in place. I nearly considered using a tuck or pleats at the top but decided against that. I finished the sleeve and finished the raw seam allowances. I don’t like the finish at all. The sleeve head clearly has far too much fabric – it hasn’t eased in nicely at all. There aren’t any puckers – it’s just the sheer volume of fabric.

Say no more!!


Try on

I’m thinking I don’t like it. David thinks it’s rather long and feels it would look better shorter. I agree though the length was intentional and as per pattern; I would definitely have preferred the shorter length. I find the style somehow too formal yet the fabric is informal. Again I found myself thinking about poppets - I didn’t have enough left to consider using  for the GBSB challenge.

Monday

Time to attach the collar.

There’s something decidedly funny about the neckline. Surely not because I decided to do the burrito yoke construction method! However, having used that method and having attached the sleeves meant I was in no big hurry to take apart at the shoulders. Looking at the shirt on  my body at this stage, I wanted to grab approximately ¾” of the shoulder seam on each side of my neck.

The shirt neckline circumference was much too long for the collar. So, although the pattern suggested I’d need to clip the neckline, my problem was quite the opposite. I had a bit of a time with this but finally managed to install the collar stand - my pattern doesn’t have a collar, just the stand. I don’t know why this happened - I had staystitched everything but perhaps that wasn’t enough or perhaps I made an error in cutting? There is a clear excess of fabric and deep wrinkles leading to the neckline.

I’m not sure how to sort this but imagine it’s to do with shoulder angle.

I edge stitched the collar in place (I should just have abandoned at this stage – well, I didn’t). Time to consider buttonholes. No!! I decided against them though not before testing out a buttonhole of the collar stand. I decided I would leave the shirt open, like a duster jacket. When I looked at buttoning it up, I just felt trussed up and didn’t like it at all. Too much shirt! I think the shirt is my colour, but the style just didn’t fit in with my style recipe.

Look at those dreadful wrinkles!


Sorry - taken on my phone in the dark. Taken to show sleeve rolled up


I then realised that to roll up the sleeve for use with the sleeve tabs would show the wrong side of the fabric - no great issue since the sides are practically identical - but there are two overlocked seams - not a nice look. Also, a long sleeve like this one has to be rolled up a lot and I didn’t like the bulk.  I could take out the stitching attaching the sleeve tab to the sleeve and just forget about it but decided against that at the time, anyway. I did cut open the buttonholes on the cuffs and sew on a suitable button.

Another photo taken quickly on my phone

I decided I wasn’t doing anything else to this shirt. Tuesday was now free simply to take a photo.

‘Finished’ shirt

I’m unhappy with the sleeves and with the shoulder line and collar stand. They do not lie nicely. I mentioned earlier the problems I had with the collar and the excess ease in the sleeve head. I still want to pinch that excess at each side of the neckline - it made the shirt lie much better but doesn’t improve the sleeves.


I also think the shirt is a little large for me. I am losing weight at present. It doesn’t seem to have affected my other clothes though I can get comfortably into things that were tight - but nothing else drowns me. And this was fitted on me. I think it’s a combination of style, fabric and weight loss.
This is how I'll wear it for the time being

I think I constructed the shirt fairly well. I like my sleeve construction and the cuffs. My sleeve tabs look good. My front bands are lovely. The collar stand is nice but not the right size for the shirt - or rather the shirt is too big for the collar stand. I thought I had managed the burrito yoke construction okay but perhaps that was the start of my problems? No! It doesn’t in any way account for the excess ease in the sleeve cap.


Bottom of band
I may deconstruct. Not sure yet - and it won’t be for a while. In the meantime, I’ll wear as an over layer with a tee shirt at home.

Lessons learned

One thing I would definitely change for next time  - I think that my interfacing was too soft and that’s what led to the problems with buttonholes. I’ve ordered a button foot leveller to see if that will help, too. I’ve had problems with buttonholes on collars and waistbands before but thought that was due to unevenness and bulk on one side.

I didn’t try to make buttonholes on the front bands. The bands feel fairly firm but I used the same soft interfacing.

Don’t move on to the next step if it’s clear the last step is unsatisfactory. You’d think I would have learned that one previously!

There is no point in rushing something. Festina lente!

Will I make this shirt again? No. I don’t like the style on me. I won’t put a review on Pattern Review as I suspect the issues are more user error than the pattern. I may at a later date if it seems that the problems are contributed to by pattern issues.

Second GBSB sew-a-long

The theme @Sewisfaction’s second week GBSB sew-a-long was children's wear and I decided not to participate. I only participated in the first one as I had already started the shirt. Maybe I rushed it a bit too much trying to get it ready. I certainly shouldn’t have ‘finished’ it when I was so unhappy with the results.


Monday, 25 February 2019

The skirt that might come to fruition - with your help!


I started to write this before Helen got back to me with photos but decided to post without much editing.

The skirt I'm trying to make

Helen originally got back to me to say that she liked the pleated skirt I toiled for her. This is the latest toile in a line of toiles for various styles of tartan skirts; Helen wants a skirt made in our family tartan. She liked the style and wanted me to go ahead with it. At that stage I hadn’t seen a photo of her wearing it as she wanted to get Anthony to take any photos and he had a lot of late hours at work.

Helen deliberately wore a cropped top so I could see what was going on. This waistband looks far too tight to me.
You can see that the front is not lying as a pleat equivalent. It's too tight at the hips.

She likes it and finds it comfy

The back view shows horizontal creasing just under the waistband. Is that just a size issue?

She likes the other style I suggested - but said to keep that for next year’s skirt! She says ‘we’ have wasted so much time trying to decide which style that it would be better now to get on with it. I agreed that she had been unable to decide what style she wanted!


She told me that the skirt fits well - but could not be any tighter at all. I made a 10 originally and expanded that to around a 12 really but decided next time I would make the straight 12. Note that this was before seeing photos, based on what she said.

However, I did have some queries
  • The toile was in a fabric with a slight stretch. I wonder how much give the tartan has? It's a firm pure wool tartan.
  • I’d like to line the skirt
  • I’ll have to think about this as with size changes being at the side seam, it might me better to go bigger and take in if required? What do you think?
  • I will of course be making in a mid-weight (really quite heavy) tartan with the pattern matching that entails too, so it’s entirely possible that some of the overlaps will be deeper and take up more waist space.
  • Also, is it likely that I’ll need more waist stabilisation? Traditional kilts use horse hair.

Hmm.

Then Helen sent me the photos of the skirt. It’s too small for her imo – too small by quite a bit. It’s certainly too small at the hips - and Helen now accepts that - but I also think it’s too small at the waist. So I’d need to make the 14 - or even bigger at the hips? My feeling is that a lot of young people don't really know what good fit is and accept a level of fit that I for one wouldn't.

She found that the skirt is a great length but could not be any shorter at all. If it makes pattern matching easier, she doesn’t mind it being slightly longer. I strongly suspect it will be a little longer!

She initially said would like self-fabric i.e. tartan belt loops. The toile had self fabric loops as per pattern (actually pattern has contrasting straps) but I did buy leather kilt fastenings. She doesn’t want these. She would prefer gold coloured rather than silver coloured D rings. I offered antiquey brass  - not sure what it is - but she was happy with that. Later, after sending photos (and presumably seeing them for first time herself), she wondered about buttonholes and decorative gilt buttons instead of the small straps

Helen drew the red to show where she'd like the front to come to and the yellow circles are the buttons.

Buttons similar to these
I reminded her that with this particular style it isn’t possible to get both a good fit and a perfect pattern match of the setts, because of the shaping necessary for her waist. She’s okay with that.

After she sent the photos, she asked about several possible changes

She said she’d like the overlap to come over more - I think that could be due to size i.e. skirt being too small? She drew on the photos to try to demonstrate what she’d like. As the edge of the overlap lies on the straight of grain, I feel my options are limited. I certainly agree that the overlap is not far enough over. However the leading edge of the overlap is supposed to simulate a pleat as there is only one pleat on the left and two on the right. Do you think that making a bigger size would sort this or do I need to do rather more?

I feel that the front portion is rather slim - it doesn’t change with size. I do wonder how much it would be possible to change that without affecting the structure of the skirt, remembering that the skirt is supposed to be symmetrical at the front - that is, the edge of the overlap is substituted for the first pleat on the right of skirt - right side has 2 pleats, while left side has 1. Currently, the gap between the edge of the overlap and the pleat is huge, which is why Helen has asked about extending the overlap.

I pointed out that the drag marks and lie were because of size. She accepted that after a brief discussion. Originally she thought that only the waistband dictated size, as there is a fixed large poppet there at the moment (was supposed to be a buttonhole and button but I couldn't get it to sew). Possibly the placement was slightly off as I had to guess some placements with my sizing altering half way through. She had to pull quite a bit at the strap to get it to fit.

She wondered about buttonholes and decorative gilt buttons instead of the small straps.

I asked her about lining and she wasn’t sure but agreed when I suggested tartan might be itchy against the legs . She’s not too bothered, though, so if it’s too difficult, she’s happy that I don’t do it.

I told her that with adjustments being at the side of the skirt, if she was visiting at any stage, I could fit it on her before completion. This would give a better fit. It’s possible that she may be coming at Easter. Given this, I will look at the pattern in a couple of weeks and lay out the tartan to see how it will work - the pleats at front and back will inevitably be a different depth from the existing ones. I’m hoping I won’t need a hem as hopefully I’ll be able to use the selvedge at the bottom. All being well, I’ll try to get the skirt without waistband ready for her coming. If she’s not coming at Easter, that will be my target anyway.

After our latest discussion and seeing the photos,  a try-on and fit is absolutely essential.

But first, do I need to redesign the pattern? Heart sinks! Your thoughts are very welcome.
Or do I need to forget the pattern as pleat depth will be very different, anyway?


Tuesday, 29 January 2019

Do you know? Can you answer?


I put up blog posts via Blogger.

I follow blog posts via Bloglovin’ with a few via email.

The stats on the Overview stats page on Blogger say I have 1 follower and have had that same 1 follower since the start. I know that’s not true. Blogger has me as having over 200 followers in another section, which I found by accident and can’t find again. I am aware that the pages are different depending on whether I’m using my smartphone, my tablet or my desktop PC so that could be the reason for not being able to find it again.

When I get the (supposedly) weekly update from Bloglovin’, the numbers for followers rise most weeks – but it lists the ‘numbers of new followers’ as 0, nearly all weeks. It currently lists 196 followers; Bloglovin analytics has this same number. I do get emails telling me I have new followers – these are from Bloglovin, even when the weekly update will read ‘no new followers’. So where does Bloglovin’ take its total from?

Bloglovin lists that I follow 25 people; Blogger a lot more than that (over 200) with little overlap. My feed on Bloglovin’ reflects the larger number. I know that sometimes, people don’t list Bloglovin’ as a way of following them and I can add their blog address myself – that accounts for a few of the 25.
I’m coming up to a blogiversary so was reviewing these stats – but they don’t make any sense whatsoever to me! I had thought that if I reached 200 followers, I might offer a giveaway – but am I already over 200? I have no idea.

I assume it might depend on how people choose to follow my blog?

I know that at the end of the day, it doesn’t really matter how many followers I have (though I’d be lying if I said I didn’t enjoy having followers!) – but I am so frustrated in not being able to clarify!

We had also discussed having a family website, so I wondered about shifting from Blogger – but it seems like a very big task. I’d still want to read blogs from other people, so would keep Bloglovin’ anyway – unless you feel there is a better option?

I'd really appreciate any comments, thank you

Saturday, 26 January 2019

Update - new version of Blackwood Cardigan from Helen's Closet is being released next week

I tested the new version of the Blackwood cardigan earlier in the month. The pattern was now in number size ranges rather than S - M - L etc and now going to size 30. In addition, there was a choice of cup sizes B or D.

I of course sewed the tester version (and was delighted with it) but there are a couple of tweaks following tester comment. So my version is not the current, new one. I sewed between an 18 D on top and 24 at the hips. I was pleased to see that in the new version there will be a little extra room in the sleeves, which is something I planned to change in a future version.

I won't go into any more details as the pattern will be getting released on Monday coming, 28 January. It will be available free of charge in both B and D versions to all previous purchasers.

As a tester, I received the new pattern today (but as a previous purchaser would have had it updated, in any case). I downloaded and am going to check to see the differences in comparison to my own pattern corrected for fit. As I mentioned previously, I was going to shorten sleeves - I think longer sleeves is a young uns thing as well as provide a touch extra room in the sleeve.

You may have noticed that Helen undertook a size survey and received a lot of responses - she has posted the results of the survey on her website.

Tester version
I will add, for the sake of completeness, that I received the test pattern free of charge and was not required to post about it. I am not affiliated to Helen's Closet and all views are my own.

Wednesday, 23 January 2019

A long time ago....


Those of you who have read my blog in the past will be aware that I have been trying to make a tartan skirt/ kilt for Helen, my youngest daughter, for yonks, using the family tartan we had specially woven; many many many yards of it (yes, that many!) We have two weights of the tartan - a heavy one woven many years ago (some of it made into a kilt for David) and a medium weight one woven two or three years ago or more specifically thinking about Helen's skirt. Yes, she requested it that long ago! Actually, it was even longer ago as she requested this using the heavyweight tartan before I started sewing, when we going to get it made. I can't quite remember. It took us a long time to decide that the heavyweight tartan was too heavy and to elect to get a medium weight cloth woven. The story of the tartan is here and in earlier blog posts.  Here, for example

The tartan


In the past, I have had two main attempts at tartan skirt toiles, using plaid fabric but not the real deal. It was slightly problematic as Helen wasn’t then, and still isn’t, exactly sure of the style she wants. She is clearer than she was though. She now wants ‘a cute pleated mini skirt’ in the family tartan.

The first toile was a fully pleated skirt. Narrow waistband. Pleats stitched down part way. Very classical. It was knee length and so was far too long for Helen’s taste, but it was designed to see if she’d like the style. 


Christmas 2015!! I didn't realise it was that long ago!


I didn't use a pattern, as that was the advice I got from books and in person from those who might know. At the time, I got the impression she didn’t like it but I think on reflection that was to do with the length; I thought I could just have made it shorter. She told me this week that the issues were that it wasn’t a mini skirt but also that it made her look very hippy on the side opposite the zip as it didn’t lie flat and the pleats seem to twist around (I thought it was too big at the waist when I saw her wear it previously but that was a while ago). She says she does like it, and it fits well at the waist, so she’s tempted to go for a shorter version of that. I didn't use a pattern, struggled a bit and wasn't at all happy with the zip closure, by far the weakest part. Helen held a Burn’s Supper in her flat at the weekend (yes, early!) and wore it then so her thoughts on the skirt are current.

The second toile was a shorter circular skirt - at that time, she hadn’t settled on pleats. I used a commercial pattern. This just wasn't what she had in mind.


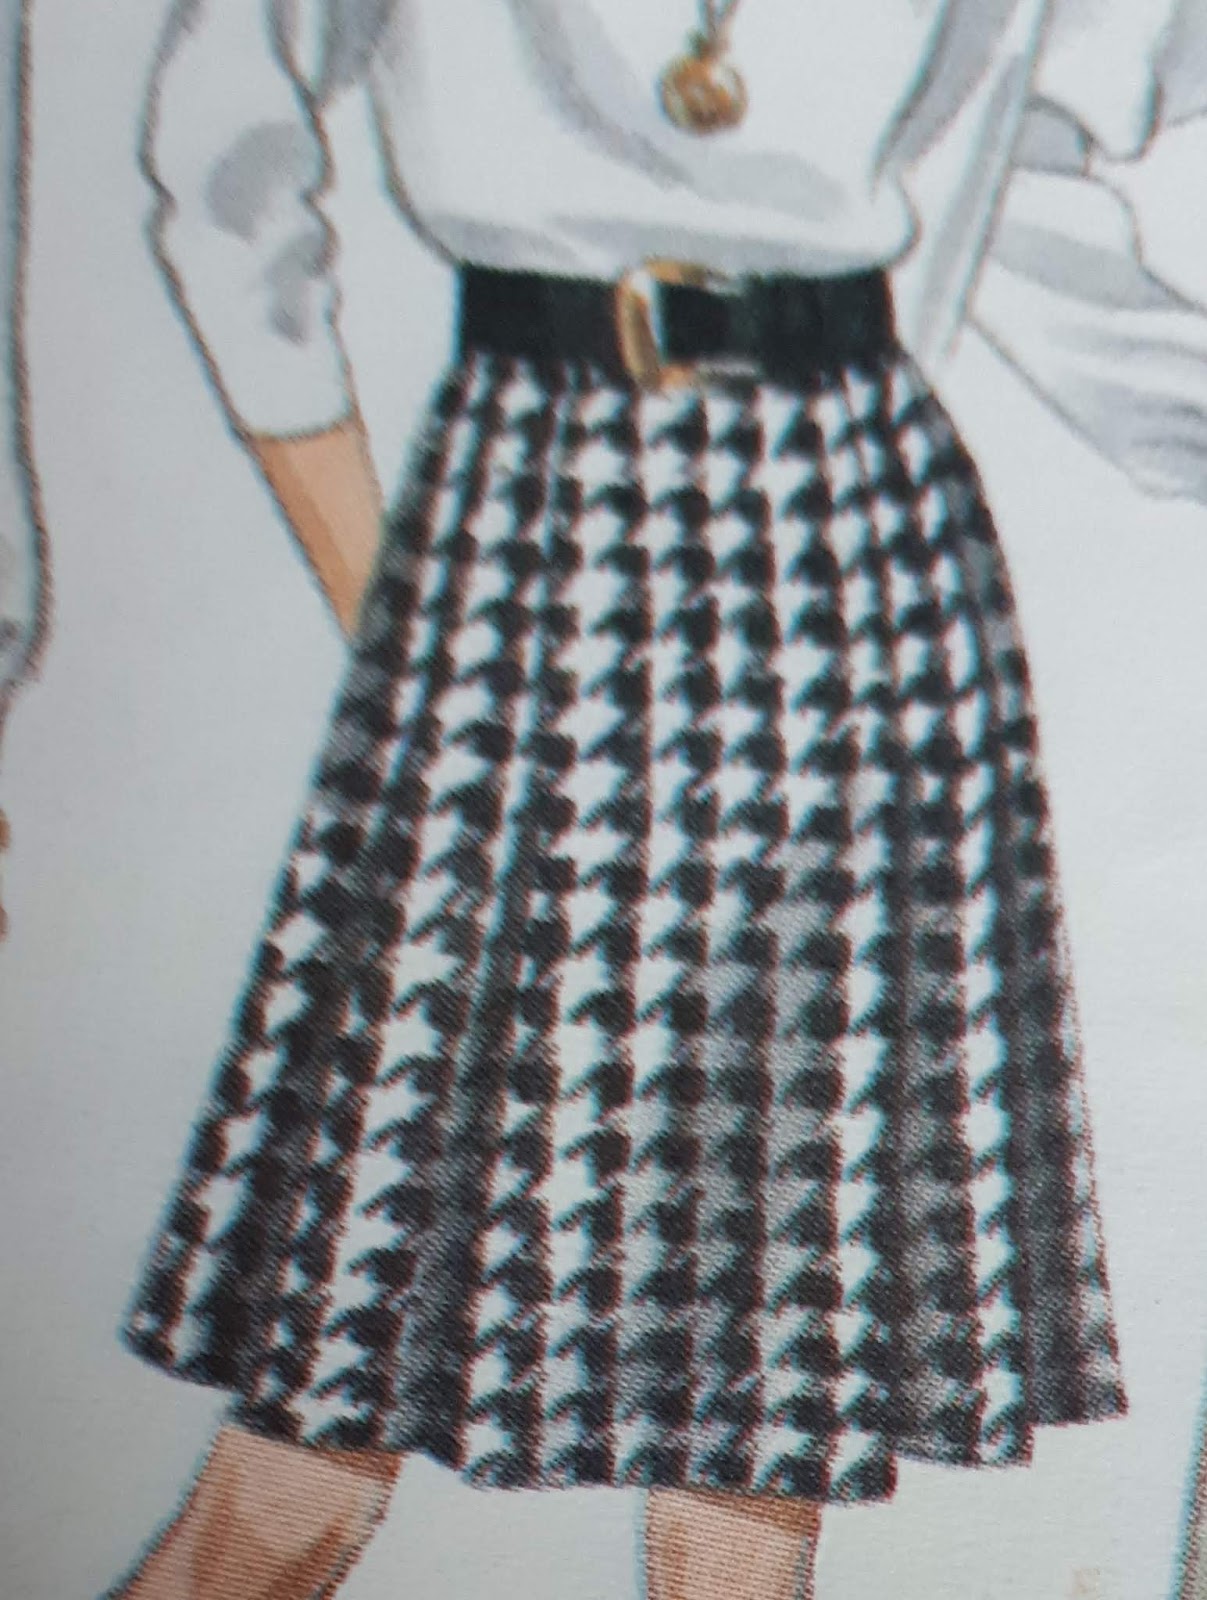
I have this pattern:
This has many good elements but Helen doesn't want a yoke like this and it's probably too long. Maybe it's still doable

Originally, she was against the idea of a proper kilt (or maybe that was us as kilts aren’t for girls in theory and by tradition at least) - but isn’t now. She has said too that she’d be happy with box pleats (but not like the pattern I showed her as she found that one frumpy). 
No to this
Modern Simplicity pattern; I don't have this pattern and I couldn't get any of the older ones.
I could buy this one but kilts are usually made directly on the fabric

She has recently bought a skirt from Pretty Little Things that she likes. I've seen a photo but not the real thing. It's fully pleated.

Helen tried on and liked a skirt from Jack Wills; she took photos of her trying on the size 10 (UK), a perfect fit, but didn’t buy it. I decided to buy it but unfortunately could only get a 12 so it will be going back after a bit of examination! It’s not on the website. I tried the 12 on Missy, the dressmaking model adapted to Helen's size (see here)  and it just slipped down below the waist onto the hip.


We're going to have a chat on the phone, but I think I’m clearer. I have already said to Helen that our tartan is a heavy wool and pleats will inevitably make it bulkier - and therefore make her look hippier. I also said that I thought the kilt-type closure is potentially better for fitting.

I have a pattern for a short full pleated skirt. 

It’s slightly long but could be shortened by the 2” required. A bigger issue is that although it is shown in tartan, the tartan repeat (the spacing of the checks) is not the same as ours. Therefore, I can’t really follow the pattern, though it might give me a better idea of how to proceed. When I made the previous full pleated version, I didn’t use a pattern and wasn't sure how to finish off. I had one long piece sewn together at one side, the zip side - maybe that’s why the skirt twists on wearing?

A big issue with pleating tartan for a woman is waist shaping. When I made the full pleated version, I carefully increased the depth of each and every pleat towards the top to try to achieve the reduction in width without compromising the pattern match. This took a long time and involved lots of calculations.


My preference is for a version of the Jack Wills kilted skirt. This has the kilt wrap at the front but there are two pleats each side of the plain wrap. The side seam is smooth for about 2” each side of the seam. No zip of course. The back then has two pleats plus a dart at each side, but the centre is smooth.

The JW skirt is pretty good but isn’t exactly matched - so perhaps that issue is less relevant to Helen than the overall ‘feel’ of the garment. Having the side seams free of pleats and using the darts will help with the shaping. Having just the two pleats allows me a far greater flexibility. The pleats can be 'any' width to fit in so I can match the pattern to the set size. In the full pleated version, the pleats had to match all the way around. A lot of calculation and experimentation and careful measurement. Of course, each tartan is different, so those calculations are worthless now.

Another issue is that I’d like the selvedge to form the bottom of the skirt as a hem would be bulky. This is traditional in kilts. I need to examine the tartan to see if this is possible. I won’t be doing that, though, until I am well into the process of pattern making and toileing.

I think I’ve decided what I want to do, unless Helen has a strong opinion to the contrary. I don’t think she does as she said ‘whatever is easiest’. I don’t have a pattern, so this may not be the easiest route, but think I can manage to create one. I hope I can manage. I asked for advice in sewing bee - and there are complexities I hadn't considered, mainly to do with shaping.  The RTW skirt has a curved hem and waistband. I tried to make a kind of pattern but it was difficult, even with help and the conclusion is that I'd be better doing straight from the fabric. I'd make up a toile of course. I have some pieces of plaid that will work for that. Just for the shape and rough size, not the pattern matching.

Any thoughts?


Sunday, 20 January 2019

Reflections on my sewing


Reflections on my sewing

Earlier in the month, I had planned to post these reflections but didn’t get around to it. I decided that I would post them now, anyway – even though I have already thought a bit about lessons from 2018 and plans for 2019 and posted that. I think this post is more reflective of the real circumstances!

Matching (quality) fabric to pattern
You can't make a silk purse out of a sow’s ear. I knew this previously, but I still make mistakes with fabric choice - or maybe it’s the right fabric but the wrong pattern? It’s certainly sometimes the wrong style for me! Cheap fabric has a place for toiles etc but not for a garment I am going to take many hours to make and hope to wear for a long time.

Cheap, maybe off-grain fabric leads to the need for extra time spent and probably a less than optimal result. I spent a LOT of extra time on the wonky knit I recently used for the Blackwood cardigan; note that fabric wasn’t ‘cheap’ though I did get it in the sale.
 
Wonky fabric. A lot of work to salvage it. Final cardigan at the end of the post
Style
There are some shapes which will never suit me - why have I persisted so long? I’m thinking of the vintage style dress I made a couple of years ago - I spent ages trying to fit it. Why? I didn’t suit it.
I thought you'd rather see the pattern envelope than my version which I did post about, though.
I have to remind myself that as a larger and taller individual, I'm not going to look as good as the slim models.

The fabric was a lovely Liberty - but the style of the print and the colour weren't for me.
I had the fabric and made the toile - it was not a good look for me! I have given the pattern away


I’m hoping that trousers/pants don’t fall into this category as I like wearing them and they fit in with my lifestyle. I think wider legged trousers are easier to fit but perhaps not ideal for my shape. I’ve long since given up on the idea of skinny jeans or jeggings.

Quality over quantity
Other than getting trousers to fit well, I don’t have a huge need for clothes!! I have many (not all brilliant quality) and look after them so don’t go through them that quickly. Except for trousers! So it’s important that I take my time, use the best quality fabric for the job, probably natural. I don’t have the space to store a lot more clothes. I’m just not much of a fashionista. I do like well sewn classics that will last forever. As I replace the items I have, I hope that’s the direction I’m steering towards. I should say, I’m willing to add RTW if I come across something suitable (unlikely, sadly). I’m not saying I have to make everything I wear - I would end up nude!

Procrastination
As I approached some trickier bits of sewing (either genuinely trickier or that I believed would be tricky), I found myself procrastinating. I need to avoid this - the actual sewing was never as bad or as difficult as I thought it was going to be. Procrastination means that I end up rushing at the end and leads to mistakes. Actually, I realise that I procrastinate all the time! Like writing this, or reading blog posts or...

Practice
Even when I think there is no problem, I need to do more practice sewing. This would have avoided the problem I had with the armhole binding on Helen’s silk dress. As I had successfully done it on a previous version, I assumed it would be okay, but it wasn’t. Different fabric = different issues, even when they are supposed to be ‘identical’. I ended up doing the practice pieces after I had made the mistake in the first place.

Plan
I reckon I know what I like and what I want to make so I need to plan out how I’m going to achieve that. I’ve stopped being seduced by the latest pattern I’ve seen. I’ve stopped entering contests and competitions for the sake of it. However, I recognise that as an inherently competitive individual, these do have a place! I’d like to enter the trouser contest late in the spring, hoping that might give me the push I need - but only if the timing is reasonable for the point I’ve reached in the process.

Destash and organise
I have much more fabric and many more patterns than I could sew in my lifetime. Hence, I need to destash. That will help with my space issues. By the way, I have a very large house - it has a disproportionate amount of my stuff in it and a relative lack of storage space. Anyway, when things are stored you forget about them or can’t find them when you want them.

On that note, I planned to continue with the blouse I started before Christmas - but couldn’t find the pieces (already cut out with pattern still pinned to them) anywhere. Turned out I was looking for the wrong container and David found them tonight. So at least I have some work to take to sewing bee next week.

My friend Chris from sewing bee has requested any scraps etc I might create as she is making and stuffing a pouffe. First lot is going to her next week. Sadly, I had dealt with a large bundle just before she asked me. I did have an issue with scraps - some big enough to make ‘something’. Chris also wants the little bits.

Get fit
It would probably be easier to fit me if I was back to nearer the weight I feel comfortable at. The extra weight does appear to lead to extra fitting problems - and of course is bad for my health. I’ve just (re)joined Slimming World on a 12 week ‘Countdown’ membership; in that time apparently, you can be expected to lose 2 stones. That would get me well on the way. I do find the group environment helpful.

I’m not yet able to get back to the gym or golf. My foot is still rather painful. I hope I can get to play on my golfing holiday to Spain in May! Oh, if I’ve lost weight, my pre-existing golf clothes should fit so no great pressure to make more. I don’t need to be high fashion.

Cooking
I need to do more cooking to make the meals I want for my eating plan; David has done a lot of cooking to let me sew but that is perhaps another reason why my weight has crept up. This of course means less time for sewing but if I am back to my slimmer self, it will be well worth it.

Today I made a lovely vegetable Scotch-type broth. We had it for lunch and 3 portions for the freezer. I also made a lovely chicken, sweet potato and squash tagine; we had it for evening meal and there are a few portions left for another time. These fitted in with my eating plan. If I batch cook, there is hopefully less cooking to do later, and more time to sew!

Actual sewing plans?
No, not yet.
Last year I only managed 2 of my ‘makenine’. At least only 2 were successful. 2 others were disastrous wadders. The others were trousers, jeans and pants - and I didn’t get past the first stage of fitting. As I will lose weight this year, I’m not sure as yet when I’ll start being able to make well-fitting trousers and I’m not going to put unnecessary pressure on myself. I am going to continue to pursue this goal, though

I have decided, though, that I will not sew orphans. Any item I make must go with the previous or the next item I make. I think this is referred to as ‘endless combinations’. However, if a special event requires that I make something then that of course is fine; I sadly don’t go to many special events, so I haven’t figured in making items for these events. (I’d ‘like’ a dress for my birthday)

Earlier in January I  made a Blackwood cardigan and I’m planning a tank to go under it. I’ve chosen the fabric and the pattern but still need to alter it - that has led to this round of procrastination!


How Do You Read Blogs?

It's a while since I've posted a blog,  lots of reasons. I'm thinking of starting again. However,  I used to read the blogs I fo...