Monday 21 October 2019

Update and Continuing with Machine Embroidery Course


I haven’t been sewing anything recently. I’ve managed a few alterations and repairs and a little bit of machine embroidery - though I’ve fallen behind with the course I’m doing. My mother was ill, on palliative care for a few weeks now and died in mid September; her illness was much more prolonged and she was ready to welcome death. I’m not sad that she has died - I am glad for her sake. Yes, of course I miss her - more than I thought even. I’m glad that I was able to spend quite a bit of time with her over these last few weeks and I was with her when she died. We've had the funeral where I wore navy (trousers and jacket) as my black ‘funeral clothes’ don’t fit and I have never got around to actually making or buying any. I don’t think you need to wear black but my mother was 91 and those attending the funeral somewhat traditional. My mother ‘would have been pleased’ with the way the funeral went.

We’ve cleared her flat - she has lived for about a year in rented sheltered accommodation. This should have meant that there was a lot less stuff to go through - after all we’ve moved her three times in the last 3 and a half years but there was still so much. We already have a lot of her possessions here. There just wasn’t room where she was. I’ve had to bring the paperwork home with me as I couldn’t deal with it there and we had a very limited time in any case to move out. Those of you who have been through this will know how difficult this process is. It brings back memories apparently forgotten. There are lots of photographs from the past of course. My mother was very attached to a few pieces - paintings and ornaments and I really don’t know what to do with the ones that others don’t take. I have chosen two little ornaments that were around literally all my life and will remind me so much of her. Such a lot went to charity shops as did her furniture as sadly no-one wanted that and we couldn’t take it.

My mother was very supportive of my sewing. Quite surprised of course as I had shown no inclination whatsoever in that direction when I was younger. At school I took 
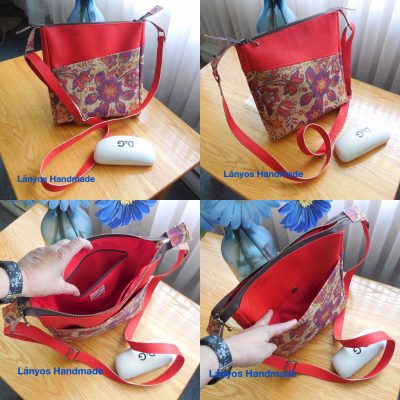
science which precluded domestic science. She loved the stripey bag I made earlier in the summer and I gave her that - and had instructions to make her one in navy for Christmas. I was looking forward to doing that as it was nice to think she would have something she wanted. She was too frail to manage the weight of a leather bag, so the fabric one would have been perfect. She was always a bit difficult to buy for as there was nothing she needed, she said. I never really understood that until the last few years when my children ask what I’d like ….

I had a bit of a break just before the funeral  and David and I went to a 40s weekend at Tanfield Railway. This was actually one of his photography course outings. Last year, I broke my foot just before we were due to go to the Pickering 40s weekend  so David went alone and suggested we go this year in costume. That’s not going to happen as there just isn’t time. Next year we will go to Pickering and possibly make it a family event. Yes, and dress up.
The Tanfield event however, was different and didn’t involve the public in dressing up, it seemed. There were a number of retail areas selling 40s memorabilia. There was a set of embroidered back brushes that I remember my Mum having, though I don't recall her ever using them. They must have been discarded during one of her house moves  (she moved 3 times in the last 3 years). There are other things we didn’t find that I felt should have been around. Nothing I can do though. She has an expensive diamond ring and a paste equivalent - and I can’t tell the difference!!

I really don’t have much sew-jo at all, not surprisingly. I have a lot of things to catch up with myself that had to be put aside over the last few weeks. Once those and my mother’s paperwork has been completed, things will gradually get back to a new normal.

My youngest daughter is pregnant, due January. I made a bib to fit in with her jungle/safari theme - a bib with a cute little lion.

This is from Kreative Kiwi; next is a monkey

She doesn't want to know whether it’s a boy or a girl. I have a few embroidery makes planned. These will be things like bibs, playmats etc. Nothing gender specific. An interesting (to me at least!) tale here. I wasn’t keen on my oldest daughter being swamped with ‘girl toys’ and encouraged Duplo and other more gender neutral items. She went to a childminder who looked after another little boy and who had teenage sons still at home. She also had two older daughters - still at home but no longer playing with toys. The childminder agreed to look after a little girl after school and got out some ‘girl toys’ - and my daughter absolutely loved them!! 

The embroidery course is practice for making what was going to be a baby quilt - except baby quilts aren’t ‘allowed’ so I think this will be a playmat. I haven’t started yet, though.

Since I wrote that last bit, I have caught up a bit with my embroidery course.

On Sunday, I completed the braided table runner. It took a long time to make. I really like it and am pleased with it. I had actually ‘finished’ it a couple of weeks back but was not happy with it due to the borders being roped and with excess fabric. I looked for a work around solution but there was nothing else to do but bite the bullet and dismantle and shorten the borders.. At least this allowed me to insert an extra layer of thermal batting to make it more useful. I still used my little sewing machine but this time used a walking foot which helped. I have learned a few lessons and the next one will be better - or different at least.
 
This is pretty big as done in a 150 x 150 hoop
From Sweet Pea ith machine embroidery course

On Saturday, I completed the next lesson in the course which was for a baby bib with a jaguar and a snake. I had no major problems but again noted a few things for the next time. It took a long time to make and when you look at the cost of bibs in the shops, it’s not really worth doing bibs at all! However, this kills two birds with one stone - it teaches me some techniques AND I hopefully have someone to wear it in January. Of course, it also fits in with her nursery theme.

It's a rather cute looking harmless jaguar isn't it?
From Sweet Pea ith machine embroidery course
I still don’t feel like garment sewing though I have done a few more alterations. I’m only two lessons behind with the embroidery course now (they come every two weeks) so will get on with the next one later in the week. I’m not at all keen on the most recent lesson (an articulated ballerina)  but I suppose there will be a fair bit to learn! Even since I wrote that last night, we’ve had another lesson so I’m actually three behind again! I like the most recent, a table centrepiece.

I've missed being involved with social media to any great extent but hope to get that sorted soon.


Monday 26 August 2019

Flip and Fold Cushion


I’m really quite excited! I finished the Flip and Fold cushion from Lesson #4 of the Sweet Pea ITH Course, and I love it. This rather surprised me as I don’t have anything else of this nature in my home. Why not, though? I’ve always admired quilts.

The finished cushion. The borders of the cushion match the reverse side
The instructions and pattern came in 3 sizes. I chose to make the smallest size (4 x 4 hoop - 100mm x 100mm). I had a very straightforward reason for choosing this size. I bought a jelly roll of fabric with colours and patterns that go together - that someone else, not me, has chosen -  for practicing. I was able to use pieces of the jelly roll fabric for my block pieces. I had to check that first as the centre piece for each block was wider but the 2.5 inches of the strip was just fine.

The jelly roll was from the Moda Vive la France range. This range was recommended to me by the quilting shop I visited. I realised that I wouldn't be able to use the strips for the borders on the cushion, or the back. I purchased some yardage from the same range; the colours were of course ideal but I decided against the two fabrics I bought as one had stripes - any wobble in my sewing would be very obvious - in fact, ditto with the other, which was a plaid.

The whole process was very enjoyable and helpful to me working towards making a quilt. Once again Martyn Smith proved an excellent instructor.

Back of the finished cushion - matches borders
First of all, the stabilizer recommendation was perfect. I used no show mesh stabilizer which is strong but not bulky or stiff in a quilt - I’ve bought some more so that I have it in hand when I start the quilt proper. I say quilt proper, but any proper quilters would probably throw up their hands in horror!  I’m intending what I believe is called ‘Quilt As You Go’ - very similar to what I did for this cushion as each block is made separately then stitched together with or without a border between it and its neighbour. 

I made each of the 9 blocks as per instructions. Each block has 5 pieces of fabric, batting and stabilizer. After the five pieces are attached and sewn down, the embroidery machine then goes on to create the quilting pattern over the pieces. Just think how long this would have taken by hand!!  

I know that I could have made a nicer pattern with my pieces, but I really didn’t see it at the start. I realise that really the design you want would have to be drawn out, coloured, in advance. I might do that for the next lesson which is for a table runner.

I used bamboo batting as that is what I had. I bought this a while back from the fabric sale run by the widower of a prolific and I understand excellent quilter. I also bought some fabrics there and used one of them for the borders and backing to the cushion. The pattern of this fabric doesn’t perfectly fit in, but I find it pleasing.

I had no problems creating the blocks. Each block was finished quite quickly. I did find that my scissors were not quite as good as I’d thought - trimming was trickier than it should have been. After the blocks were created, they were trimmed all the way around, using ruler and rotary cutter,  to leave a half inch seam allowance. The blocks were then joined together using the sewing machine. This I found quite tricky as there were several matching points and for a couple of the blocks, I had to redo more than once. Join 3 rows of 3 then join the rows together, then put on the binding. The only issue is my sewing! I thought they looked great afterwards.

I found that even at this stage, I had a bit to redo but that didn’t take me long. The cushion was of course supposed to be square with all blocks the same size. Thankfully, no-one is going to be measuring my blocks - and if they try to, I won’t invite them back to my home!

Then the backing is attached, wrong side to wrong side, a gap left, and the whole thing pulled through. No problems. I decided against inserting a zip and followed the tutorial exactly. However, Martyn stuffed his cushion with loose filling and I wanted to use a cushion insert. After letting my ‘fingers do the walking’, I was able to buy the perfect size of feather cushion insert from a local shop.

I struggled a bit to get the insert in and realised I should have left a bigger hole. Or zipped the whole of one side. However, I got it in and I think that it's the right size. This will be a decorative cushion, so I was happy just to slip stitch closed.

Front


Yes - there is glorious sun today


I took these photos today as I wanted to post the blog I've had in draft. There are no constructional photos.

Verdict - I loved the process and will certainly repeat this. In fact I want an almost identical twin. This will have to wait because:

Lesson #5 is out today. I've watched the instructional video. I don't have the necessary solids which I believe would be better for the design, but hopefully will get on to it later in the week

Lessons learned      Flip and fold technique; okay I’m sure there is more to learn
For the future  - draw out pattern wanted.
Trying new things might lead to gems but don’t spread too thinly!


Saturday 10 August 2019

An ITH Machine embroidery course (online) and a bag


I’ve been busy with a lot of non-sewing-related items and haven’t felt it appropriate to post about them. I'm continuing to attend a summer class on using Lightroom and hope that when the photography club re-convenes in September I will be able to participate more fully. There has been some sewing too, though, though more machine embroidery than sewing.  

Small scissor case. Free pattern on signing up to newsletter.

My sewing includes repairs and alterations to several garments to make them wearable. I’ve lost a bit of weight (not enough) and my trousers in particular are all too big so I’ve done what I can to make them fit. Hopefully they’ll get too big again! I still find it amazing that trousers appear to get longer as I slim! Even at 5'11", I'm having to take up trouser legs or risk tripping on them or getting wet legs from the wicking. Sadly, a lot of things I had in storage don’t quite yet fit again. I see that  August is a time for alterations - I’m sure I have many more to do so I might post about those on IG.

I haven’t finished the garments I was making - I planned to use my coverstitch machine for bands. I need an uninterrupted period to get to grips with the machine. Now is not the time. One of the tops I had finished definitely needs altered as I don’t like the neckband - hubby says he thinks it’s fine.

I started an In the Hoop (ITH) embroidery course online from Sweet Pea in Australia. There will be 12 lessons at fortnightly intervals. Each lesson has the appropriate pattern to download plus written and video instructions. I really like the videos. It’s amazing how much useful and interesting information is given off the cuff.

I’ve completed the first three lessons and think I’m learning a lot. The first lesson was an appliqued coaster, the second a luggage tag  (there were 3 different designs but I only did one; I will have to get around to the other two as they are all cute) and the third a purse, which I finished last week (I confess I completed the other two just in time for the third lesson to come out! Still, you can go at your own pce so that's fine)

#1 Here is my coaster:

I could have made it much more colourful but decided to go subtle and not change the thread colours as I just wanted to learn the techniques. I realise I’m not very good at putting colour schemes together.

It doesn't look square because of the way the photo was taken - it is square!
The coaster is sewn right sides together (on the embroidery machine - it’s much more accurate than I am!) turned through a gap and the gap slip stitched closed.

#2 Here is my sun luggage label:

The label is done with back and front wrong sides together and is finished with satin stitch around the edges. I had done this before with black thread and black in the bobbin - my bobbins are either black or white. This time I had to wind the bobbin with the embroidery thread so each side would match.


In addition to the sun design there were another couple of seaside themed designs which I’d do if I had a holiday coming up.

I had lost my embroidery supplies, needles and so on and used a different needle which I thought would be okay - but I don’t think it worked; I’m putting the irregularities down to that. Fortunately, I did find the correct needles for the 3rd project.

#3 Here is my purse:


I really like it. There were 4 sizes and I did the 150x150 one. I didn’t realise until now that the 150x150 hoop is smaller than the 6x6 hoop - they need a different pattern to fit properly. You live and learn! I might have wondered why there was both a 6x6 and a 150x150 design but someone else pointed this out on the useful FB group.

The purse is fully lined. It was done in the hoop other than the strap (on the sewing machine) and closing the internal lining with slip stitch (by hand). I was so glad of the helpful video as the purse had to be turned through in two stages.

I didn’t have small D rings or clasps etc so just used what I had.

I’ve really enjoyed what I’ve done so far. One project every two weeks (with no fitting involved - yay!) is fine for me. There are a couple of projects I’m particularly looking forward to.

#4 coming up!

Next week is a ‘flip and turn’ cushion - this will be the closest I’ve ever  been to real patchwork or quilting. Looking through the materials required for the lessons, I will need to order a few things. I’ll try local first and if that doesn’t work, I’ll go online. I do need some pieces of quilting fabric that go together. I’m not so good at matching or putting patterns together. I also need some decent soluble stabiliser and some tear away stabiliser plus smaller D rings and clip loops (sorry I forget what they’re called).

I have found the patterns produced by Sweet Pea to be excellent and the satin covering stitches actually cover what they're supposed to. The designs are pricier than many others found on the internet but I'm prepared to pay for quality and support. I haven't completely given up ideas of digitising my own designs, as I did with the Celtic design for the pocket of David's jeans, but that's not on the cards for the time being. I did try to digitise one of my flower photos - what a disaster!

Why now?

So why now? David gave me the embroidery machine for my birthday last year or was it the year before hoping I’d get some fun from it. I’m beginning to now that I realise my limitations - I started too advanced for me. I didn’t really previously see myself as someone who used lots of handmade items, bags and so on though I love textiles embroidery and quilting - to look at, I mean, never having attempted it myself. I enjoyed the few items I made at Christmas past (with the possible exception of the one that did not have an accurately rendered pattern - though even that was fun in its way) which are on my blog if you want to look at them.

Also, my youngest daughter is expecting, due January 2020 and I’d really like to make some things for the baby - a baby quilt, a bib etc. She’s keen for that too. She and her husband don’t want to know the baby's gender. 

One of the lessons on the course is for a stuffed toy and another is for a jungle themed bib. Jungle/Africa is the theme she wants to go with so it couldn’t be more perfect. Sure, I’ve got quite a way to go before I can try a quilt/wall hanging/floor mat - apparently babies shouldn’t use a quilt as a piece of bedding. I’ve found somewhere I can go for an individual lesson, participate in a quilting bee (don’t know if that’s what they’re called) with help if needed and go to specific workshops. This is doable! I have quite a while in which to do it, too. 

The Sweet Pea website has a free design for two sizes of scissor cases. I have been meaning to make some cases for my scissors so this seemed ideal to give me a bit of extra practice and be useful at the same time. I decided to start with the small case. I think this was pretty successful. The only problem is not being able to adjust the size for different scissors. I’ll have a go at the larger case next.


Gemma Bag - a cross-body bag

When I went to post about the course, I realised that I had never posted about the bag I tested - so here is the post, written a while back and just waiting for decent photos - there still aren't decent photos as I gave the bag away before I had the chance to take more. My bag has already appeared on Linda's IG and FB pages so I hadn't felt any great need to post my own. The other testers made some gorgeous bags - go have a look.

I’m not normally a bag maker though I have admired from a distance. One of the other sewers at my Thursday sewing bee is a bag maker and makes some terrific items. She uses beautiful fabrics but I’m not keen on unicorns, floral skulls etc, which are very popular with others. I love handbags and have many of them, but they tend to be on the boring side when compared to the beautiful handcrafted ones - mine are often leather and often a plain colour.

When I saw a call for testers for the Gemma bag, I put my name forward, identifying myself as a novice. Linda of Lanyos Handmade and Nice Dress Thanks I Made It wanted all levels to test the bag.

I had admired her original bag when I saw it on her social media. It was made with plain and patterned cork. I thought it looked very classy and was one I could use. I was pleased when I was chosen to test the bag.


I had most of the things I needed. I found it difficult to get cork at a reasonable price and couldn’t find a similar patterned cork, but Linda suggested that as a beginner I’d be better with a test bag made from cotton. I identified the UK equivalent of the recommended interfacing for the cotton lining. I had most of the hardware though it turned out that I didn’t have the correct slider. I did have D rings, magnetic closures etc and purchased zippers of the required length. I have LOTS of zips now!

I’m going to skip over some of the problems I had with printing the pattern and making up the bag since these issues have been resolved, I was using the Beta ie tester version! Briefly, the issue was that the pattern wasn’t originally optimised for printing on A4 and this led to some size problems. Many bag patterns simply give sizes that need to be drawn and cut out so this was really no biggy - except that I did draw out the lining, which eventually proved to be too big for the outside. I was able to resolve this. Obviously, the bag will be much easier to make when all the sizes are optimised.

My cork (one plain sheet and one slightly patterned but not the gorgeous floral Linda used) arrived earlier than I had anticipated but I decided to use cotton for my bag, anyway. I used cotton that I had in my ‘collection’ (aka stash!) I didn’t want multiple patterns so decided to go with stripes two ways on the outside and polka dots for the lining. I didn’t like the interfacing  I used for the cotton .The original bag is cork on the outside - Linda’s later recommendation for interfacing a cotton exterior would have been much better than what I used but I had already made it up. Never mind - this was effectively a toile!

I had no problems following the instructions. I used quilter’s double-sided tape to place the zippers - my first use but certainly not my last! I was rather pleased with my letterbox zip on the inside. I have practiced these in the past (jetted pockets etc) and know that it is important to cut right up to the corner. I originally went for curved corners on the lining but decided to box the corners on the outside. I have done that previously and don’t find it difficult (though you would be forgiven for thinking otherwise considering how long I have been putting off the boxed cushion cover for my goose box!). Sadly, I realised that I failed to match my stripes across gusset and bag!

I found that the slider I had wasn’t the right kind so omitted that altogether.


I rather like the finished bag though the fabric makes it very casual in my view and the colours are very summery. Great for use with a summer dress - not the wintery clothes I was wearing when I took the photos! 


Our weather has been all over the shop. Today David and I were supposed to be on a photoshoot on Holy Island (Lindisfarne) but it was cancelled because of inclement weather. I was glad, as my mouth is still painful following dental surgery and gum graft last week and I didn’t fancy getting soaked.


Now that I have the finalised pattern, I might make another in the cork I have bought. I’d really like to make a leather bag with all the pieces of leather I have but I wonder if that’s too thick for my machines.


I feel, though, that I am facing too many learning curves at the moment so bag making will take a step backwards. I have a new camera, more complex than my previous one, have newly purchased Lightroom and Photoshop and need to move forward with my coverstitch machine. I’m attending a summer school on the use of flash photography (well, they call them speedlights or speedlites) and in a couple of weeks will be able to really tackle my photo editing software when the summer school moves onto that.


Thursday 20 June 2019

Quant, Dior and family in London


David and I had a brief break in London this past weekend. We had originally hoped to visit Cambridge but Alison et al were going to the Lakes to watch her father in law do the Iron Man challenge. Joanne was able to come from Cambridge  to London to meet up with us. In the end, Alison and Steven called off their trip to the Lakes and Alison and the boys came down to Helen's on Saturday evening.


On Friday, I visited the Mary Quant exhibition at the V&A. I am a little too young and lived too far away from anywhere to have been a Mary Quant girl. Then I was a student and couldn't afford the prices. I do remember buying a Mary Quant lipstick which I loved and I probably have her to thank for introducing tights long enough for my long legs - and of course I did wear mini skirts and dresses. I didn't wear her platform shoes though as I didn't need the extra height.


I really liked some of the designs. I was surprised by how expensive some of these clothes were - it made sense as to why I never bought them. Interestingly, I’ve spoken to a few people since I got back, many old enough to have worn Quant clothes, and they all said they simply couldn’t afford them. I had thought that Mary Quant was aimed at the masses but it clearly wasn’t.


I had a couple of definite favourites from the exhibition and hope my photos have come out well enough.


Interestingly, while watching one of the videos, the stylish older lady next to me told me that she had been a Mary Quant model in the 60s and we had a chat about that. She looked younger than her years, that's for sure. She hasn't yet been to the Dior exhibition but was hoping to pick up tickets one morning in the daily release (tickets are sold out).


Friday evening we met Helen and Anthony who took us out to Fish! at Borough Market. I'm still recovering from dental surgery and am not allowed to eat hard food so fish seemed ideal. I ordered their classic fish pie which was delicious.

We were staying in Greenwich. I hadn't been before. We visited the various markets, saw the Cutty Sark but didn't have time to go to the astrophotography exhibition, though I’ve seen the short-listed photographs online. We walked under the Thames through the pedestrian tunnel to the Isle of Dogs.


On Saturday, I met up with Helen and we went to the Christian Dior exhibition. Helen and her friend hadn't been able to get tickets but because I'm a member with a plus guest membership, Helen was able to accompany me and we could choose our time. The early members' hour on Saturday was just too early for us though! Helen hadn't been keen to go to the Quant exhibition as she saw those clothes as everyday and she wanted to see couture clothing.


I was surprised at how much Helen enjoyed the sparkles and feathers on some of the gowns! We both really enjoyed the toile room and the dressed miniature models. I’m not showing many photos since they don’t do justice to the garments and have been shown many times before


Meantime David was looking at some of the photography exhibits

Afterwards we met Joanne and went for lunch in Chelsea at The Phene and had a nice chat over a light lunch. I was exhausted by the time we got there as we had walked from the V&A  so afterwards we took a taxi to Helen's flat. This took an hour (public transport was quoting 80+ minutes) and was proportionately much cheaper than the taxi we took from the station to our house 5 minutes away.

Anthony prepared a lovely vegetarian chilli in part to cater for my older grandson who has become pescatarian and my requirement for softer food. Alison and the two boys arrived shortly after we got back; Steven took the opportunity of their cancelled weekend to catch up on some work so didn't come through.

We had a lovely evening. Joanne had been going to stay with Helen and travel home the next day after brunch in Greenwich but decided to go back in the car with Alison.

On Sunday, Helen wanted to take her Dad out for brunch for Father's Day. She and Anthony drove to Greenwich where we had a lovely brunch in The Royal Teas. Greenwich was very busy and lots of places were full. This place was so busy - turning away lots of people and was great even if not very salubrious looking on the outside! They were then going on to Anthony's parents and we were going home.


I took the opportunity of the train journey home to do some reading (The Secrets of Colour by Kassia St Clair) Marianne pointed out some factual inaccuracies in the account of the colour orange so while I’m enjoying the book, and it appears to be well researched, perhaps I need to read it with an element of scepticism?

I also did some catching up with blog posts - I hadn't realised just how many I had missed. I'm still not caught up - probably never will be.

I’m just about to embark on a journey to learn how to use Lightroom and Photoshop which I’ve just subscribed to. I’m attending a photography club with David and over the summer there are a number of classes. Flash photography and the use of layers in Photoshop. So you need to excuse my current photos - but perhaps my future photos will be better!!


How Do You Read Blogs?

It's a while since I've posted a blog,  lots of reasons. I'm thinking of starting again. However,  I used to read the blogs I fo...