Showing posts with label Jeans making. Show all posts

Friday, 13 February 2015

More on jeans class (class 4); last before midterm break

After the last class, I moved onto the next steps at home in the hope of finishing my sample a week early. The reason for this is that our midterm break comes after week 4 not week 5 on this occasion and it would be great to come back after the break into making up our pants pattern rather than finishing our sample.

Well, to my surprise, I had done more or less the right thing! When I arrived at class, the tutor R who had made up our pattern was showing our tutor D how to move to the next step. D has made many pairs of jeans but the sequence of steps was a bit different, hence the need for this. I had the opportunity to watch and realised I had followed the steps.
Last week ; unhappy about non vertical stitching line
 
You can see that the fly facing scarcely shows because it is caught in. I couldn't show the fold that I had accidentally made.
D checked my work. I was unhappy that the curved stitching at the fly was not vertical. I had accidentally caught in an extra fold of fabric, somehow. You can see the irregularity in the reverse view but not the actual fold. (Again, I was taking photos on my smartphone and it seems that I haven't worked out how to load them all - I took rather more than I had access to). D also reminded me that it is very important to let the zip top curve where it wants to go rather than try to straighten it, as is our natural desire. This I had managed. I unpicked the stitching outlining the fly facing. I unpicked the top of the zip. This wasn't difficult as I had just basted. The front ended up in the same place - I had that correct - but the fly facing was able to spread out further. I really hadn't noticed the extra fold of fabric until D pointed it out and was amazed at the difference it made!
I can't find photo before zip guard was attached but it's still possible to see that fly facing is spread out more. the white basting stitch is still in place. The zip is finally sewed in in the green.

I re-sewed the top of the zip and sewed in the whole zip to the fly facing.  I then top stitched around the edge of the fly facing. You can still see the blue chaco liner from my first attempt. My top stitching isn't as good as it should be as I went off line and in trying to correct, some unravelled. So I went over the whole again. So there are two rows of topstitching, supposed to be on top of each other. I didn't correct as I know what is required and this is a sample.


Showing old and new fly topstitching lines and side seam top stitching, 1 row only (mock fell seam)
Then we had to attach the zipper guard. R had made it slightly too short as the pattern had changed. So we ended up folding and 'overlocking' by machine using a zig zag stitch. We then attached the zipper guard behind the zip. This was slightly tricky as the seam allowance was rather narrow (we used 1cm throughout and of course this is about half that). D normally attaches hers at an earlier stage (and often misses it out). The top part of the zipper guard is left raw as that is caught onto the waistband.


zipper guard; you can also see the curved securing stitch at the bottom
R hadn't designed the pattern for proper fell seaming. She said extra fabric would be required for this. I was disappointed not to do some proper fell stitching but decided to do mock fell stitching as suggested. We still had no overlocker in class so I stitched side seams with my sewing machine, used the sewing machine to zigzag the seam allowances together and then pressed to the back. I just did 1 row of top stitching as I was running out of thread. (Note to self - buy lots of thread when doing jeans for DH. He doesn't want markedly contrast topstitching but it will need to be proper topstitching thread - a very dark green, hopefully)
 
At this stage, the two fronts are joined with the zipper in between and a back is joined to each front. The back seam has not been sewn. I now wish I had topstitched the pockets using the green thread. You can't even see them here.


We then sewed the inseam. We then put one side inside the other to sew the crotch seam. As I see that most jeans have a felled or mock felled seam here, I did that. Not easy but possible.
 
Showing crotch seam stitched together (I had previously overlocked)
I see that on some jeans, the outer seam is normal and the inner seam felled - on others it is the opposite way around. D also said some jeans have on both - I couldn't see how that would be done. The answer is with great difficulty! Easier in a commercial environment.
 
Before topstitching
See the topstitching in back crotch seam.
I did some further mock felling.

Then I pinned up the double hem but didn't have time to stitch this. I'll finish this at home. This will have a double row of topstitching. I either have to buy more of the colour I was using previously, or change altogether.

We have two weeks before the next class. I asked D what the next steps were as we didn't have a sheet for what we had done earlier in the evening or the next steps. It's really only the waistband after that. This pattern has a curved waistband. I have to interface what will be the outside of the waistband. I then sew the interfaced and non interfaced sides right sides together and turn and press. I could then sew to the jeans body but I think if I get that far I will leave it until class to make sure I go about the waistband and button in the correct way.

I would certainly improve the finishing if doing the real thing.

I'd really like to have a toile cut and sewn for the trousers I'm planning, so D can fit me next time but I'll need to wait see how busy I'll be. I did buy a jeans pattern but still plan on making trousers. I'll miss the PR jeans comp but so be it. I decided to look again at the 'toile' I made from the McCall's pattern. I thought that part of the problem might have been that I didn't sew together properly and secondly that I had forgotten it was a 1" seam. So, having taken them to pieces, I basted them together careful leaving a 1" seam allowance. Unfortunately, I've mislaid the pattern for the moment so couldn't be more specific than that. However, I know that  palmer Pletsch fir from the waist. I tried this toile on in my Thursday dressmaking class. However, It really IS so bad that I need to start again, completely. I think I may abandon this pattern (as I say I can't lay my hands on it anyway). I have a number of choices - Burda or Vogue. I'd still like to use the beautiful grey fabric I have - I just hope I haven't ruined it with all the stitching and unpicking; fortunately there is no visible sign of this.

I've bought some denim with some stretch in a dark green colour (on 50% off sale) - DH wears a lot of green and I've offered to make him a pair of jeans. Not for the PR competition, though. I still have to find a men's jeans pattern. I see a Kwik Sew one and a Thread Theory chino pattern which DH quite likes but which is $20! I don't know of any others. DH doesn't want skin tight jeans. The fabric hasn't arrived yet - I didn't realise when I ordered it from a UK website that it would be coming from Germany.  Update - it came (pretty speedy; and tracked) and looks really nice even if a slightly brighter green than I had anticipated. DH likes it. However, I had problems with the Internet today and haven't bought a pattern yet - maybe it will have to be a self draft. I have the Sure Fit design system and have the module for men so perhaps that will get its first airing.


I'm assuming the brighter green is the right side and the very dark the wrong side! I need to take a picture during the day rather than at night as here.


Yes, I bought 6 metres - plenty of fabric for experimentation! 98% cotton 2% spandex but no obvious stretch at all
I also bought myself some blue as the black denim I really wanted was out of stock. Trousers first, though.
Just 3 metres - it was a lot more expensive as it wasn't reduced. Cotton 48%/polyester 48%/spandex 4%

The fabric is pretty stretchy.
I need to prepare the fabrics. Tumble drying is not recommended so I need to work out how to dry 6 m of green denim fabric if I don't cut it up!

Saturday, 7 February 2015

Jeans class 3; back pockets, yoke and problems with zip insertion.

I thought this was going to be a fairly straightforward class this week.  We didn't achieve as much as we should have.

Firstly, we finished off and tidied up our patch pockets. I decided against modifying the decorative top stitching on the pockets.

 We then measured out where the pockets were to go (the placement hadn't been marked on the pattern) and checked that each pocket was placed identically. We then sewed on the pockets using an edge stitch and an additional row of stitching inside this, with reinforcement at the top pocket corners.

Then it was time to add the yoke. We weren't using an overlocker, by the way, though I would choose to use one at home.  The yoke was sewn onto the back piece using a 1centimetre seam allowance. The seam allowance area was then stitched using a zigzag stitch and the seam allowance was then pressed in the yoke direction. After this, it was fairly straightforward to edge stitch and add a further row of stitching to catch down the seam allowance just within the 1cm.

Top stitching at top of pocket and bottom of yoke, in detail. . 
Overview of pocket and yoke

It was really impressive to see how much shaping the yoke added.


Back pocket and yoke added.
The next task was to zigzag stitch the curved seam on front and back. Since returning home I have overlocked those parts still accessible and my photos show that. However, at class, it was zigzag stich only, though the tutor may bring an overlocker next time. I'm not taking mine to class as it's hard enough just taking a sewing machine as there is quite a distance from the car park to the class - at least I do have a car. One time, I decided to just use the class machines - but never again. Compared to my other class on a Thursday, where I'm happy to use the machines as they stich nicely, these ones, although new, are very rough indeed.

Then it was zip time. Unfortunately, the tutor was having a major problem with her sewing machine so quite a bit of time was used up trying to sort this.

The first task was to stitch the zip right side to right side on the left front jean piece. Once this was achieved, the zip was turned back and the edge was edge stitched. My stitching is a bit wavery so I may take this out and change it, to make it look better. However, the actual sewing was achieved reasonably easily. I was concerned when the tutor was having so much bother that I would too.

Showing back of zip with reference to pocket bag


Zip on left side of front, turned back and edge stitched. Serging added afterwards.


Then we had to start preparing the other side. Time was running out, however, and the instructions were far from clear and possibly incorrect, according to our tutor. As requested, I attached the fly facing and then understitched.

Wrong side. Not tidied up yet.
Understitching on fly facing showing. I suppose this gets turned back.

Like this? 

I have absolutely no idea what to do next as I can't make head nor tail of the instructions and haven't been able to work it out based on them. I looked at the jeans I'm wearing and it looks as though the zip should be between the layers. That makes much more sense to me.  That's what I had to do when I was putting the zip in my jacket - it lies between the front and the facing; here I think the zip should be sandwiched between the jeans front and the zip facing??

I've decided just to leave it until next time when presumably the tutor will have worked out what to do next (the instructions and diagrams were not drawn up by her and she seems to be struggling a bit), though I do think there will be some backpedalling.  I fully expect to have to take out my stitching on that side next week (that includes seam stitching,  overlocking of seam and understitching, so I won't be a happy bunny if that happens!) I'm almost tempted to take it out now to save time in class but maybe just maybe there is another way?

Okay,  I lied. I can't leave well alone.  Just as I was thinking about taking out some of my stitching,  I decided to try to follow the next few steps (without benefit of diagrams).

I'll list all the steps, including those I have done and have had checked.

Step 11: Starting with left front piece (this has a 0.5 cms extension - actually it didn't because R forgot to put it in but we were told it would work okay without this). Place zip right side down on right side and stitch down.  Check.


Step 12: Turn back zip and edge stitch on right side.  Check.
Up to here I'm fine and have had it checked. Matches diagrams too.

Step 13: apply fly facing, edge stitch and press. There was a diagram showing this step with what was clearly understitching and our tutor D told us to understitch. Check.


I had my work checked to this point.

No diagrams from this point on. I decided to machine baste everything that is with a long stitch length so it would be easy to take out at class next week.

Step 14: Join front rise from 1cm in from fork point to bottom of zipper. I did this but I didn't sew close enough up to zipper - I left 1cm there too.  Easily rectified. Done.


This shows line of green understitching on left which can fold over zip but doesn't seem to want to lie naturally there. 
Step 15: With right sides of both front leg pieces together line up pin down CF rise.  Open out, where zipper tape lies on right front of jean pin to fly facing. Zip tape will curve at waist seam.  Pin it as it wants to lie.  Do not straighten it up. Done.
Zip machine basted to fly facing only

Step 16: Stitch to fly facing only.  Done.

Step 17: with zip closed lie jean flat right side up, chalk in curved fly line. This must be wide enough to catch in fly facing.  Top stitch. Done.


Looks okay. Would be better with edge stitching?  Should blue line be parallel to zip rather than sloping in at top,  even though this means that fly lies better? 

However,  while I can close the zip and it is covered by fabric from right side,  I'm not sure that's how it is supposed to be.  When I topstitched around,  this is not vertical and perhaps it should be; it follows the line of the fly facing, which its also not vertical;  it is caught in at the waist edge which encourages the fold. Although the understitching on the fly facing encourages it to turn under, I'm  wondering if perhaps edgestitching might have been better - or in addition as the fold is quite loose rather than crisp - then it probably needs pressed at this stage.


Reverse side. Fly facing is Now much smaller than earlier photo because of fold. 


I don't understand the next step 18: zip guard, bag out bottom edge,  press and overlock side closed.  Leave top edge raw as this goes into waist seam.

Now I am really giving up until next week! I've taken a few photos on my smartphone to remind me of how I've got here. Next week is the last class before the mid term break although it's only the 4th class,  and so I'm hoping to be finished with the sample to let me get on with my trousers as soon as we return - I've definitely decided to do trousers and not jeans or slacks first. I'll need quite a bit of help with fitting before I start to construct. Fingers crossed that what I did today doesn't need to be undone. 

Thursday, 29 January 2015

Jeans class 2 - pockets; DD's dress repair update

I posted my first jeans' class a bit too early; I meant to save and put in some more photos before publishing. Never mind.

Here are photos to end of stage 4. Plus how I think stage 5 is going to go.  I didn't' even know my phone could do that trick with the small insert and I couldn't work out how to switch it off. I eventually managed by switching off whole phone - there must be an easier way, though.

 I've seen a few posts on jeans sew-a-longs e.g. for the Ginger jeans. It strikes me that I might find it useful to read those. I don't have a jeans' pattern and I'm not sure what I would go for. I have seen reviews of Jalie jeans, Jamie jeans, Ginger jeans and possibly some others.  Any recommendations?  I do not want skinny jeans and would prefer a high rise. Another option is self drafting using the Sure Fit Designs system and modifying for jeans. I'm slightly concerned that they would look too grannyish as I don't have the necessary style knowledge - I am a grandmother and I'm not a fan of high fashion (on me that is) but I do like to give a nod to the current century! They would certainly fit better. Maybe skinny jeans that actually fitted my not-skinny legs would look okay; when I've tried on RTW, they look awful.

It might still be better to get trousers to fit well then go on to jeans later. I do have fabric for trousers but not jeans; I'm not sure if the best fabric to go for - should there be some stretch in it?

The weather held up and I got to the class last night. Since then, it has deteriorated. Unfortunately, as have I! Normally, I go to my weekly sewing class today but the combination of the roads, a nasty cough and the lack of a specific project made me decide to stay at home. I'll do this post and finish the waistband lining on the grey wool skirt I needed to modify - that's what I would have been doing in class. I had already deconstructed the skirt to take in the yoke, yoke lining, skirt and lining and last week I stitched them all up again but L, my tutor, suggested that handstitching the lining down would give a better finish than the stitch-in-the-ditch I did the first time around. I also have a couple of pairs of trousers to add faux hems to in order to lengthen. Hopefully, next week I'll start a specific project - though it's been very useful in January to catch up with some repairs.


I didn't take finished pictures of the green dress I was mending for my daughter. It was quite a puzzle.


In this picture, you can't quite see that the rear of the other strap is wide

This loop allowed the thin strap to be lengthened; the torn area was repaired with a patch from the flap. It really disintegrated when the stitching was unpicked.

This rear flap was completely removed

There's no change from the front.
 However, I deconstructed the dress and removed the extraneous and unwanted flap. There was quite a bit of unpicking as the whole area had been understitched too. Where the strap had previously been attached had disintegrated so I had to patch in a piece of fabric on the inside of the yoke, pulling in the remaining fabric to the correct size. - the flap supplied the fabric. Inside the layers, there was clear elastic but I decided not to replace this; I sewed it by machine to the inside layer.  I added to the length of the thin strap using the redundant loop. I decided to leave the strap external rather than sewing it into the yoke in case it needed adjusted. Most of the dress then had to be put together using hand sewing as I couldn't have stitches showing on the correct side only in my repaired part. Where I had stitched the elastic mimicked the understitching in the original. I then skip stitched the tattoo layers together. It was slightly tricky and when I was finished I was glad to post it off to my daughter post haste, which is why I don't have photos. She has told me she's very pleased with the dress; she likes it much better without the flap and says the strap fits perfectly. Job well done!


Anyway, last night's jeans class. A fellow student, Linda, and I were the only two to have completed to stage 4. We had both looked at the next stage and interpreted it differently. We were able to work out that I was correct in pinning wrong side of the pocket to wrong side - she had done right sides - but she was correct in the amount of fabric to be pinned. I had thought it was the whole pocket. She realised the front was taken up in the fly and the side in the side seam. The tutor, D, was busy with other students but was able to confirm our conclusions. It's quite satisfactory when you work something out yourself.

After that, it was fairly straightforward. Seamed wrong sides together, turned, pressed and seamed right sides together to make a French seam. Then the layers were stay stitched together.
1st stitch line


Preparing to stich 2nd stitch line

Layers pinned together ready for stay stitching

View of front before basting together

Then onto the back pockets. D showed us how to make a cardboard template of a pocket so that our two pockets would be identical. I chose a straightforward shape and used the tutor's sizes. We then drew onto calico, adding a 1cm seam allowance all around except at the top of the pocket where it was 2 cms. After cutting the pocket out, we pressed using the template for accuracy. We had a choice for the top of the pocket. The top would be turned over twice and stitched down. However, the choice was in what to do with the side seam. Linda and I both chose to turn in the side seams first so that our top hems would look smooth from the top.

Edges were folded and pressed over template
We were going to have to wait for the rest of the class to catch up. This gave Linda and me a chance to try some decorative stitching on the pocket. I don't like what I did. Fortunately it's just a practice piece. I couldn't see the mark of my white dressmaker pencil and hadn't wanted to risk a darker colour so kept it ultra simple. Linda found a pencil worked well and she could rub out the marks. We were both using regular thread. I know that the pocket stitching and topstitching will be done in thicker thread. I need to give some thought to the eventual design - I like the look of two parallel curvy scrolls. I don't have smartphone photos from class of my pocket stitching - will take photos next week when it's time to sew on to the jeans.

That's where the class ended. Our sample jeans had not been marked with pocket position. So next week, we will start with D showing us how to position the pockets.

It's already evening and I didn't get the skirt yoke started. That's the danger of staying at home - other things always seem to take priority, even when you're not feeling well!

Monday, 26 January 2015

Dressmaking class - jeans making

First dressmaking techniques class of new term

This term is trouser making skills for 5 weeks then we can choose to make an item of our choice, not necessarily trousers, though my choice will be that (or should it be jeans now?)
Interestingly, we are actually making up a size 12 model, short legs to save fabric, in a jeans style.
On Wednesday, the first night of the term, after introductions, we had to pair up and cut out our pattern from heavy calico, and the pocket backs from lighter weight cotton.

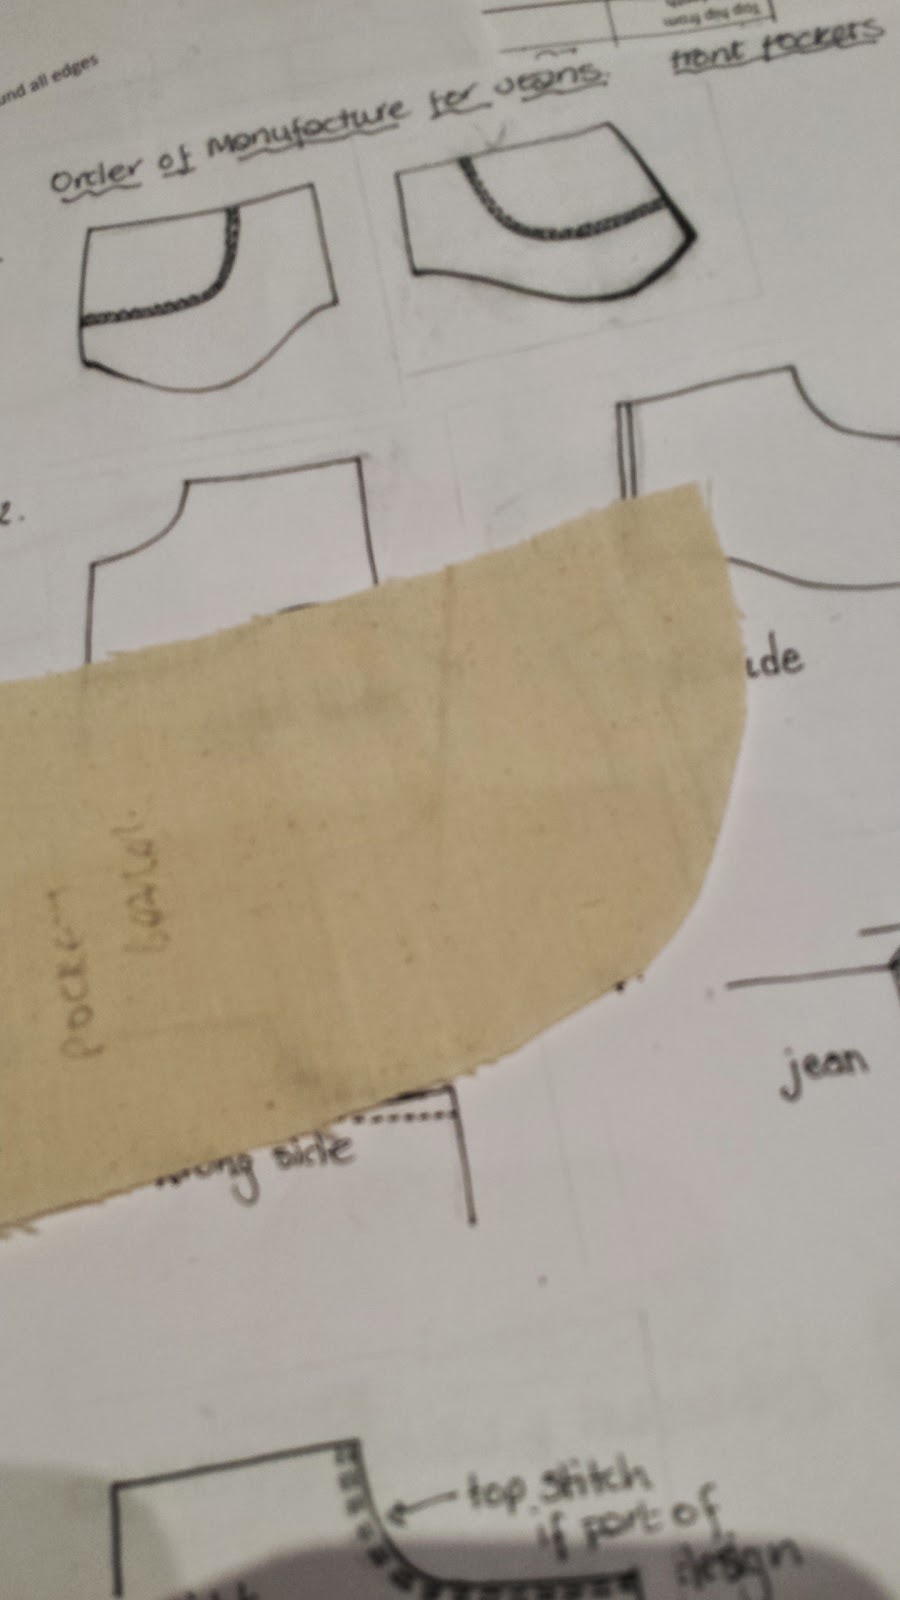
It took quite a while to cut out all those pieces. Then we started to assemble the front pocket and pocket bearer - this was a new term for me.
Our tutor demonstrated
Step 1 - overlock curved edges of pocket bearer. Place on top of pocket bag 2mm edge stitch around all edges
Step 2 - seam scooped pocket edge only
Step 3 - grade pocket curved seam to 5mm
Srep 4 - 2mm edge stitch with seam towards pocket bag. Press. Edge stitch will keep pocket bag from rolling out  OR press and edge stitch.

This was as far as we got. I didn't manage to do these steps in class as I hadn't taken my machine with me. As it was near the end of class, I decided I would finish these steps at home. 

Which I did do. No problems as this was fairly straightforward but I can't see the whole thing. 

I decided not to topstitch the pocket front, though of course in the final jeans,  the pocket would usually have two parallel rows of topstitching. To be honest,  I looked at trying a fancy stitch but that didn't work out. I thought it'd find out in class next time the best way to do it. 

The next step is step 5 which is sewing the pocket bags together. There isn't a diagram for this (apparently it was so difficult to draw and make sense that it was abandoned) and while I have some idea of what to do, I don't know where to stop and start the stitching. On Wednesday,  we will be getting a demonstration. There is bad weather forecast for Wednesday onwards,  but hopefully I'll make it. 

On Saturday, we will be attending a funeral in Scotland provided the roads aren't too bad. DH didn't see much snow growing up because of the influence of the Gulf Stream but the roads between here and there can be bad. 


How Do You Read Blogs?

It's a while since I've posted a blog,  lots of reasons. I'm thinking of starting again. However,  I used to read the blogs I fo...