Sunday 27 November 2016

Another tartan skirt 'wearable muslin' for Helen

Pleated skirt for Helen


On Missy
Some of you may remember that for last Christmas I was going to make Helen a full pleated skirt from our family tartan, at her request. I ran into problems with time and with the rendition of the skirt. I didn't use a pattern. I made a full pleated toile using another plaid, not our own tartan, which looked quite nice but I felt had problems with the closure. No, I didn't just feel that - it had. I didn't get the opportunity at that stage to move on from that version of the toile. These photos are from Christmas 2015.


I also had the skirt quite long as I felt that a traditional pleated skirt should be around knee length. Helen didn't really want a traditional pleated skirt, simply a skirt made of tartan. Unspecified design.


This is DH wearing his kilt in our tartan.

I started to think about it again this year after the wedding, some recovery time and the PR Sewing Bee. I planned to make it either for Helen's birthday or for her Christmas. I spoke with Helen a while back.

I felt that, apart from the side zip closure on the full pleated toile, there were issues with weight - a full pleated skirt is very heavy, particularly in a medium weight wool tartan. Another major issue was that the waistline was too big. To create a smaller waistline, it's necessary to fold over the pleat more at the top than at the bottom. If there are enough pleats, as there are in a full pleated skirt, this is scarcely noticeable. If we reduced the number of pleats to lighten the skirt, it could be very noticeable.


Still under construction here - you can see that the pleats are deeper at the top to create a smaller waist.
This is the side closure that gave me so many problems

We discussed styles but didn't really come up with a clear plan - discussion time was limited. I did show Helen two patterns. On the basis of our discussion, I went ahead and made a toile from McCall's 7022 in the version shown here - view B.


McCall's 7022, view B - I like this view and bought the pattern after seeing it


This is the toile, below, worn by someone else in my class. It's made of medium weight calico. I thought it was pretty good and sent it off by post to Helen for fitting and pinning (I thought it unlikely that it would fit perfectly and I can't use Missy for fitting any more; I reckoned it would be too big) I heard nothing, so chased her up and learned that the skirt was too long and too loose at the waist, as expected, amount unspecified. 


Sewing class side view on classmate

Sewing class back view on classmate

Sewing class side view on classmate

Sewing class front view on classmate

In my Thursday sewing bee, I explored how I would develop the pattern, using the width of a tartan set to determine the pleat width. I noticed that the pleat markings are not parallel all the way down. Lyn said this is to create waist shaping (so rather like the pleat issue on the earlier tartan full pleated toile). I was surprised how much waist shaping there was as there is a yoke, which already has any darts built into it. I was worried about trying to make the skirt as is (well, a smaller size) because of this issue - I didn't want my pleats to be uneven.

I also considered changing the two knife pleats into an inverted pleat and sent Helen a sample (the other side was a box pleat, of course)

The pattern comes with two other versions. An A-line skirt without pleats (versions C and D) and a full circle skirt (versions E and F), both on the same yoke.

I originally planned to alter the pleat position, size and orientation but use the original skirt version, in a smaller size and shorter. I puzzled over how to include my pleats at the width I wanted. The original pattern front is cut in two pieces - presumably that's even more shaping. I had decided by this time that I wanted to have the inverted pleat rather than the knife pleats. So I looked at how I would do that. I struggled. I couldn't see how to do it and decided that it was probably easier to add the pleats to the plain A-line version. Lyn agreed. 

Then I remembered that in a telephone conversation, Helen had mentioned the possibility of a circular skirt. I hadn't been sure because of the way a plaid would lie in a circle skirt. I decided in class that I would indeed make the circular skirt version of the pattern, in a shorter length, one size smaller.
I decided, however, that the full circle was too much for a wool plaid and proceeded to remove some of the circle, following advice from Lyn. I guess I took out about 6" from each quarter of the skirt - so about 24" from the total circumference - that is wedges starting at the hem and tapering out at the yoke seam. The seam length to be attached to the yoke was unchanged.

The pattern comes in two lengths and I had previously made the longer one. This time, I split the difference, shortening from the longer pattern length by approx 5 cms.

So I made up a standard size 10 yoke. The skirt was between lengths and had a slightly reduced width at the hem. I made this up as a rather fancy toile, using a remnant of a lighter weight wool plaid I had in my stash. I took it to class to make a pleated version and there would have been enough fabric to make a skirt. However, because I decided to make a circular skirt, I was very short of fabric. I was unable to match the fabric pattern at the sides. Nor did I have enough for the yoke facing. I decided that I would fully line the skirt and facing, using a fairly standard type lining material.

I had no problems making up the skirt. I didn't entirely follow the instruction order because I was lining the skirt. Another slight change was that the pattern had the back on the cross grain, the front on the straight of grain but Lyn advised me to keep the back on the straight of grain too.

The following photos are on Missy. She's okay for modelling but not for fitting as Helen changed quite a bit running up to her wedding.


Finished skirt front - on straight of grain

An idea of the circle shape, one side held out

The skirt back, on straight of grain

I made up the skirt, made up the lining 1" shorter, joined the lining to the skirt at the top, understitched etc, inserted the centred zip, stitched the lining to the zip tapes at the sides and then stitched the lining yoke seam to the skirt yoke seam, hidden above the junction. I did the zip and the yoke seam by hand. All seam allowances were overlocked to reduce fray. 


Inside of skirt, back
I then hung the skirt up for two days to allow the hem to drop - and it did drop rather unevenly. I measured and cut off down to the same length all around. I had to do this from measurements on the fabric as of course I had no live model to allow me to measure from the floor.


Very little to be removed at back seam, on straight grain
Rather more to be removed where skirt was on bias


I double turned the hem and hand stitched.


Showing double turned skirt hem. Yes, and simple overlocked lining hem!

The lining was now too long so I measured and then decided to trim off using the overlocker rather than make a proper hem. Lazy I know - but then, this is a fancy toile and by this time I had feedback from Helen that she wasn't sure what style she wanted and didn't really like the yoke, she'd prefer a narrow waistband...

I didn't lose heart, though. I have had loads of admiring comments about the finished skirt. It is eminently wearable. My original class model is currently making up the knife pleated version of the skirt for herself and declared it to be her favourite pattern. She's doing it in denim and it looks very good.

I'm giving the skirt (as is) to Helen as part of her birthday present (next week) - it would be fairly easy to reduce the waist and yoke at the side seam if necessary though I don't think it should be. It's a nice skirt. Although it is a toile, I think this is truly a 'wearable toile' or 'wearable muslin' - it is finished in every respect. I've also bought a grey ribbed polo neck to go with it. Others have pointed out that the hem of the polo neck will cover the yoke, anyway. 


The ribbed polo neck looks tiny compared to skirt! Perspective to get everything in photo.

Helen has asked me to 'hack' and slightly modify her favourite red sand-washed silk dress, which is worn out past the point of acceptability, for her Christmas (instead of the tartan skirt - no way can I manage both!). She was going to do it herself in emerald green velvet (she looks fabulous in green). Helen's dressmaking skills aren't quite there yet. I've agreed to do the pattern if she gives me the dress home with me, or we might have time to do it when I visit. I'd like to make it up in red sand-washed silk for her. Does anyone have any idea where I could buy sand-washed silk in the UK? Yes, I know I could get the same stuff as I used for the wedding dress but that is ivory or white and would need dyed and is mega-bucks (that was from Soho). It doesn't need to be of such high quality. Preferably red or dark green or dyable (my spellchecker doesn't accept that as a word - should it be 'able to be dyed'?).

I wrote this up with no plans to publish it until after Helen had seen the skirt, tried it on and commented - I'm visiting her next week. I don't think she'll see this blog post - but I have already sent her a photo of the skirt so that's not new to her.  However, I have decided to publish the post in the hope that someone can give me a source for the silk. I can buy in London (assuming a London source, I know - otherwise mail order) when I visit as I have a little free time.

I'd be grateful for your comments and possible silk sources, TIA


Sunday 13 November 2016

Making a Jacket - tissue fitting and first toile

I’m making a jacket as part of my tailoring class but also because I have wanted one for a while - a well fitting one, that is.

Fortunately, it looks like the fit on my jacket will be better than that on my knit tee-shirt!


I had a number of jackets in my consideration list.
I chose a Palmer Pletsch blazer (McCall's 6172) for the jacket for a number of reasons.
  • I feel it's less formal than the Vogue Claire Schaeffer jacket, which I love and will come later should this jacket work out well. In the meantime, though, I need to sew something that better suits my lifestyle
  • PP has comprehensive fitting guides including lines for FBA etc.
  • I bought a Craftsy class on interfacing jackets which uses this jacket, so it went to the top of my queue.
  • It's a simpler make than the Vogue.
  • It has all the bits I need to practice for my class, which perhaps Vogue jeans jacket might not have done . I will be doing that one too but I think it's slightly too informal for all the techniques I need to practice.

We worked in pairs in class to take our measurements. Rory took these in order to make up a trial block which we'd toile. There isn't time in class to do this. Everyone wants a jacket to fit themselves rather than just learning techniques on a standard size garment. I'm no different. The blocks we'd then create would be used to make up the jacket of our choice.

I'm going to miss next week's class, when I thought we'd start this process.  However, I think we're running behind and next week is actually going to be about lining insertion. ‘Dropping in the lining’.  I'm going to do that in Monday's sewing bee so I don't fall behind. I started making a toile of my jacket so I wouldn't fall behind.

I went along with the PP instructions, on the whole at least.
I chose my size based on high bust measurement. (I was borderline just to choose by full bust size). If between sizes, they instructed to take the smaller size, which I did. This was 40.5” so I went to 40". I used this size, as instructed, to choose the size 18, which is for a full bust 40”. The idea, of course,  is to have a better fit across upper chest and shoulders. My full bust measurement is 42/43, depending who takes it and when! So clearly there will need to be a FBA. I knew that would be the case. But how much of a FBA?

I cut out the tissue for a size 18, including hips, even though my hips are larger. I reinforced and clipped the tissue as advised,  pinned together and tried on (one side only). The instructions say that if you need a FBA, wait until you've done that before sorting hip size. I pinned the tissue from armscye to waist or a bit below and tried on (with help from David of course). I don't have any photos of this process but it's pretty well documented in the pattern instructions and in Fit for Real People.

I found it difficult to judge where my bust and waist points would be so decided to concentrate on the FBA.

First thing I had to do was to ensure I didn't need a broad back adjustment as that would affect what was required in the way of a FBA. I didn't need one. The tissue met at the centre back without strain and was pinned there onto my tee shirt.

I then had to see if the tissue jacket centre front line met my body centre front line. Of course, it didn't, as expected. I then had to measure the distance between tissue and body CF lines. 2.25”. This was the amount of FBA required (total 4.5”). I did this in inches, BTW, as pattern talked about those.

There was a choice of a standard or Y FBA.  I choose the latter as they suggested this if you often had to build up the armscye at the front. All the lines were drawn on the tissue,  so I had no problem doing this. My paper insertion was rather large! 2.25” at the pivot point but much wider lower down. At this point, there is still a side dart, which can be left or closed and rotated into the vertical dart. I choose to close and rotate. This,  of course, meant that the original dart area was enormous. I thought I had got it wrong.

I took the tissue to class and tried on there. Rory felt that I was in the right ballpark but further adjustments would be easier in calico. She marked waist and bust point and roughly pinned out the rather large front dart.

I had also tried on the 2 piece sleeve and felt it was too tight so did a 4cm full biceps adjustment. This involved a slight building up to original of the sleeve cap. I didn't alter length.

This is where I deviated from the PP method as they then advocate moving directly onto the fashion fabric. I had too many things still to work out.

I went early to my tailoring class on Wednesday past and cut out and machine basted the pieces together for half a jacket only - the calico I'd taken turned out not to be big enough for a full jacket. When I say half a jacket, I'm excluding facings,  collar etc of course. I went for the medium length. I don't like the long and while I love the short  length, I feel the style is too young for me - and it doesn't have pockets,  which are part of the course requirements.

Rory fitted me. The front dart was big but will be cut away in the final jacket. I have a forward sloping waist,  but she felt that the waist position at the side of my body was in the right place. She gave me the choice of keeping the shoulder width or narrowing slightly - I decided to keep. Seeing these photos, taken at home today, not at class, I'm less sure this was the correct decision. What do you think?

You can't quite see the roll line(pencilled in) - because the collar is pinned to make it lie better, the roll is not going all the way down. Do you think the shoulder is too wide?

She repinned the back seams.

She then said I could miss out one of the seams at the side but there would then be less waist suppression possible there. I don't want too boxy so opted to retain it.

I thought you'd be able to see where the armhole needs dropped as the current is far too high but it's not showing up here.
More pinning out.

In addition, she pinned out a wedge across the collar towards the side to encourage the collar to lie properly.  PP do this at tissue stage.

You can see the pencilled in roll line here - I need to true this

I need to transfer these changes to the pattern tissue then I think I'll make up in a cheaper fabric first to check further on fit details.

I quite fancy the jacket in boiled wool - I bought some in Leeds at Sew Up North


As a postscript, I'm thinking this could be my early bird make for SWAP 2017. Add some navy...

Monday 7 November 2016

A post note - the tee is a wadder

I took the blue tee shirt (Cashmerette Concird) to class tonight - see 2 previous posts.  I found it very uncomfortable as after wearing it for no more than a few seconds and a bit of  movement, it would start to ride up and the front neck pushed against my throat and it felt tight and uncomfortable under the arm. There was excess fabric in front of the armscye.

The neckline was puckered in part because I hadn't trimmed it adequately (taking shortcuts as this had been a toile). I snipped the neck and that helped the neckline issue - it lay much better and the puckers diminished. Though I still found the shape odd, which I put down to the shoulder seam being too far forward for me.

My assumption was that the tee shirt was too tight, hence it riding up to a smaller part of my body. I put this down to the fabric being firmer with less stretch than the original, though still meeting the stretch criterion specified by the pattern. . I wondered if the folds of fabric were an indication of needing a FBA. I wasn't sure about other issues.

Rory and Dan agreed the tee was too tight. There was distinct tautness across the front. They were also concerned about the shape of the sleeve, though additional fabric at the front bodice would help this. They thought the armhole was a bit small and high. The other ladies in the class thought there was too much fabric at the back, as I had, as I could grab an inch at each side just behind the side seam.

I decided it wasn't possible to make further changes to this tee that would in any way improve the fit.

Rory felt that the pattern needed rather more change as the too far forward shoulder could be amplifying the issue and asked me to take it to class to get checked before making another.

I no longer have this tee shirt. You're surely not surprised! The other ladies in class asked if I couldn't wear to garden or do the vacuuming. However, I said it was really too uncomfortable. Rory said I was a perfectionist. I don't think it needed a perfectionist to reject that tee!!

Will I make another? I'm really not sure. Is it worth it? I'm really not sure. I rather feel I would be better starting with a closer starting point. I'm really not sure, though. Certainly, I have no plans for one over the next few months.

Sunday 6 November 2016

Sew Up North in Leeds on 5th November 2016

Becca and Jenny organised the Sew North Meet-up in Leeds,  which took place today. I'm on the train home as I write this. I'll try to sort some photos tomorrow in the daylight. I didn't take any at the event itself, sadly.


To be honest, I wasn't sure about attending as I am clearly the oldest who does. I don't mind that too much as I was always the oldest or thereabouts attending my earlier sewing classes. I just hope I don't make other people feel uncomfortable. I had a few people asking if I was going so I decided I would. I particularly wanted to meet again the ladies I met at the Yorkshire Spoolettes meeting in Dewsbury in February - Margaret,  Karen, Ali, Hila, Corrine.

The train trip to Leeds is just under 1½ hours. I left home at 7.45am. Nice and relaxing. I went on an earlier train than I originally planned just in case it was late. I prefer to be early than late. No problem,  though. We met from 10am in Costa on Briggate. I'm not sure how many we were in the end, I think 48 had signed up for part of the day at least. I met Becca and Jenny and handed in the sewing book (Nancy Zieman's Confident Sewing Collection) I was donating to the raffle - a lovely book, well 3 books in one, which I'm sure the winner will enjoy. I have another copy at home.

The first people I saw in a sea of strangers were Ali and Margaret. I ordered something to eat and a coffee as I wasn't sure when I'd get a chance next and it was already a while from breakfast. Then Karen arrived and we had a chat. She also commented on the fit of the tee shirt  I made (from a photo - I didn't wear it). We agreed that fabric makes a huge difference. Then Hila arrived and came over for a chat, congratulating me on getting to round 2 of the PR Sewing Bee. She's becoming quite famous! Jenny and Becca had a goody bag including fabric discounts for the day.

Clearly that number of women couldn't go around Leeds in a group,  particularly on a Saturday!  And particularly when this was a special weekend in Leeds with the unveiling if the ‘World's Largest Kissing Tree’ I started in a group with Margaret, Karen and Hila and we expanded and contracted until just Margaret and I finished together. I was Margaret's shadow (sorry,  Margaret - I hope you didn't mind!) as I didn't know my way around.

I was still looking for a suitable fabric for a kimono for Joanne.

We first went to Samuel Taylor. Hila bought a beautiful remnant of a Liberty wool fabric in red, grey and cream. There wouldn't be enough for me and even Hila felt she’ll have some problems because of the need to pattern match. She's incredibly productive so I'm sure we'll be seeing what she makes before too long! First she is doing the PR contest (One Pattern, Many Looks) ...and she's going with the make a red dress for Christmas. I didn't buy anything but went back later, on the way to the station, as I'd forgotten to get a yellow jeans or trouser zip. They didn't have that colour, sadly. They had run out of the quilting materials Margaret wanted.

From there,  we went to Kirkgate Market. Jack's Fabrics, B&M Fabrics stall (with discount), haberdashery stall and a stall selling African waxed fabric. Lots of lovely fabrics but I didn't buy anything! I was tempted on a couple of occasions but the fabrics weren't quite right. The patterns on the waxed fabric were great but I feared the fabric was too stiff. Others we were with bought plenty!

We then went to B&M’s shop. Again with a discount. I bought boiled wool in two shades,  navy and raspberry. I see the raspberry as a jacket very soon but the fabric is quite fine so I need to check that it's suitable.

I think the colour is showing not too badly. Our weather is atrocious today so not much daylight! Plenty of rain.The navy fabric is slightly finer and smoother - I haven't photographed that here.

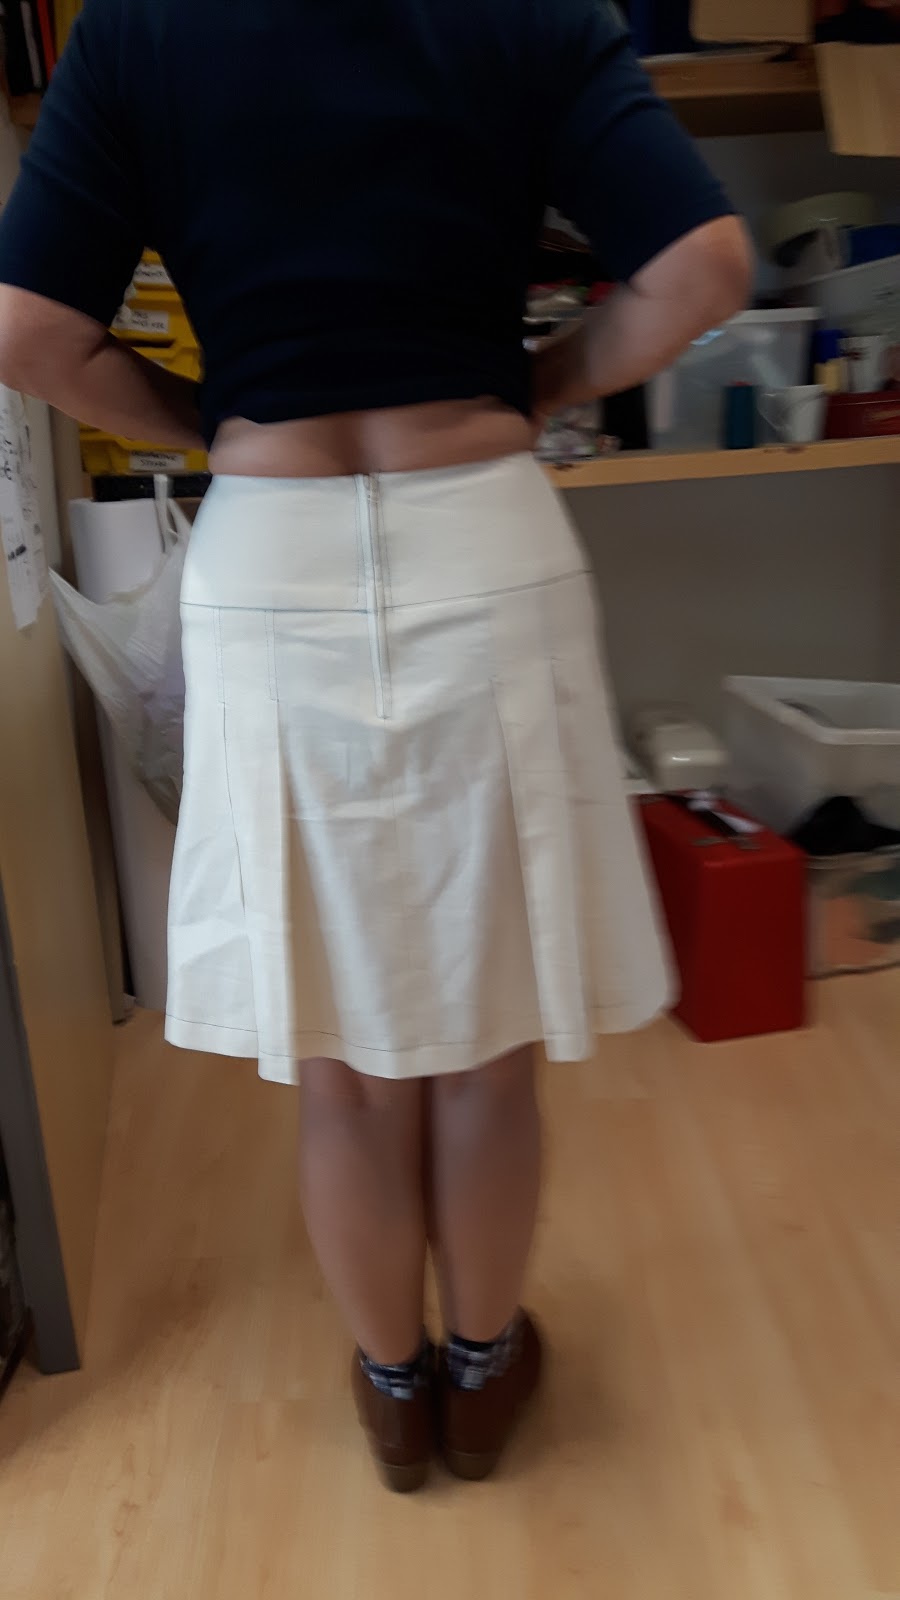
I like the medium length version B - my colour is pretty similar!
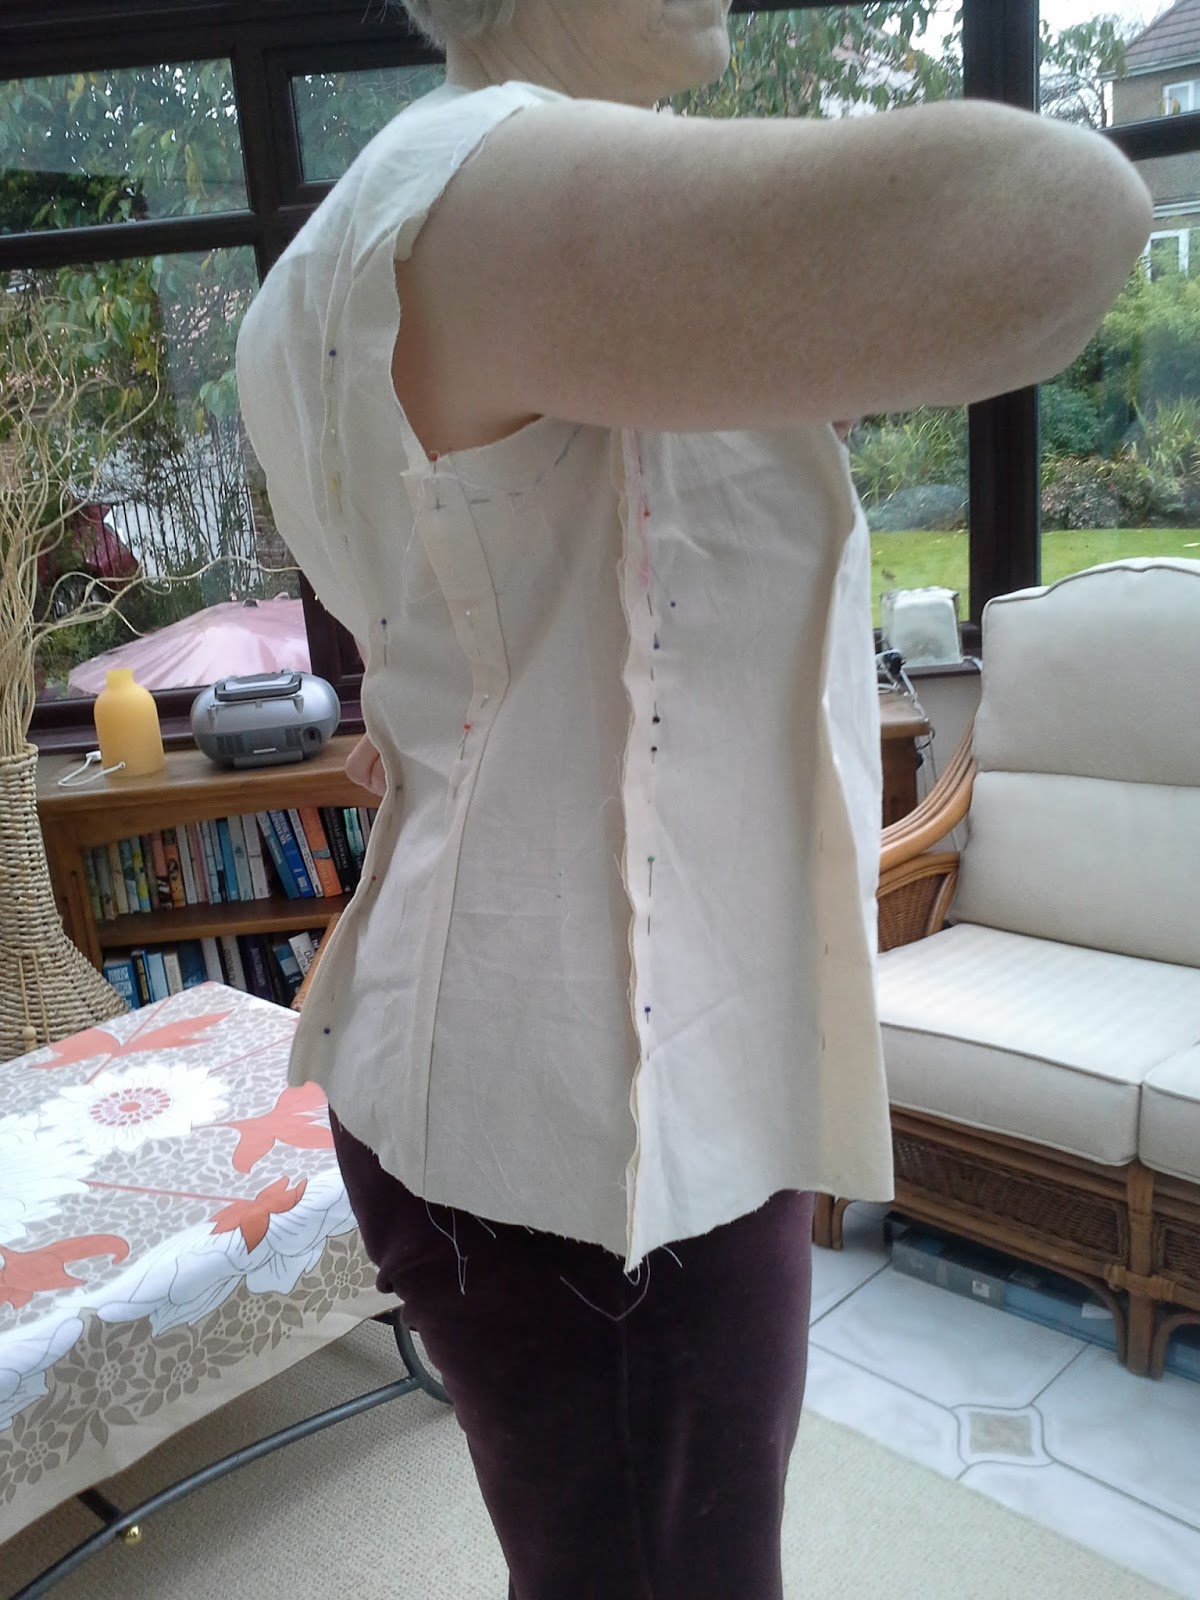
I've started to fit it in calico and will be posting about it in a couple of weeks.

McCall's 6172 Version B


I bought thread for these plus yellow for the yellow fabric. No suitable zip. Margaret bought the end of the roll of teal boiled wool (gorgeous) and 2 metres of the navy I bought. She's thinking of a fairly full and drapey skirt. Margaret has been making lots of gorgeous quilts and other crafts (check them out) but is planning to get back to some garment sewing. Another very skilled and productive sewer!

We decided against going to the new John Lewis which has a small haberdashery - I have one at home so no point,  really.

We then went to Peter Aldous, a rather nice craft shop, which Margaret hadn't previously visited so was keen to see. She bought a clutch pencil. The we decided to have something to eat before meeting the others at Fabrication Crafts in The Light - it is a Social Enterprise supporting micro craft and fashion businesses also teaching crafts skills in house and in the community. They provide ad hoc work space, and have recently set up the Leeds Fashion and Craft Network to increase this support. It's not a funded organisation.
At Fabrication, we had tea/coffee, chocolate cake, bought raffle tickets and swapped fabric and patterns (though there was loads left at the end)

I was incredibly lucky! I got some beautiful Linton tweed Karen had put in as it didn't suit her warm colouring. I'm cool and found it perfect!


I also got a black lightweight fabric with a blue flower which I think will work well for Joanne's kimono (David thinks the black floral silk is better, though).
I'm not too sure whether the background is black or dark navy

I put in a lot of patterns and a couple of books but no fabric on this occasion. I don't know if any of my patterns were popular. Certainly some of the magazine freebies were duplicated. I got a dress pattern and a unisex adult/child gilet pattern (next term we are making a padded gilet. I don't fancy it for me as I don't need to add padding! I might make for my grandsons).

I was even luckier in the raffle! I won a pair of tickets to the Knitting and Stitching Show in Harrogate and 2 metres of fabric of my choice from Girl Charlee.  I indicated I was going to decline this but was asked for my email address, so I accepted it. It's just as well really as Margaret won the next prize, the star prize,  a £100 fabric bundle from Minerva Fabrics. Gorgeous fabrics. ready to take her back to dressmaking. If I had declined, she wouldn’t have got that! The raffle raised over £200 for the Yorkshire Air Ambulance.

Margaret is keen to take a Chanel jacket class and I offered to go with her. I'd enjoy that. I'm not sure when it will be. I have the fabric, though!


I asked Ali about her new combined coverstitch machine, which she loves . Sounds fabulous!  She showed us the fantastic stretchy hems on her top,  which she had finished just last night. Gorgeous fabric too. Hila reckoned such would be an investment for her, too,  as she hopes to sew to a hundred,  like Lillian Weber, the amazing woman who sewed well over 1000 dresses to donate to Dresses for Africa. “Dresses for Africa is an organization which not only clothes little girls in Africa (boys too) , they do lots of other projects there, like building wells and community centers to improve lives of people in villages in Africa.” As I mentioned earlier, Hila is very productive! She was one of the bloggers on the blog tour for the Pattern Review Lillian dress.  I could sew every day from now until I'm 100 and probably not use up all my fabric! I hope I'm exaggerating!  I have clear plans for today's fabric. No plans for a coverstitch machine, though.

I was pleased to hear that Ali is planning a further Yorkshire Spoolettes trip to Dewsbury. I'd better get sewing!

We looked around the shop and those closer to Leeds enquired about their classes etc. The shop has some beautiful craft and designer items, selling work by over 40 local artists and designers - beautiful gifts. The staff were wonderful hosts today and kept the tea, coffee and cake coming!  We put in a donation for this. Fortunately, I'm not fond of chocolate cake so wasn't tempted beyond a mouthful.

Luckily, I had an open train ticket so could travel home when I wanted rather than having to wait until the time of the train I had booked a seat on. We finished earlier than I originally thought we would. I really didn't feel like Christmas shopping, despite Leeds looking great and clearly being a great shopping area, so just made my way to the station.


I had a nice day and am glad I went. It's nice, too, to be getting home at a reasonable time. We hadn't made arrangements to go to any fireworks displays, but we could do now (though probably won't!). (I watched Strictly but fell asleep! Getting older!)

Friday 4 November 2016

Cashmerette Concord - part 2 - and, yes, a completed garment from the toile

Part 2 for a simple tee shirt,  you ask?  I'm not a fast sewer and have other things going on, as usual, too, as you'll see. I'm not in a hurry with this. It's quite nice to be able to take my time.
Completed tee-shirt


Altering first toile

I took the original tee to my sewing bee a couple of Thursdays ago now. I took advice about the gusset insertion to the bodice. Just as well as I was going to shape the pieces like the bodice sides but I was advised to make a smoother more regular shape. The first was a bit like a chilli pepper. The second a slightly bowed triangle. I made this triangle 5cm across at the top, tapering to zero at 18cm. I then added a 1cm seam allowance all around. I carefully marked the bottom of the triangle.


I cut out one new sleeve - to minimise fabric use.


I inserted the gussets into the bodice, both sides. I was more successful with the sewing on one side than the other. I tried on the bodice at this stage, properly, and under the arm was very floppy but Lynn said I couldn't really judge until the sleeve was inserted.


So I went ahead and inserted my one sleeve. It went in beautifully. The top of the sleeve cap was smooth and gorgeous. But. You knew there was a but coming, didn't you! Yes, the sleeve was too loose and under the arm still loose and floppy. I clearly didn't need such a big biceps adjustment. I had originally measured my biceps at the widest point and added an inch for ease, as recommended in sewing books as the ease for knits and compared to the pattern. My measurements were 4.5 cms bigger than the pattern. Obviously, different stretch knits will behave differently. I can certainly see why each different knit would need a toile.


Lyn examined the tee and concluded:
  • The gusset is too wide. 1 cm would be adequate.
  • The sleeve is too wide by the same amount
A view looking from narrowed gusset up to narrowed sleeve. You can see how much I was going to remove

  • However, the sleeve cap fits beautifully, so consider just cutting off at the sides. (Considered - done) Note, of course, that this is the original sleeve cap shape as I kept that when I widened the sleeve so the original pattern sleeve cap is lovely.
I don't have a picture of the lovely sleeve cap at this stage. This is the original sleeve cap shape

This shows the bodice with gusset attached to the widened sleeve, lying on top left of photo
I have quickly re-stitched here to narrow the gusset - the dart shape is the amount the gusset is too big.
The amount between the two seam-lines is what I need.
Even restitched, the gusset is not too obvious. Here the sleeve has also been reduced in circumference


So I unpicked the gussets and the sleeve, redrew and cut out the required width of gussets and trimmed the sleeves 

I put in the new gusset to the side pieces of my original fabric tee-shirt. My sewing wasn’t perfect - I think I need to practice gusset insertion as this was my first time. Really, rather than a gusset, it’s a godet - but the sewing is the same and I haven’t done that either apart from one practice in class last year I think. I don’t think that was that good, either.
I sewed on the neckband. I realised after I had done this, that there was some puckering right at the front, so I decided it had to come out. My marking snips hadn’t worked properly and I think that I had uneven stretching. I couldn’t get the stitching out.

I sewed the bands onto the bottom of the tee. The back of the tee shirt is slightly longer than the front, which is quite nice. However, I didn't know whether I got the bands mixed up or whether I didn’t sew properly (I had lost my marks) but the front and back band didn’t end up at the same place, though they should have. I decided that for the toile this didn’t matter. I was going to sew up the sides as per instructions but then read a review where the reviewer said she’d definitely add the bands afterwards. I was going to ask in my next sewing bee but realised that despite me not having lengthened this pattern at all and me being tall, I found the length too long - more like tunic than a tee. So I decided I was going to chop the tee shorter.

I basted up the sides and tried on. Not happy. The back was too wide by quite a bit and my thought was to cut away but wasn’t sure if that would work. Then, I wasn’t sure if the sleeves would work in the new shape of armscye. The front armscye was too low and gapey. The length was too long.So I went to the last part of a sewing bee I don’t usually attend. I went because I was missing my sewing fix with all my classes being on holiday and for this advice. I don’t usually go to this sewing bee, because the evening class is on the same day (same tutor - Rory) and because until recently I had golf in the morning/early afternoon.

Rory pinned the back armscye in. I’ll try to show a photo of this if I haven’t already taken the pins out when I was transferring the changes to the pattern. The pins show the stitching line, not the cutting line. She also commented that the front armscye was too low and needed filled in.

At this stage, I still couldn’t take the neckband off and had lost patience with the project. After all, I now had to change armscyes, cut off length evenly, perhaps take bands off first and take neckband off. There’s a limit even to my patience!

Second Toile/Second and a half Toile - and completed tee-shirt

I decided to use one of the scrap pieces that I found when sorting through my fabric stash to make another toile. I wasn’t sure it would work as it’s a bulkier fabric with less stretch, and only a one-way stretch (US - two-way) rather than a two way stretch (US - four-way) like the fabric I used for the first toile. I used the fabric previously to make a Pattern Review winter street dress. I used another colourway of the same fabric to make a dress for my daughter. I’m not sure what the fabric is. (Rory says it's a Ponte Roma) I bought it from the stock of a closed down pretty high class garment manufacturer. The factory closed down 7 years before I bought the fabric and had been in storage in a church hall until it had to be sold.

For this toile, I used the altered and narrowed back and the G/H cup front, which I had altered to match the altered back, meaning that it was slightly built up at the arm. I used the medium length rather than the long curved and faced hem and I again decided to use short sleeves and cuffs.

The fabric was much nicer to cut out and I managed to get my pieces out of the very irregular piece I had left. The fabric was also much easier to sew up. I rattled on pretty quickly. Neckband on, sleeves inserted flat as per pattern instructions. I used my sewing machine for the main construction but I was considering whether to overlock just to make things look neater (I decided not to).

I decided as I was finishing off for the night to machine tack up the sides to see if I could get the top on, with the fabric being less stretchy. Yes, I could. I felt the front armhole has too much fabric and so the next version would need that changed. I guess that the armhole didn’t need built up after the cup size was changed from C/D to G/H; probably I should have gone down a further size in the upper body but remember that I was worried about negative ease. Also, I had already adjusted the sleeves which fitted the armhole beautifully and I wanted to try them out without major further alterations.

I was coming to realise that there’s no such thing as a simple project!

Update, rather than a 3rd post!

I took the top to the sewing bee this week. The sleeve needed adjusting front and back and still more width needed taken away from the back armscye - it's now less than a size 12. I've done this to the toile and finished the tee.

However, Rory pointed out that the shoulder line was in the wrong position. That I couldn't change on this toile. I vaguely remembered that someone commented on certain inbuilt adjustments to Cashmerette patterns - obviously, FBA with regular sized shoulder, but did they also mentioned sway back and forward shoulder adjustment? I couldn't find anything on the web so emailed the company directly. As before, I got a helpful and prompt reply - yes, they do have an inbuilt forward shoulder adjustment and sway back adjustments (but not high curved back adjustment). They also offered advice as to how to change this in future tries.

I don't have a forward shoulder and don't need this adjustment, so my feeling was initially that this pattern range isn't suitable for me - I don't see the point in undoing an adjustment, particularly when this also affects the sleeve and the sewing order? I'm sure someone who does need this adjustment will welcome that it had already been done in the same way as the FBA had been done. Not a criticism of the pattern or the company. Horses for courses!

Interestingly, Dan said I wasn't really a plus size (!!). When I questioned that, she justified her thinking and pointed out that my proportions are completely different even if the actual bust, waist and hip measurements are the same.

Anyway, I finished the tee shirt including the sleeve bands and all topstitching. Not at all bad, though the position of the shoulder line was further forward than is ideal and the front neck is a little higher than I would like. This surprised me as I thought the original neck was actually quite low and wide - just shows, you need to wait to see the finished article - but also the fabric is very different.

I again asked advice in class.
Me in class - quick photo. Proper shoulder line marked in yellow thread but I don't think you can see it.
It hasn't been pressed at this stage
The verdict was that the top was fine and I was being overcritical of myself (what's new there?). Rory suggested that I emphasise the position of the shoulder seam by zig-zagging over the seam allowances, which would also keep the seam allowances flat (this fabric is quite spongy). Overall, everyone felt this was a very satisfactory top, which fitted well.


I did the decorative stitching over the shoulder seam this afternoon and just managed, as it was getting dark, to get some photos

Back- there's quite a bit of fabric pooling and David feels a couple of inches too wide in higher back. He likes  it

Side - there's a fold above bust.
I hope you appreciate this is a natural photo! There are certain parts of me I prefer not to show off!


Front. I tried to stand upright without twisting. I think you can just see that the shoulder is a bit far forward. I don't like the fabric folds above the arm.
 Dan said that as long as I realise that I'll have to modify the shoulders on the flat pattern to do an anti-forward-shoulder adjustment, that the Harrison shirt would be good to try. I had thought that it was a pity that I'd bought this pattern and was considering giving it away, along with another paper pattern I'd bought

So what did I change in the pattern?

  • Actually very little - only fitting, which is always necessary
  • I did not make any changes at all to the neckline
  • I did not change the length
  • I did not change the style
  • I had to go up to the G/H cup size.
  • This meant I had to go down at least one size.
  • Originally the charts suggested 14G/H or 16 C/D (the latter being more appropriate because of my larger than pattern waist size) but because I didn't want too much negative ease over the bust I took advice to go up a size and make 18C/D.
  • There was insufficient bust coverage and armhole gaping together with a too low front armscye in my first toile.
  • My next toile was a 16G/H, but trimming has narrowed the back to around a 12. The front is not narrowed so much - it's probably between a 14 and 16.
  • I had to add a smidgen to the sleeve width but the cap had to be reduced - this, no doubt, the result of my alteration, which was only partly undone - that is, I narrowed the sleeve by taking in at the sides and this left the sleeve cap too big. At least that's what I think. I haven't asked specifically about this.
  • I will adjust the shoulder and sleeve to alter the shoulder position for next time. I'm not sure what else might be required. Do you have comments, please?
  • Of course, this fabric has less stretch than the one I actually intended to use - so that will have to be taken into account.

Jacket making

I've just done FBAs on two jacket patterns. The process doesn't scare me. I hope to go back to basic blocks and work on garments for me from there. I'm going to update my blocks with help from Dan and Rory. I'm not a designer, though, so my plan had always been to use details I find in commercial patterns on my blocks

Fabric Destashing and Cataloguing

During my enforced break from sewing classes and sewing bees (mid term holidays) I began sorting out my sewing stash. It's horrific! David keeps appearing with more… I even found some knit fabrics that would have worked well as a toile for this t-shirt so I needn't have used my good stuff, a rather nice viscose jersey, for the first toile.

My plan is to catalogue properly. Any advice on that? I don't have an iPad or iPhone so can't use a lot of the apps recommended. I started previously but didn't complete. I'm also going to get rid of (some) fabric that I'm not going to use. When I started sewing (over 3 years ago now) I bought lots of fabric that I thought would be good for practising. They are polyester and polyester suitings and I dislike them. I prefer calico for my toiles (I had never heard of these when I started). I've also realised that with all the effort I put into garments, I want good quality fabrics, with a bias towards natural fabrics which breath better. I don't like wearing a lot of the RTW knit garments because of their lack of breathability. I'm trying a viscose knit with this tee.

While sorting out my stash, I came across the remnants of fabric from previous makes. I was originally advised (incorrectly!) that prewashing was not required for some of the synthetic stretch fabrics. I didn't prewash a cotton jersey. Bad news. I find a lot, though not all, of the RTW tops shrink, presumably because they're not prewashed. I thought at first it was me putting on weight. I find that it's mainly sleeve length and sleeve tightness. I've always been able to buy RTW tops provided I didn't want full length sleeves - I have very long arms and don't often find full length sleeves long enough. If a three quarter length sleeve shrinks in length, the narrower sleeve bottom is now much further up my arm, where the arm is fuller, and more involved in the elbow, and it's tight. Of course, if that sleeve was actually intended as a full length sleeve but it's seven eighths length on me, the situation is even worse. I also hate any shrinkage in body length - I need all the length I can get. It's horrible to discard tops that I like but which don't fit anymore because of this shrinkage. I do,  however, have a very willing recipient of these!  This is one of the spurs to making my own,  and pretreating the fabric. So I'm washing (and tumble drying!) quite a bit at the moment.

How Do You Read Blogs?

It's a while since I've posted a blog,  lots of reasons. I'm thinking of starting again. However,  I used to read the blogs I fo...