Showing posts with label Chanel jacket. Show all posts

Thursday, 27 December 2018

Hits, misses and neutrals in 2018


I seem to have been quite busy with sewing this year but with very little to show for it! I have quite a few craft items which have been successful in their own category and some knitting - oh and repairs and refashioning. As there is so little to show, I’m doing one post for both successes and failures for the year. I'm not including failures that didn't get as far as being made up - and there are quite a few of those!

I will do them in order from the start of the year, all together in one category. Click the title to get to the appropriate blog post where the pattern number and details will be listed.

As before, I'm linking to  Crafting a Rainbow’s Top 5 of the Year.

January
Kimono - success
In January, I made a kimono for myself. I like the kimono, feel it fits well and do wear it. There is a but - the colours are not right for me and I have been intending to remake with a fabric more suited to my colouring and my other clothes. I tried to get a similar fabric but haven't been successful. Nevertheless, I consider this a success.


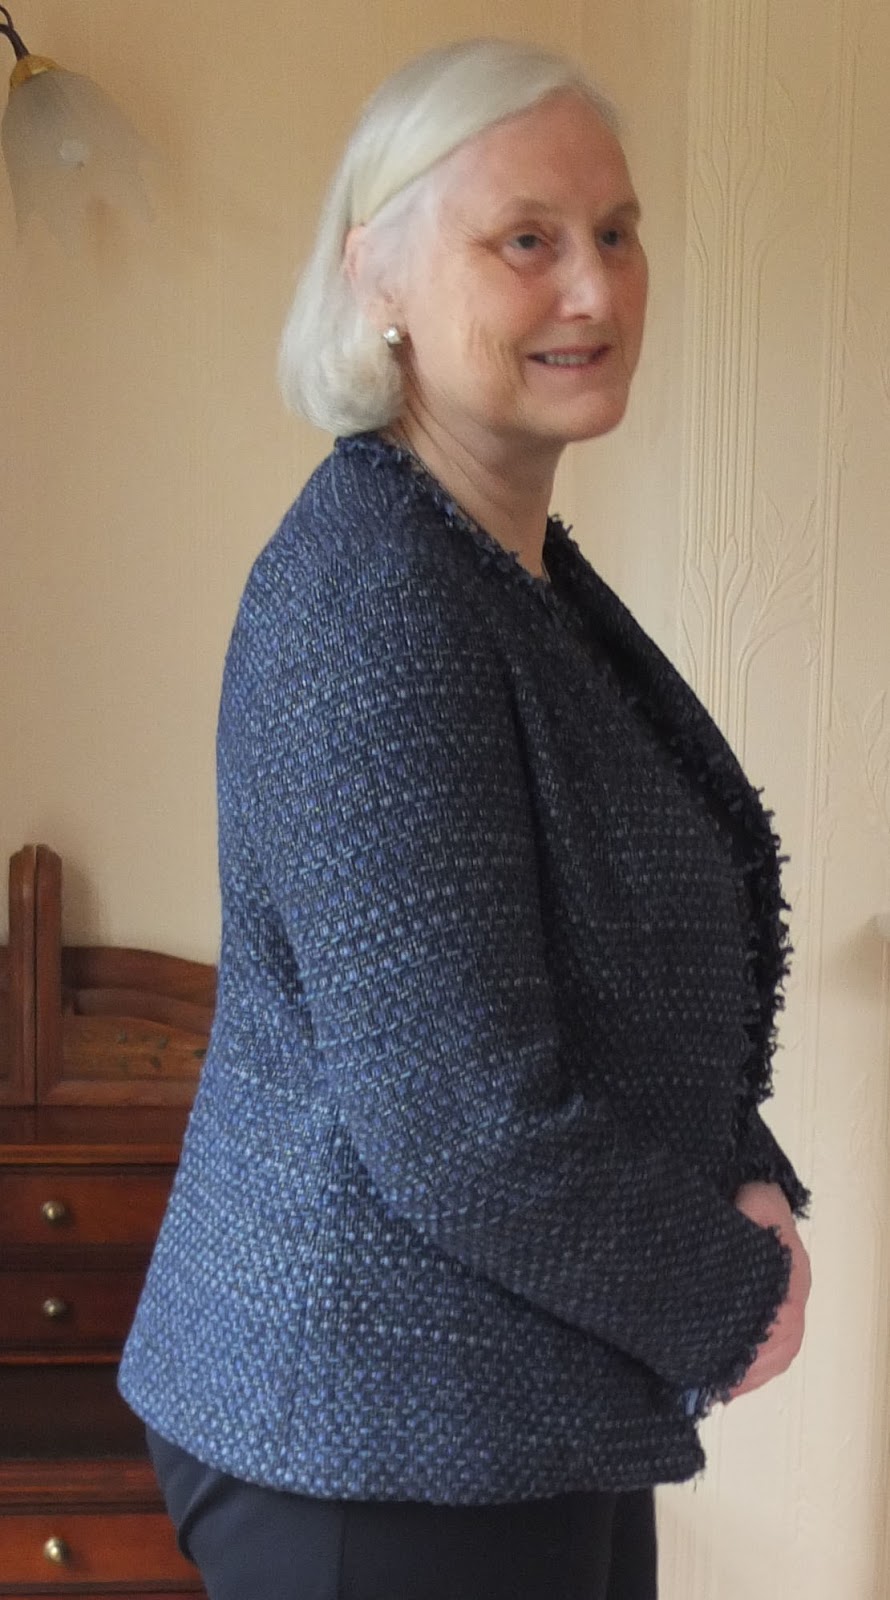
In January, I finally finished the Chanel-type jacket I had been working on for some time, after starting it in a two-weekend class I attended with Margaret of The  Crafty Creek in the autumn of the previous year. I think the jacket looks great but I haven’t really worn it. This is mainly because I feel it is a bit snug (I have put on weight, alas). I feel it is snug around the biceps and it lies with the two fronts quite far apart. I learned such a lot from this exercise, though - very much including what I would do differently next time. The main thing I would change would be to overlock raw edges before started construction. I’ll have to say this is a neutral as it hasn’t been worn in the way I had intended – so neither failure nor success.


February was a very unsuccessful month with several items and pieces of fabric being rejected. March was a more successful month

It was cold in March. We haven't had much cold weather yet this winter.
I made the Jasper sweatshirt and have worn it a lot though it’s only getting cold enough now to think about it again. I like it but it was criticised on the style website I’m a member of for being too dark for my colouring - while I didn’t want that to influence my view of it, it has to some extent. I plan to make it again but in slightly lighter weight fabric

New Look 6481 tops - 2 x successes 1 x fail
I’ve worn these tops a lot. The fail was as a result of using a fabric with insufficient stretch and it was too tight for me. It went to my daughter who wears it, as far as I know so not a total failure. Operative error.


Regularly worn. I like one better than the other - the one that has slightly more stretch - as it feels more comfortable. Same fabric as the NL 6481s


Trousers - epic FAIL
For the whole year, well until autumn really, I was trying to make well-fitting trousers. The closest I got was making up a pair of trousers that I was forced to wear for golf matches as I had no other suitable trousers which still fitted me. I did get to wear them but they were neither stylish nor comfortable.
I intend to solve the problem in 2019!
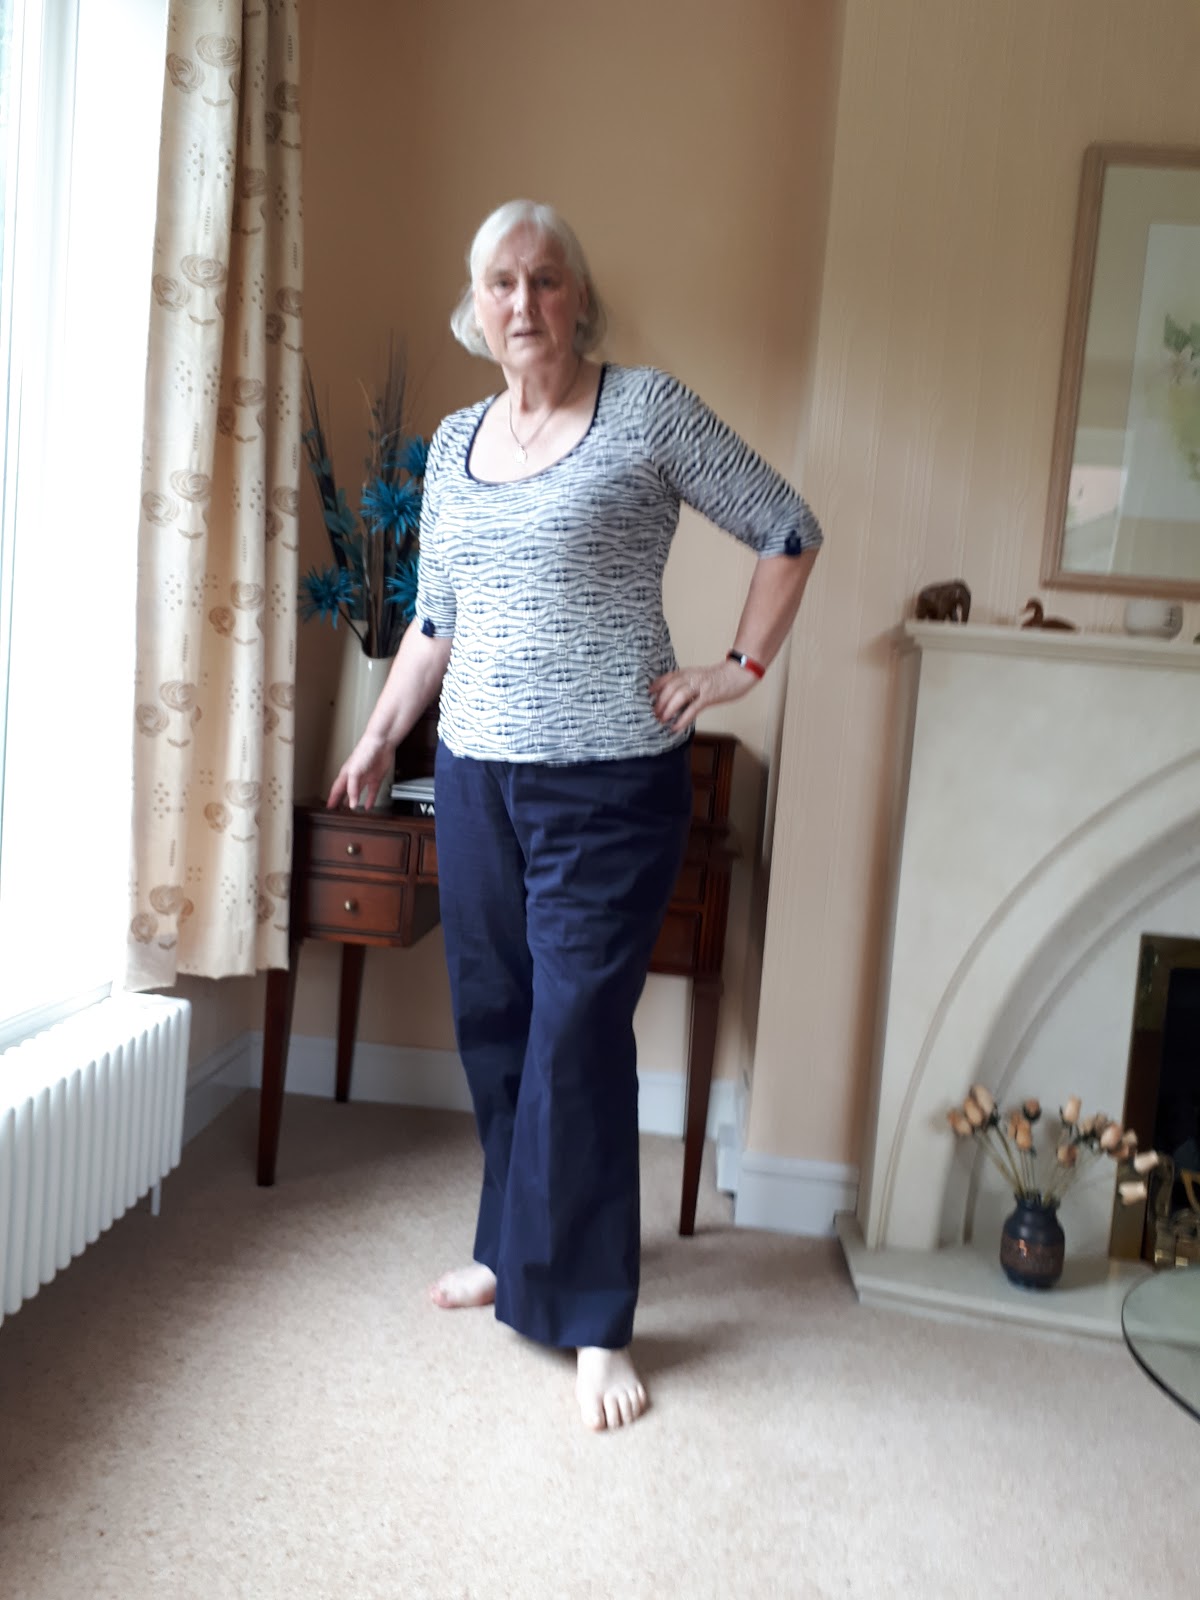
 
I have so many awful photos of the various stages - this was the least bad
I haven't linked to a post

Self-drafted top - failure
I finished this but have never enjoyed wearing it. The fit just isn't right.


I made another Cashmerette Concord, this time with a V neck, tunic length. I’m not really wearing it - I think because the neckline is a little loose/stretched and a bit low for my liking. Operative error again.

Items for my daughters - successes. Probably
I made another pair of culottes for Joanne. While she was visiting for Christmas, I made some repairs to a much earlier pair of these culottes (she loves this style) and has told me she hasn't started to wear the most recent ones as yet.


I also made another silk dress for Helen. 


I am sure these will be successful but it’s too early to say as yet.

Gosh, that’s not much to show for a year! The trousers took up a lot of my time and made me feel completely despondent so I had to give up. I did a lot of garment refashioning, garment repairs

Machine embroidery - successes
I started to use my embroidery machine and enjoyed it. There is quite a big learning curve that I haven’t mastered yet, but I’m beginning to produce items that I have enjoyed making and the recipients have liked receiving.

Classes 
I attended a few classes - working with leather; silks and sheers and corset making. I have taken something from each class. My oldest daughter likes the corset I made (a standard size 12 with a D cup, clearly not for me!) and even though it is a sample speedily made up a couple of days before Christmas, she has taken it home with her. My youngest daughter found a little too much space in the cups - she added a couple of cooking apples to fill the cups out! She liked the waist shaping it gave her, though - she has a fairly straight figure

WIPs
I have some WIPs, ready to restart in January

Make Nine Project - failure
I signed up for the make nine project and have not succeeded in making anything like 9 items. This is because quite a few of my items were going to be trousers/pants and I haven’t got the fit right as yet. Is it possible that I won’t be able to? I didn’t make the jacket as that was to go with the trousers.

RTW Fast
I have been more successful with the RTW 2018 Fast, depending on how you measure success! I have done the fasting - but have not managed to fill the gradually increasing holes in my wardrobe.

7 Steps to Style and Evolve Your Style - failure
I intended to put everything into this but found I just didn’t. This was partly because I was on the RTW Fast and so wasn’t buying new clothes (or even charity shop clothes for refashioning). I had a huge bundle of old clothes that needed restyled but they got me down, I had little idea how to proceed (Lots of trousers) so I abandoned that idea.
I haven’t seen much point in buying new fabrics when I have huge stash or new patterns ditto. So this coming year, I will concentrate on making what I have manageable and reflect me.


Friday, 26 January 2018

My Chanel-type jacket - part 3. It's finished.


My last post about this jacket was over 4 months ago as I was busy with family things and making the outfits for the murder mystery weekend (with of course the exception of David’s Franciscan monk’s outfit that he made entirely by himself), posted earlier. However, I hadn’t completely forgotten about the jacket.


This post has been part written on each of several days. Today I just wanted to get it posted (I'm still feeling rather unwell). The quality of the photos could be better (understatement!)


After my last post, I removed the sleeves, reduced the size of the seam allowance in order to give a bit more space for my biceps and re-attached to the armscye. Previously, my pattern matching was absolutely perfect but for some reason I couldn’t get it perfect this time - strange as the sleeve attachment previously was very wonky as I discovered when I was removing - the seam width changed a few times and in places I had double or even triple stitched as I was having issues inserting the sleeves originally. I had to consider how many times it was appropriate to redo and took advice from Rory and Dan (Gillian's classes were finished) - their advice was that the sleeves hung beautifully and the pattern matching was fine so to leave. I took their advice. I also had to take into account that while this jacket will work for me, the sleeves are too short and although the fringe will hopefully disguise that, I’m not really a fringe person!! So this could be a really fancy wearable toile! No, not a toile as I will consider it a finished jacket but it will highlight any future changes required.

The next step was to create the fringe. As suggested by both Mary (Cloning Couture) in comment on my last blog post and Kate at my weekend sewing trip, I did try cutting the fabric strips on the bias and compared this to straight stitching. However, I preferred the appearance of the straight fabric strips. In addition, I had originally auditioned two fabric strips on top of the lining but found I preferred only one as it was less full - as I said above, I’m not really a fringe/frilly person and I found the two layers to be a bit ‘too much’. Anyway, I told myself, Chanel actually used the selvedge from the fabric (I considered that too) and one layer appeared closer to that. I used the lining fabric cut on the bias to allow it to go around corners more readily. Some people have asked me about this and how I did it. I'll have a look to see if I have any photos - I think I do but my computer is in intensive care and I've bought a new one which I haven't got set up as yet. I might have some on my phone. I'll post if I can - or perhaps post at a later date. I can't check at the moment.


I created the fringe strips in my sewing bee with Rory. Sorry Rory for the incredible mess this made (glad I wasn’t doing it at home!!). I couldn’t believe how many threads and the amount of lint from my fabric strips! I did have to trim the strips afterwards as they were a little too wide. Even more mess. I attached the strips to the bias cut lining and was ready to go.

I had already marked my jacket just inside the seam allowance with machine stitching, which would also act as stay stitching. Gillian had said to put tape around the neckline but as I was adding two layers of lining underneath into the neckline turnover, I decided, rightly or wrongly, that I didn’t need to do this.

I attached the lining part of the strips to the jacket fronts and neckline, just like you do with piping, carefully ensuring that the junction between the lining and the fabric lay along the stitching line. This was more difficult than it sounds as I could scarcely see my staystitching. Maybe I should have used a contrast colour of thread. I pinned and then tacked. I quite enjoy the process of tacking (basting) by hand and feel that it made it more likely for the horizontal patterns on the fringe and the jacket to match. I then machine stitched the fringe to the right side of the fabric. I did this at my last class of the year with Lyn, who helped me with the corners. I found it very difficult to sew with the bulk of the fabric on my right as was required for one of the corners. I didn't add fringing to the bottom hem. Despite my care, the pattern between jacket fronts and fringe doesn't exactly match but I’ve decided to leave it as I don’t want to carry the jacket unfinished over to 2018!


Ha! It's now 2018. Don't say you're surprised that I didn't get the jacket finished! In December, I started and completed the long-promised red silk dress for Helen, made a few Christmas presents and finished my knitted waistcoat. I did a little on the jacket but I'm unfortunately not someone who can watch TV while working and I usually watch with David in the latter part of the evening. If I'm really pushed, I'll sew right up to bedtime but I prefer not to do that.

Next step was to turn up the jacket hem and stitch it in place. I placed curtain chain weight in the hem fold and secured that at seam lines and the ends. This was the process if there is no fringing - I'm not completely sure how I would have done this with fringing. Just a minor modification to the process, I feel.


I said I didn't like the double fringing but the single seems a bit scrappy. I think maybe I'm just not a fringing person. I decided I'd continue, though. Next time I'd go for braiding - I would've done with this one if the sleeves had been long enough. I bought a choice of braid and of buttons but haven't used either.

Next, the lining seams. Sleeves first. The under layer of lining is smoothed across the seam and pinned in place down the seam line. It's then cut level with the fabric edge (forgot to say seam allowances were trimmed). Then the other side is smoothed across and folded under level with the seam line and the first pin taken out and transferred to keep the two lining areas in place. In some cases, I had stitched my quilting lines too close to the seam lines - I needed more side than I had anticipated. So I had to unpick a fair bit of my quilting and re-tie my threads. This is an ongoing task. Next time, I would be aware of just how far away from the edges I need to stay and this would save quite a bit of time.


It isn't too difficult - but, boy, is it tedious! I do hope it will be strong enough! I'd hate my lining to start falling apart.


I continued in this vein, a little bit each day. Things did move on and the hand sewing was often a relief from the day. Today (Thursday 25 January), I had just the sleeve lining/jacket lining armscye junction to do. I took it to class with Lyn - I haven't been well, not yet recovered and wanted a simple almost mindless task. Lyn advised folding the jacket seam allowances towards the sleeve rather than opening them out as elsewhere. She felt this would give a nice shape. I did this, then smoothed the under layer of lining over, pinned then tacked them in place, identifying the stitching line. Here Lyn offered an important piece of advice - the need to ensure the lining is not pulled too tight. I had been pulling too tight so adjusted that. After I pinned the over lining over, I tacked and removed the pins so I could try the jacket on. I think it looks pretty good. When I tried on, the tacking stitch was under pressure in one area so I added a little extra there.

I finished stitching one sleeve in place and managed to get the other stitched in place tonight.

I'm not putting pockets - or mock pockets, as you no doubt guessed.

So that's it finished!
I'm quite excited now that I see it finished!

It's rather crushed so I'll hang on Madame and steam tomorrow. David liked it when I tried it on and said he'll take some photos tomorrow.

I didn't steam before I took the photos as I was worried about losing what little light there was available. I also realised just now as I was finishing this post, that I didn't put the chain on around the lining/hem junction - after all that searching for suitable chain!! I'll probably leave it off.

Summary of resources used:
Chanel jacket class by Gillian Hargreaves - 2 days. I attended with Margaret (The Crafty Creek), who has blogged about the course. I'm not sure if she has finished the jacket as there has been no further blog post.
The Iconic Tweed Jacket by Lorna Knight (Craftsy class) I bought this a while ago and hadn't watched. I found it a great class and enjoyed the instructor but her methods were slightly different from those I was following from Gillian.
Books by Claire Schaefer
Assistance in class from Rory (Centre Front Studios) and from Lyn (WEA) as mentioned in body of text.

Then on to other projects!


Sunday, 15 October 2017

Making a Chanel-type jacket day 2

In progress
Following my last class, my tasks were to quilt the lining to the fabric/interfacing combo. Purists will realise that a 'proper' Chanel jacket doesn't have any interfacing but the interfacing here was ultra soft and lovely and probably helped me handle the fabric. To quilt, I did large herring bone basting stitching across the pieces, to secure them together. I originally tried pins down the lines of my stitching. These nicely marked the lines and secured the fabric but a couple caught the fabric so I ended up not going that way.
The pins here show where the stitching is going to go

Each piece was quilted with a line of stitching from the right side of the fabric, starting in the middle of each piece and ensuring the combo lay smoothly. I had a suitable pattern to follow. Each line of stitching is finished at least 1" from the sides and 3" from the hem. The process is not difficult, I was glad to find. You can, by the way, handstitch the quilting but that's not for me. In my case, I had to reduce the machine thread tension - and now think I could perhaps have reduced it a bit more. In my practice piece, I used a piece of fabric that had inadvertently been fused with interfacing on the 'wrong' side and the quilting lines are completely invisible. That's not the case with the other side of the fabric but at least my lines are even! My fabric could be used either way. I actually preferred the side I've used as the wrong side but Gillian pointed out that it would be particularly prone to getting caught so I took her advice and used the other.


So the pieces quilted were - fronts x 2, side fronts x 2, back x1, undersleeve x 2 and sleeve x 2. I did make a new back piece as when I looked at the piece I had, it was skewed. I only found this when I went to start the quilting. So I made up a new pattern piece the full back piece (the original has you cut on the fold by whatever means you choose to interpret that - mine was not on the fold, but flipped over on a single layer of fabric). It might have been okay but I had enough fabric to redo so that's what I did.
The underlying pattern shows the discrepancy
Better focus than the previous one

The stitching lines from the quilting were left with long threads at the end. These were pulled through to the inside of the sandwich and we tied them off. My lines were too close to the ends, particularly as there were a number of adjustments carried out in my fitting so these will have to be retied. It's important not to tie the ends too tightly, or that causes a dimple on the right side of the fabric. My ends are much shorter now so that will be a challenge!

After the quilting, I had to baste the jacket together for the final fitting. The fashion fabric is sewn together, but the lining left free. I used a big stitch on my sewing machine for this. Margaret hand basted. We roughly inserted one sleeve only.

On the way to staying with Margaret prior to the second class, I made another attempt to get suitable chain for the jacket and was partially successful. I had ordered some on-line but it was much too fine.
On Friday night, Margaret and I sat finalising our homework. Of course, we each tried our partially completed jackets to see what we thought. I thought Margaret needed quite a whack taken in at the shoulder princess seams as the shoulders were much too wide and the sleeve was lying strangely at the top. Margaret had also allowed extra for her hips but this wasn't necessary. I thought mine was too tight in the sleeves.

Day 2
When I was making up my jacket, I had taken in at the princess seams on the shoulder, tapering downwards towards the bust apex in front, as recommended previously but in fact, I needed even more as the shoulders were still too wide. Still - no alteration to the armscye! Lesson learned. There was even more taken out over the back - the original curve there is now much straighter.  Just under the arms on the side seams was also taken in, only for a short way.
Jacket basted, one sleeve roughly basted in

Right shoulder and back pinned (you can see in mirror)

I addition, my right shoulder required fabric to be removed from the neckline. This shoulder also needed to be shortened by taking in another portion at the princess seams. The left shoulder didn't require this. Yes, my shoulders are wonky!
Gillian pinning changes. You can just see the alteration to the neckline edge of my right shoulder
To my surprise, I didn't need to use the extra seam allowance sewn to increase hip width.

The jacket looked and felt much better.

I spent AGES, far too long, making the adjustments necessary - this because the patterns needed to be matched. The first time around, I hadn't been too worried about 'perfection' as I knew adjustments would be needed, but this time, things had to be right. It was tough, particularly over the curved bust area where there is both easing and pattern matching to be achieved. Also, I had to unpick lines of quilting as these now interfered with my adjustments.

Adjustments made. Pinned on centre front. Not pressed yet. No sleeves yet.
Next step was to trim any excess fabric from the seam allowances and insert the sleeves. Time was actually rather short so we trimmed just enough to finish sewing the shoulders and insert the sleeves. The jacket got a good pressing before this - apparently the last opportunity!

Gillian was happy with my jacket so far.
None of the hems done as yet so lots of raw edges and loose threads

She showed us the next stages.
  • Taping the neckline.
  • Folding up the hem and inserting the curtain chain weight.
  • Margaret is doing buttons so she had a facing and will need to do buttonholes. She is planning to do machine buttonholes. I have no facing as my lining goes right to the edge. I think Margaret is also planning to insert flange piping between her lining and facing. That looks rather nice.
  • How to sew the ling beautifully, by hand. Margaret got to start hers but I'm quite a bit away from that as yet.
  • How to add braid to the jacket edges. I was going to add braid but Gillian showed me how to fringe the fabric and I decided I'll go with that. Basically a strip of lining, two strips of fabric laid over it, sewn longitudinally down the middle. Then lining folded away from fabric (this is sewn to jacket fabric on right side on seam allowance for front) and fabric fringed by removing the warp threads. My sleeves ended up a bit short so I have decided that this is a suitable fix - fringe added to the sleeve cuffs.
  • How to do a mock welt pocket. Not a working pocket, which neither of us wanted. I need to decide whether to do a button or a fringe trim to match the front I'm planning

·        You'll realise that I'm not intending to do 'couture'

Since getting home, I have decided again that the sleeves are a bit tight. I had originally thought that perhaps after trimming the allowances etc they would be fine but I'm thinking not so best to do this now. I'll add just a touch at the two seams - even 1/8" would add a total of 1/2".

I don't think the finishing touches are difficult to do - fitting is clearly the biggest issue - but they are time consuming. I'm short of time at the moment so will probably do what I need to do a very little at a time and it will be a while before I can model the finished jacket.

I haven't yet made the amendments to the pattern for future reference but will do that soon, maybe today, before I forget what they all were!


I made the long jacket version but the length is fine for me as a shorter version and to do the long version with buttons, I'll need to lengthen the pattern by at least 2".  I'll also lengthen the sleeves.

Monday, 9 October 2017

Making a Chanel-type tweed jacket. Day 1

Margaret asked me if I'd like to go to a class in Leeds, at the Yorkshire School of Sewing, making a Chanel jacket, as I'd previously expressed an interest when we met in Dewsbury. Of course I would! Two separate days, with homework in between. Margaret offered to let me stay with her the night before each class which sealed the deal!

Margaret has already done a blog post following the first session, so I'm keeping this brief.


I originally planned shorter length, longer sleeves, no buttons and welt pockets.
We had a number of supplies to buy before the class. The pattern. Vogue 7975.
Fabric. Interfacing. Trim. Thread. Buttons. Chain. We had to make a toile of the jacket basic pieces to take with us.


My time was cut short a bit as my mother is in hospital but I had managed a toile suitable to take before she was admitted.


I made a toile using Swedish tracing paper and found that I could hardly move my arm up. I was surprised at this as I thought Chanel jackets were cut high under the armhole to facilitate movement. The whole shoulder shape was off, I thought. (I've changed my mind since but that's another post maybe)

Alongside this I had been making up a Grainline Morris blazer and had what I thought was a similar problem. With that my tutor suggested I add fabric to the underside of the sleeve and to the body of the blazer which helped (I have posted about this and am far from happy with the outcome so this was not probably the correct alteration to try). I decided to try the same here and initially thought that worked well. I added approx  1” to the underarm and to the side body. This of course made the armhole too small so I had to extend that upwards. More was needed at the outside than the inside. The end result was a greater distance between shoulder and apex which was good for my 5’11” frame, I thought, but there was quite an alteration/distortion of the armhole/sleeve which I tried to balance again and an alteration/distortion of the distribution of fabric around the shoulder area. A lot of changes. Second toile in calico this time. Unfortunately I wasn't able to get professional tutor help with the fitting of the toile as I haven't been able to get to classes.


There was no change to biceps width. No other changes to length. I made up the short version. I thought the body is a little short, perhaps by ½” apex to waist and by 1½” waist to hem but I didn't adjust due to lack of time. It's not bad and the first thing in the class is adjustment of the toile. So it's ready for better or worse.


I should say I traced the pattern so I haven't altered the original pattern.


Fabric - I had some choices in my stash. I'd been asked to supply 1.5 metres or 2 metres if a larger pattern match. As I'm both a larger size and a longer length I felt that my Linton tweed pieces were too short at around the 1.5 metres length. I did have a piece of Avoca fabric from Fabworks and bought a piece of bouclé from them at GBSB Live last week. Both long enough. The first is navy and silver (better for my colouring) The second black and cobalt. I'll take them both.


A piece of Linton tweed but probably not enough. I like the colours here.
Another option for later
Originally I planned to use the navy and silver fabric and really wanted to trim the jacket in leather. I visited Le Prevo Leather, which is only a couple of miles from my house, for the first time, and bought some beautifully soft fine navy leather. I don't know if it will be suitable so I decided to get some trim too to give me a choice.


Margaret and I went to Fine Fabrics of Harrogate and bought lining fabric and interfacing (though unfortunately not quite enough of either). We bought some trim and some buttons in Duttons for Buttons - and I bought some more in Bonds of Farsley which I had never visited (or heard of) previously. Originally I hadn't planned to make a version with buttons but the class instructions mention buttons so I thought I'd get them. Lovely buttons.


Tomorrow is the first of the two classes. Everything is ready. Margaret and I both hope to make two jackets alongside each other. I think one of mine will be short no buttons and the other longer with buttons. Both will have long sleeves as I don't like jackets with ¾ sleeves.


Day 1


I was somewhat apprehensive, despite having briefly met Gillian the day before in Harrogate.


Gillian wasn't happy with my toile. She felt my adjustments had knocked the fit off and there was far too much fabric at the back, in the wrong place. The neck and shoulders didn't lie properly. The back neck fell back.The shoulder seams were uneven. The sleeves didn't lie or hang properly. I agree that this was the case. She feels that armhole/sleeve adjustments should be the last to be tried due to the complexity and that there is often another way of solving a problem. In addition, she didn't feel this pattern had major issues with this area. Basically I had created unnecessary problems. She asked me to cut out an unaltered version from the pattern tissue - fortunately this was still as per original. Fortunately too there were only two of us and Gillian was able to help me try to catch up with Margaret who was charging ahead.


So new toile. Still calico. Original size. Long length this time. Gillian thought this might be a little big for me but we agreed I should cut the size for my bust (42” full bust so a size 20 - other times I might cut according to my high bust 40” size 18 and make a FBA as I am a DD cup despite just 2” difference). The fit around the back was much better. The shoulders were still too wide. When taken in at the Princess seam, this narrowed the shoulder and worked well and the sleeve also felt much more comfortable. Clearly this should have been my first adjustment not going in big time to the adjustments I made! It didn't need a FBA. Waist position fine. So I was going to be cutting out an unaltered version in fashion fabric!  I think that's a first!


I went with the navy and silver grey fabric which has a stripe pattern - matching required! Gillian showed me how to match properly. She did quite a bit (a lot!) for me to try to keep me up with Margaret.


Then beautiful soft interfacing was fused onto the back of the fabric pieces, ensuring they kept the original pattern shape. As I mentioned earlier, Fine Fabrics ran out of the interfacing we wanted so we ended up piecing and using different interfacings which again slowed down the process.


The edge of the fabric/interfacing was machine basted. That was an easy bit!


The fabric is navy and silver grey - I can't get a good colour on screen
Then the lining was cut out (I hadn't completed this at the end of the class). This will be tacked to the fabric/interfacing using large herringbone stitches. Then the bundle is machine quilted using lines of stitching approximately 1” apart and stopping at least that from the sides and 3” from the hem. I was able to test out stitch length, tension, colour before we left.

Testing quilting - reverse side
The quilting is invisible from the right side.


Reverse - ready for quilting
So I have quite a bit of homework before we meet again! As I cut out the longer length, I'd like it to have buttons but this means I also have to cut out facing pieces which I didn't do so I need to see what is sensible to try to achieve. I can't do any while I am in Scotland visiting my mum. I should manage some this weekend though. I need to as the next session is the following Saturday (thank goodness we had an extra week between sessions!!)

Fabric ready for quilting
Margaret has already posted a blog post here and I think is still hoping to do two jackets. I'll be happy with one.
Machine quilting the fabric

How Do You Read Blogs?

It's a while since I've posted a blog,  lots of reasons. I'm thinking of starting again. However,  I used to read the blogs I fo...