Showing posts with label Machine embroidery. Show all posts

Thursday, 27 December 2018

Hits, misses and neutrals in 2018


I seem to have been quite busy with sewing this year but with very little to show for it! I have quite a few craft items which have been successful in their own category and some knitting - oh and repairs and refashioning. As there is so little to show, I’m doing one post for both successes and failures for the year. I'm not including failures that didn't get as far as being made up - and there are quite a few of those!

I will do them in order from the start of the year, all together in one category. Click the title to get to the appropriate blog post where the pattern number and details will be listed.

As before, I'm linking to  Crafting a Rainbow’s Top 5 of the Year.

January
Kimono - success
In January, I made a kimono for myself. I like the kimono, feel it fits well and do wear it. There is a but - the colours are not right for me and I have been intending to remake with a fabric more suited to my colouring and my other clothes. I tried to get a similar fabric but haven't been successful. Nevertheless, I consider this a success.


In January, I finally finished the Chanel-type jacket I had been working on for some time, after starting it in a two-weekend class I attended with Margaret of The  Crafty Creek in the autumn of the previous year. I think the jacket looks great but I haven’t really worn it. This is mainly because I feel it is a bit snug (I have put on weight, alas). I feel it is snug around the biceps and it lies with the two fronts quite far apart. I learned such a lot from this exercise, though - very much including what I would do differently next time. The main thing I would change would be to overlock raw edges before started construction. I’ll have to say this is a neutral as it hasn’t been worn in the way I had intended – so neither failure nor success.


February was a very unsuccessful month with several items and pieces of fabric being rejected. March was a more successful month

It was cold in March. We haven't had much cold weather yet this winter.
I made the Jasper sweatshirt and have worn it a lot though it’s only getting cold enough now to think about it again. I like it but it was criticised on the style website I’m a member of for being too dark for my colouring - while I didn’t want that to influence my view of it, it has to some extent. I plan to make it again but in slightly lighter weight fabric

New Look 6481 tops - 2 x successes 1 x fail
I’ve worn these tops a lot. The fail was as a result of using a fabric with insufficient stretch and it was too tight for me. It went to my daughter who wears it, as far as I know so not a total failure. Operative error.


Regularly worn. I like one better than the other - the one that has slightly more stretch - as it feels more comfortable. Same fabric as the NL 6481s


Trousers - epic FAIL
For the whole year, well until autumn really, I was trying to make well-fitting trousers. The closest I got was making up a pair of trousers that I was forced to wear for golf matches as I had no other suitable trousers which still fitted me. I did get to wear them but they were neither stylish nor comfortable.
I intend to solve the problem in 2019!
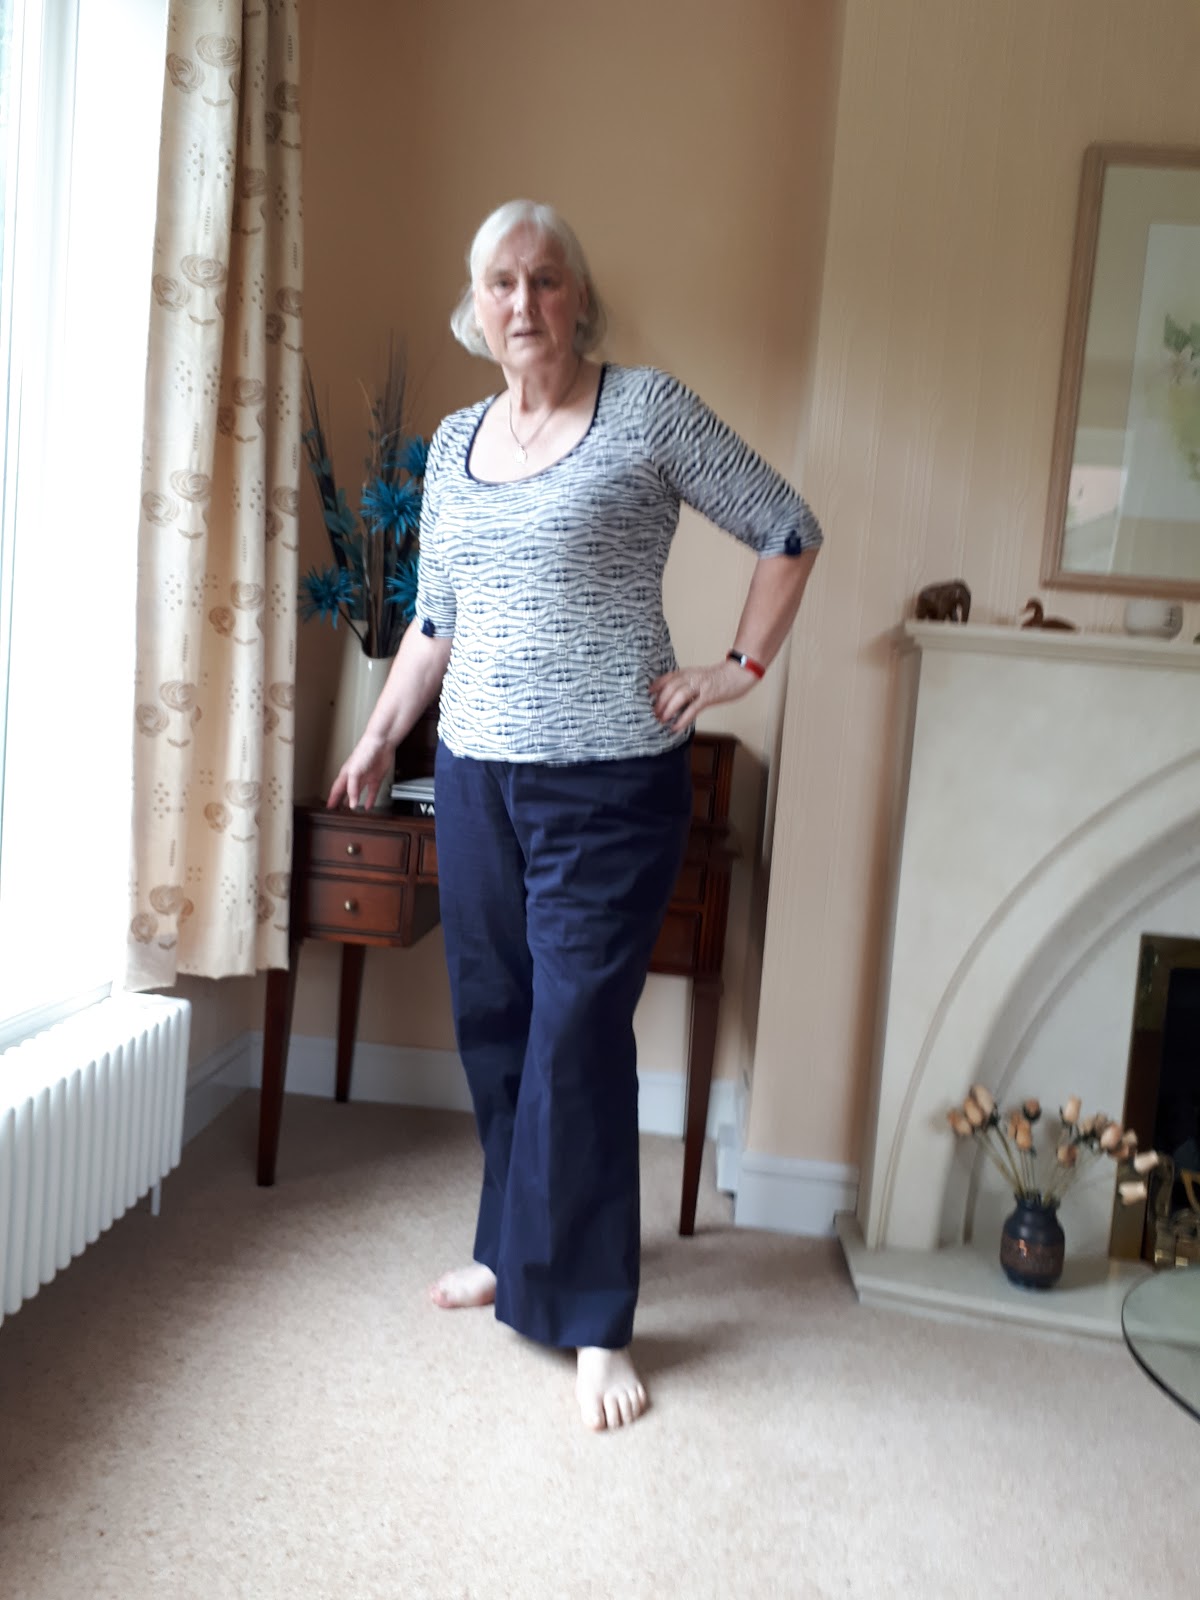
 
I have so many awful photos of the various stages - this was the least bad
I haven't linked to a post

Self-drafted top - failure
I finished this but have never enjoyed wearing it. The fit just isn't right.


I made another Cashmerette Concord, this time with a V neck, tunic length. I’m not really wearing it - I think because the neckline is a little loose/stretched and a bit low for my liking. Operative error again.

Items for my daughters - successes. Probably
I made another pair of culottes for Joanne. While she was visiting for Christmas, I made some repairs to a much earlier pair of these culottes (she loves this style) and has told me she hasn't started to wear the most recent ones as yet.


I also made another silk dress for Helen. 


I am sure these will be successful but it’s too early to say as yet.

Gosh, that’s not much to show for a year! The trousers took up a lot of my time and made me feel completely despondent so I had to give up. I did a lot of garment refashioning, garment repairs

Machine embroidery - successes
I started to use my embroidery machine and enjoyed it. There is quite a big learning curve that I haven’t mastered yet, but I’m beginning to produce items that I have enjoyed making and the recipients have liked receiving.

Classes 
I attended a few classes - working with leather; silks and sheers and corset making. I have taken something from each class. My oldest daughter likes the corset I made (a standard size 12 with a D cup, clearly not for me!) and even though it is a sample speedily made up a couple of days before Christmas, she has taken it home with her. My youngest daughter found a little too much space in the cups - she added a couple of cooking apples to fill the cups out! She liked the waist shaping it gave her, though - she has a fairly straight figure

WIPs
I have some WIPs, ready to restart in January

Make Nine Project - failure
I signed up for the make nine project and have not succeeded in making anything like 9 items. This is because quite a few of my items were going to be trousers/pants and I haven’t got the fit right as yet. Is it possible that I won’t be able to? I didn’t make the jacket as that was to go with the trousers.

RTW Fast
I have been more successful with the RTW 2018 Fast, depending on how you measure success! I have done the fasting - but have not managed to fill the gradually increasing holes in my wardrobe.

7 Steps to Style and Evolve Your Style - failure
I intended to put everything into this but found I just didn’t. This was partly because I was on the RTW Fast and so wasn’t buying new clothes (or even charity shop clothes for refashioning). I had a huge bundle of old clothes that needed restyled but they got me down, I had little idea how to proceed (Lots of trousers) so I abandoned that idea.
I haven’t seen much point in buying new fabrics when I have huge stash or new patterns ditto. So this coming year, I will concentrate on making what I have manageable and reflect me.


Saturday, 22 December 2018

Celtic Owl Notebook Cover - In the hoop machine embroidery design


I’ve been enjoying playing with my embroidery machine, finally. I’ve found this easier than trying to dressmake while I’ve been less mobile than usual. Now I have my moonboot off but my foot is still sore (and could be for up to 6 months apparently) and less mobile than previously. So I need to keep going with some mobility exercises.

By now I may have posted about a couple of the projects I’ve done - presents for my grandsons. This depends on me having taken photos which I haven’t managed up until now. I’ve been busy but next week should be a bit clearer, I hope! When I’ve been at home, the weather has not been good for photography. Or dark. Or both. The photos I am including in this post all show wide angle distortion - that's why all my straight lines, including those on the cutting mat, are curved. Apparently you can correct for this but I've just cropped most of it away. Next time maybe.


My latest project was a Celtic owl notebook cover. I bought an embroidery pattern for notebook covers of various sizes. I absolutely love it - and so does everyone who has seen it.
The lines are straight! This is the 1:1 printout of the design to be stitched;
you can just see the lines showing the centre of the design. 
I decided to start with the A6 size. There are two owl designs, one denser than the other so I decided to start with the simpler of the two. I started with the front cover - the front and back covers are stitched separately and joined together using a quilt and go technique; the spine is made to the thickness required. The instructions directed me to a video which was very helpful.

I love the effect with the gold lame.
This of course is my second attempt
The photograph with the instructions was what attracted me in the first place, so I followed the use of the same fabric. I used a gold lame fabric.  Behind the fabric was a layer of batting, and both were loosely mounted, using glue, on cutaway stabilizer. This is called floating as the fabric is not actually inside the hoop. I was a bit wary of the process, but the design stitched out beautifully. The gold lame is slightly raised between the black and dark grey stitches and gives a beautiful embossed leather effect.

I had to put the lining and the sleeve on the back of the hoop and join the two together then trim away all the excess fabric from top and bottom. I used too much glue, I believe, and made this process harder than it needed to be. 

I used my duckbill scissors to trim away the excess fabric (the stabilizer to which the design is stitched is still in the hoop and needs to stay there so I didn’t want to cut it) but in retrospect realise I probably could have been closer to the stitching.

The step after that is that the edge is then stitched all around with a satin stitch border. It looks lovely.

BUT
My cutaway stabilizer was white as was my batting and the former in particular showed at the edges. This is inevitable really, since this is not cut away until after the design is finished.


In theory the batting shouldn’t show as the excess batting and fabric is trimmed away before the satin stitch border is stitched. Having the batting set back a little would help enormously.

I’ve bought black stabilizer to solve that problem. I also bought some black batting while I was at it.

SECOND BUT

My A6 notebook front cover would not fit inside the front owl cover. My embroidery turned out the right size but it needs to be a bit larger to take account of the border which takes away from the space available. When I checked the sizes of A6 and the embroidery quoted sizes, it looked as though there was enough - but this was the outside measurement of the cover not the internal measurement

A6 notebook cover and A6 notebook - you can see the notebook is too big
I even had to trim the notebook for the bigger design in the end

I could make the embroidery the bit bigger it needs to be. There are many sizes provided with my purchase - trouble is, these don’t necessarily equate to our sizes. The one I sewed was labelled A6, though. Perhaps I should have realised when at one point the instructions suggested there might be some need to trim the notebook used.

Another issue was that the pocket didn't work properly - I think because the lame interacted with the glue. I used too much.

Anyway, I love the design and felt I could get around the issues I had come across.

I have put my original front cover inside the plastic cover on an A6 cover and it looks great!

I did ask some questions on an embroidery group I’m part of. That's where I became aware that black stabilizer existed. They also said that the batting should ideally be within the stitching line, which makes sense - however, this particular design does not do that and the way of making it within the hoop leaves me rather bewildered as to how to achieve that better finish. The group advised that I email the seller. (I've since realised that I could print out and then cut the batting slightly smaller and adhere to the design)

The seller responded after a few days asking for further details and after a few further days saying that
  • I needed to trim MUCH closer - recommending a particular type of scissors that I cannot source.
  • Best to use really thin batting - I don’t have enough experience to know where in the thickness/thinness spectrum my batting comes - it was the only black batting I could source.
  • Best to use black stabiliser and batting - I found a source for black stabilizer, which is thicker than the white stabilizer I previously used
  • I could burn off any stabilizer still sticking out, using an ordinary lighter
  • Might have to trim the edges of the notebook as maybe the cover on mine was too thick (no, it wasn't)
  • I could increase the size of the design using (free) software recommended
  • I also asked about using just the background design on the reverse, but this question wasn’t responded to.

Next try

I used black stabiliser and batting. I also increased the size of my design so that the internal measurements matched up with A6 rather than the external as previously. I had to use my own software as the one recommended didn’t work for me, as I couldn't save in an appropriate format. I used much less glue than on the previous occasion and this worked much better except that part of the lining turned over so I had to unpick and redo part - this was much easier than I expected as the lining hadn’t been stitched at all and had the advantage that there was an extra line of stitching to make me feel more confident about close trimming.  

This time, I used black Kona cotton as my lining - this is perhaps a little thick but it works much better than the lame I used last time. I trimmed REALLY closely. However, while I trimmed right up to the stitching, as close as I could manage, there is still stabilizer outside the stitching line as of course it is removed after the stitching is done and the satin stitch is actually further in than I feel it should be - that is, rather than stitching across the original line, it only stitches up to it. I can’t alter that, sadly. I do feel it needs to be about 1mm further out.
The covers before they are attached together. This was black cotton cut to make the spine binding.

I wondered about burning off the bits showing but no, I can’t bring myself to do that. David feels there is no need for the level of perfectionism I wish to achieve - this design is for him in the first instance and that I certainly shouldn’t burn off the excess - too much chance of things going wrong.

I have run out of A6 notebooks and wasn’t able to get any in my local shops. Loads of A5 but not of A6. I can get online and tried a couple of supermarkets and WHSmith but didn't get any. I  needed to know the size of the spine in order to finish. I decided to use my existing test A6 notebook - I did have to trim that ever so slightly, by the way.

Final update

Well, I was unable to buy any suitable notebooks and ones I bought online arrived to day but are not suitable and others may be okay but haven’t arrived yet and my time for embroidery - or any other kind of sewing - has run out. So I went ahead with my existing notebook, with the few used pages torn out. This is for David!

I followed the instructions for binding back and front cover together. I was directed to watch an excellent video on 'quilt as you go' as the seller said he/she couldn’t explain it any better.

I then followed the instructions on the PDF accompanying the pattern. This did not work!! The pieces cut were far too narrow for my notebook with a spine of only ¼” and the back and front were overlapping. On re-watching the video, I realised that to abut the quilt pieces, the joining piece is 1” - so that’s the minimum starting size.


So I worked it out mathematically and redid and this appeared to work. However, the very narrow spine means that the notebook is pushed forward by the seam allowance edges - remember, these have dense satin stitch around them - so I had to trim ¼” off the long edge of the front and the back cover to allow them to fit in the sleeves. I guess the spine needs to be wider than the notebook spine to allow the notebook to slip between the front and back.


The inside of the cover


I was far from happy with the finishing instructions.
The tips of the wings are cut off

As the owl wings go right up to the satin stitching, and I have to stitch ¼” in from the edge you will see that this cuts off part of the owl wing. The satin stitching is 4mm wide (the mix of measurements is all around in machine embroidery and quilting!) Also - what’s the point of having satin stitch that’s going to be covered in a seam allowance and just creates bulk? I couldn’t bring myself to cut it off but tbh that’s what’s required, I think. It shouldn’t have been stitched in the first place. Why couldn’t the design have created a suitable blank area at the side to be joined? After all, this is a notebook cover

Conclusion

I still love the owl
But I won’t be doing further notebook covers until I can work out a better way. The specific issues are the satin stitch being too far into the design and the poor finishing instructions.

Post script

I found a beautiful notebook, with a sparkling gold but smooth cover, smaller than A6 which would fit nicely into the cover but unfortunately its spine is wider so no can do for this rendition - it get pushed too far forward.

Then today, one of the notebooks I ordered online arrived - although the spine is thicker, because the notebook is smaller, it fits well as is. I need to decide whether Joanne is getting it with this new notebook - not perfect but okay - or David with the old notebook. I think David, as I can improve the notebook cover for Joanne. 

Helen and Anthony are coming late tomorrow (Saturday) night after their return from Argentina - I'm not sure how much they're going to be affected by the problems caused by the drones around Gatwick - they're flying into Heathrow but the repercussions are widespread.

I'll be busy tomorrow as Alison and family (including Thomas, the cat) are arriving. My mother arrived today. Joanne will be coming Sunday. So I've scheduled this post - hope that works!!


Thursday, 20 December 2018

Machine embroidery – sleep masks


I love Celtic designs as some of you may know. I have made a Celtic Owl notebook and will post separately (should really be first but hey ho). From the same company I bought the pattern for the Celtic Owl notebook cover, I bought a pattern for two sizes of sleep masks. I say the notebook should be first because I learned from that , though I actually completed it second. The main thing I learned was to trim VERY close to the stitching.

Okay, onto the masks. I downloaded the pattern I had purchased (Stitch Delight), looked at it and the instructions accompanying it, and transferred it to my embroidery machine.

I made the first mask (the gold and black one) in the same gold metallic lame I used for the notebook cover. I hooped black stabiliser and floated black batting and the fabric. I liked that the pattern suggested stitching the first step directly onto the stabiliser to allow you to see exactly where the design was stitched and use the bare minimum of batting and fabric – these are held in place with temporary glue until the machine puts a securing line of stitching in place and then it’s fine.
The first mask went very well. After the mask shape is stitched, then ribbon and a further layer of batting and fabric (this time, black Kona cotton) is attached to the back, again using a spray of glue. For this mask, I didn’t have any gold or black ribbon so decided to use some of the green I had. Then the layers are stitched together back in the machine. After that, the fabric and batting on both sides of the hoop are trimmed back close to the stitching joining the layers but the stabiliser stays in place. So, in the hoop there is a sandwich of, from the bottom, fabric, batting, ribbon, stabiliser, batting and fabric. The hoop is then put back into the machine and decorative satin stitch border is added all around. After that, the stabiliser has to be trimmed away from the stitching.  This was the trickiest bit! It could be closer but I feared cutting the stitching.


The green ribbon inspired me to make a mask for Helen using the green silk from the dress I made for her (another post). I hooped up as before and the design started stitching out – but then….
 
What a mess on the right hand side!

The machine gave an audible error warning that there was a problem with the top thread, which is easy to fix. Instead, I found that a large part of the design had stitched badly and the inside of the hoop had slipped out of the outside. I was in the room but had watched only the start of the design – it takes about 25 minutes for the machine to stitch it out. I found this fabric very tricky to use – I don’t know if the problem was because of this or whether I hadn’t secured the hoop properly. I couldn’t salvage the design – so started again.

This time I did sit and watch but there was no problem; I was extra especially careful about tightening the hoop. Normally the hoop shouldn’t be too tight as this adversely affects the design but in this case, the fabric being stitched isn’t in the hoop, only the stabiliser is.

I backed the mask with the green ribbon, more batting and some more green silk and continued as before.

I like them but David asked ‘what on earth?’. I hope the girls will like them too. I’m only making two as I have run out of time. Originally, I thought I’d make my mother and the 3 girls one each.


Sunday, 9 December 2018

Harry Potter Notebook Covers with Zipped Pockets


Book cushions and  notebook covers together


Immediately after the YouTube video I watched to find out how to make a book cushion (see previous post and photo above) was another which gave instructions to make an embroidered notebook cover with a zipped pocket on the front. I decided to make a couple of covered notebooks using the leftover Harry Potter fabric. First, I had the problem of finding notebooks of the right size… In the UK we use A4, A5 and A6 sizes but I required different from what was widely available. While I saw the right size and type online, they were expensive as they had to be imported. Eventually I managed to buy a drawing pad (? - it has plain brown pages) of the right size and a lined notebook of almost the right size (a quarter of an inch taller but I felt that was manageable). In the end, I didn't use the lined notepads, only the brown drawing pad which looks a great colour inside the notebook covers.
I really like the lined zipped pocket - I'm going to do one for myself (not Harry Potter themed, though!)


I think the colour of the zips and the font look great with the fabric - and a very suitable Harry Potter colour

So I now had all the materials (fabric, fusible fleece, lining, zip) and decided to make these at sewing bee in my first visit for quite a while. I'd drawn out the right sizes for my cutting out onto dot and cross paper.

I was able to construct the notebook covers as instructed on the video. First steps include the zip, the pocket, joining front to back and covering everything with fusible fleece. No problems, though I had to make a trip to get fusible fleece. I do have some but couldn’t find it. Sadly that statement says a lot about my organisation and points to what I need to do in the New Year once I’m properly mobile.

At this stage on the video, the embroidery is done. As with the book cushion, I wasn’t using plain fabric but the less patterned Harry Potter fabric. I’m a novice with machine embroidery and was concerned about placing their names (again using the Harry Potter font) in the right place as I wasn’t going to be able to hoop the fabric. However, I went ahead, using spray adhesive on the tearaway stabilizer and pinned the fabric on top to the stabilizer at the edges of the hoop as advised. I had marked the fabric I was sewing with a pressure line rather than pencil etc to ensure my embroidery would be straight. I’m glad to say that it worked out well.
After that, it was straightforward.  I placed the book-cover sleeves on the face of the fabric, sandwiching them between the fabric and lining. I sewed around 3 sides then turned the fabric through with the sleeve on the front of the book properly positioned. The sleeve on the back of the fabric was left not turned to the other side. The remaining open edge was then sewn, and the sleeve turned through to the correct position. I thought this part was rather clever as there is no hand sewing and no external sewing - everything is inside the back pocket. This was really a bit of magic as far as I was concerned! A bit of pressing and then I put the notebooks I had purchased in. This bit was slightly tricky, and I thought that I had made the covers too small, but I managed.


Although I had carefully cut all my pieces to the correct size, I do think that a) fusing the fleece and b) adding the embroidery ‘shrank’ the main fabric - I found I had to trim a bit off the sleeves. My edges weren’t level with each other as they should have been and this has led to a bit of inaccuracy in my sewing. I don’t think my grandsons will be examining my stitching in that detail, though!

I like the brown notebooks with the colour of the fabric cover


Book cushions for my grandsons

My younger grandson turned 7  a couple of weeks ago. I've already posted that I gave him a hoodie embroidered with an Infinity Gauntlet (embroidery as requested) plus a Gauntlet with lights for him to wear. The gauntlet is huge on his hand but my daughter and son-in-law thought it was great. In the meantime, Ben, probably forgetting that he had requested an embroidered tee, asked for Harry Potter merchandise when they were visiting earlier in the month. My daughter said she already had quite a lot of Harry Potter merchandise for Christmas. Needless to say, this wasn't in the boys’ hearing.

Then a number of things came together. I saw an Instagram of Harry Potter fabric sold by 1st for Fabrics which is local to me. I saw some postings of book pillows (I'd never heard of them) and found a good YouTube video showing me how to make them and a number of people in the embroidery groups I follow were embroidering fantastic ones. So - a Harry Potter themed, embroidered book pillow. One for each of my grandsons. 

No books in these.

 
Book cushions with books - notebook covers are the next post, in progress at the moment
I didn't want to use plain fabric (best for the embroidered panel; often quite complex embroideries and sayings but mine is a simple name) when I had bought specific Harry Potter fabric. Sadly the Gryffindor fabric was sold out so I bought newspaper print, the Daily Prophet, instead - that's the back of the cushion. I decided simply to embroider their names on the less densely printed fabric.

Front of one cushion and the back of the other


This led to a search for a Harry Potter font. I bought one following a search but sadly it was a pain to download and even worse to use. Following advice from my embroidery group, I found a fabulous and easy to use one which was actually free! This is a True Type font so I can actually use it on my computer too - so if I ever write to my grandsons I have the perfect font! I successfully embroidered the boys’ names onto the fabric which formed the front of the pocket. I used the first initial of their surname, T, as that gave the proper Harry Potter effect.

I love the effect on the T


I made paper templates of the sizes I needed. After that I followed the video instructions;
Briefly, make the interfaced and embroidered pocket front, join to pocket lining, creating a band of lining across the top of the pocket opening, join both to main front. Join overlapping backs to front right sides together. Turn cover to right side. Not difficult. Advice from the embroidery group also included using fleece behind the embroidery and quilting the two layers together but I had already moved past that point by the time I got that advice and I think it's okay.


I made the covers to fit a 16” cushion insert. I was making these in my first time at sewing bee for ages. Lyn said that the overlap at the back was very big and I'd struggle to get the cushion in, but would manage and the cushion would be plump. That was exactly what happened. I think the back fabric has slightly stretched too with the effort of getting the cushion in.


I think they look great. The only issue is that the pocket fabric has a pattern which runs in both directions and it looks as if I've got it upside down. I haven't but I think I could've placed the embroidery better - the Harry Potter name reads 'upside down' in the centre but 'right way up' at the lower sides.


How Do You Read Blogs?

It's a while since I've posted a blog,  lots of reasons. I'm thinking of starting again. However,  I used to read the blogs I fo...