Showing posts with label Nettie bodysuit. Show all posts

Sunday, 7 April 2019

A top, a bodysuit and a pleated skirt


I've been trying to get some UFOs finished and repairs and alterations done. That's been successful. None are worth posting about, but I feel a sense of contentment, of a job well done. They include hems being let down and sewn up to make the trousers longer, buttons sewn on etc. I told you they were boring.

I had intended to focus on my trouser fitting (oh yes, that!) but I am actively losing weight so I'm going to put off for a bit. I'm delighted to say that (some of) my golf crops fit me again! (Well, they will all do by next month!) That's useful as I was going to rush and try to make some - or at least some skorts. I have a nice pattern. 


It was suggested to me that I should making skorts for a bit in view of my ongoing weight loss for a bit. I agree. I did make up the top shown in this set (skorts, top and jacket - I'd like to make them all) but find it a bit tight, especially at the hips; this older Kwik Sew pattern 3232 clearly had less ease than a lot of the big 4 patterns. It's also a bit short so I'll redo. 

It doesn't look too bad from the front

You can see how tight it is on Madame

On the whole though I prefer a top with sleeves and a collar, a polo shirt,  for golf, at least. I'm going on a girls’ golfing holiday next month. I'm looking forward to it but as I've only played a few holes so far had better get some practice in. Thankfully, my foot appears to be standing up to the strain of rotation on it.

I've cut out a slightly modified pattern for the Nettie body from Closet Case Patterns. I modified by giving my derrière a little more coverage (length) and cutting further up at the front. The original design is like a short and I prefer higher at the front and sides. The stretch in the fabric I'm using is a little less than I'd thought and the bodysuit will likely be a lot more comfortable in half a stone's time! I'll move on with it and hope to use my coverstitcher for the bands.

Yes, I'm using the same fabric as for the KS top

Again, rather too tight in the rear


Easter is quite close now and I'd hoped to have Helen's tartan skirt ready for fitting. Mmm. Not sure about that. I cut out a toile of a different style to see if it's more successful and easier than modifying the last pattern. Hopefully I can send it to her early next week. I need to get the tartan out from storage though to measure the set and see how much I need to vary the pleat placement on the pattern. I have lots of fabric and while I don't want to waste it on an unsuccessful skirt try, it wouldn't be disastrous, and I really need to use the real fabric.


The toile is from a 1991 pattern - Butterick 5712. Helen said she liked it, based on the pattern photos. There is one with two pleats front and back and the other with more. I decided to go with a shorter two pleat version, view B; I shortened by 4". The advantage of this pattern is that the sizes change only at the side seams, where there are no pleats. I found altering the size in the full pleated skirt I made her previously extremely difficult, and it was still not the perfect size. Pleats are quite difficult to adjust for a female waist, as I found out! Because all the adjustment is at the side, I can more closely match Helen’s shape. Assuming she gives me the thumbs up for the overall style, I will actually FINALLY get around to cutting into the fashion fabric - that is the medium weight pure wool tartan that we had to get specially woven. I can do the front and back (which are the same!) and adjust the side seams after she gets here at Easter.

Now, I know that a pattern isn’t needed for a kilt type skirt, like the last toile I made, but I didn’t really like the pattern - and Helen requested all sorts of changes that I didn’t feel up to making. This pattern is simpler. The thing I particularly like is that there is a lot of fabric cut away behind the pleat to reduce bulk - that was certainly an issue with the previous full pleated skirt. It’s important when the wool I’m using, although labelled ‘medium’ is actually pretty heavy for dressmaking. It should be pretty easy to adjust the pleat pattern width to match what I need for my tartan. I think I know how to do that.

I made up a toile and realised that, in deciding to make a size larger than I thought would be needed, to allow for later fine tuning, I’d be likely to put Helen off. It was much too large for Missy. So I unpicked my beautifully put in invisible zip and remade in a smaller size. According to the sizes Helen sent me, this should work although some tweaking for actual hip shape is likely to be necessary.

The pattern specifies a centre zip, but I have used a concealed zip in the toile. I need to think in advance of the type of zip to use as that will affect the waistband. I narrowed this waistband to 1” - the pattern is about 1.5” but otherwise didn’t alter length. Lyn advised against a centre zip. So either the concealed zip used here, or a lapped zip… The waistband is slightly different for these two types.

Many will ask why I've done as much on a toile - it really helps me to see where things might go wrong and when I need to do things and in what order. Helen might end up wearing it as she has with previous toiles. I also hope to be able to use the selvedge at the bottom of the fabric to avoid a bulky hem, so that would mean the pattern would have to be shortened further. Actually, on the toile, that’s the bit I’m finding most difficult. The instructions are fine, I just don’t see how to make up to a high standard and finish the cut fabric - they advise cutting into the seam edges as you make up the hem. If I manage to use the selvedge, that won’t be necessary, though. If I can’t use the selvedge, perhaps a thinner bias facing hem would be a better idea? What do you think?

The key issue is going to be finishing seam edges, which I haven’t done for this toile. I think I’m going to do a simple zigzag edge. Any other thoughts? I also need to consider a lining.


It’s ready to be posted off to Helen. I put it on Missy but had to pull in the waist at the back as Missy is 2” smaller than Helen around the waist. Do you like my new hem clips? I found then very useful when pinning up the 2” hem on the skirt.


Not much else to say at the moment!


Saturday, 6 January 2018

My Top 5 Hits and Misses of 2017

I’m once again linking in with Crafting a Rainbow’s Top 5 of the Year. So here’s my top 5 - both hits and misses in this post. They are roughly in order from the start of the year, rather than being in favourite order. I've included a link to the original blog post which will have details of pattern used and more details of construction etc. I've used different photos - I think the actual blog post has better photos but for some reason I couldn't pick them up today. I had to cut down my labels as there were way too many characters.

Top 5 Hits

1 Orange padded gilet for my grandson


In February, I made a padded gilet in class and asked for the pattern to be sized to fit my grandson. He liked it and it did fit. It’s too small now of course - he has grown so much in the last year! I’ve included it here because I learned such a lot making it. I have some fabrics for new ones for him and his brother but would need to identify a suitable commercial pattern. I'd use microfleece for the lining next time around and bought some in a  lovely lime green. I don't think I ever blogged a photo of the completed garment. An earlier post where I tried it on him for fit is here

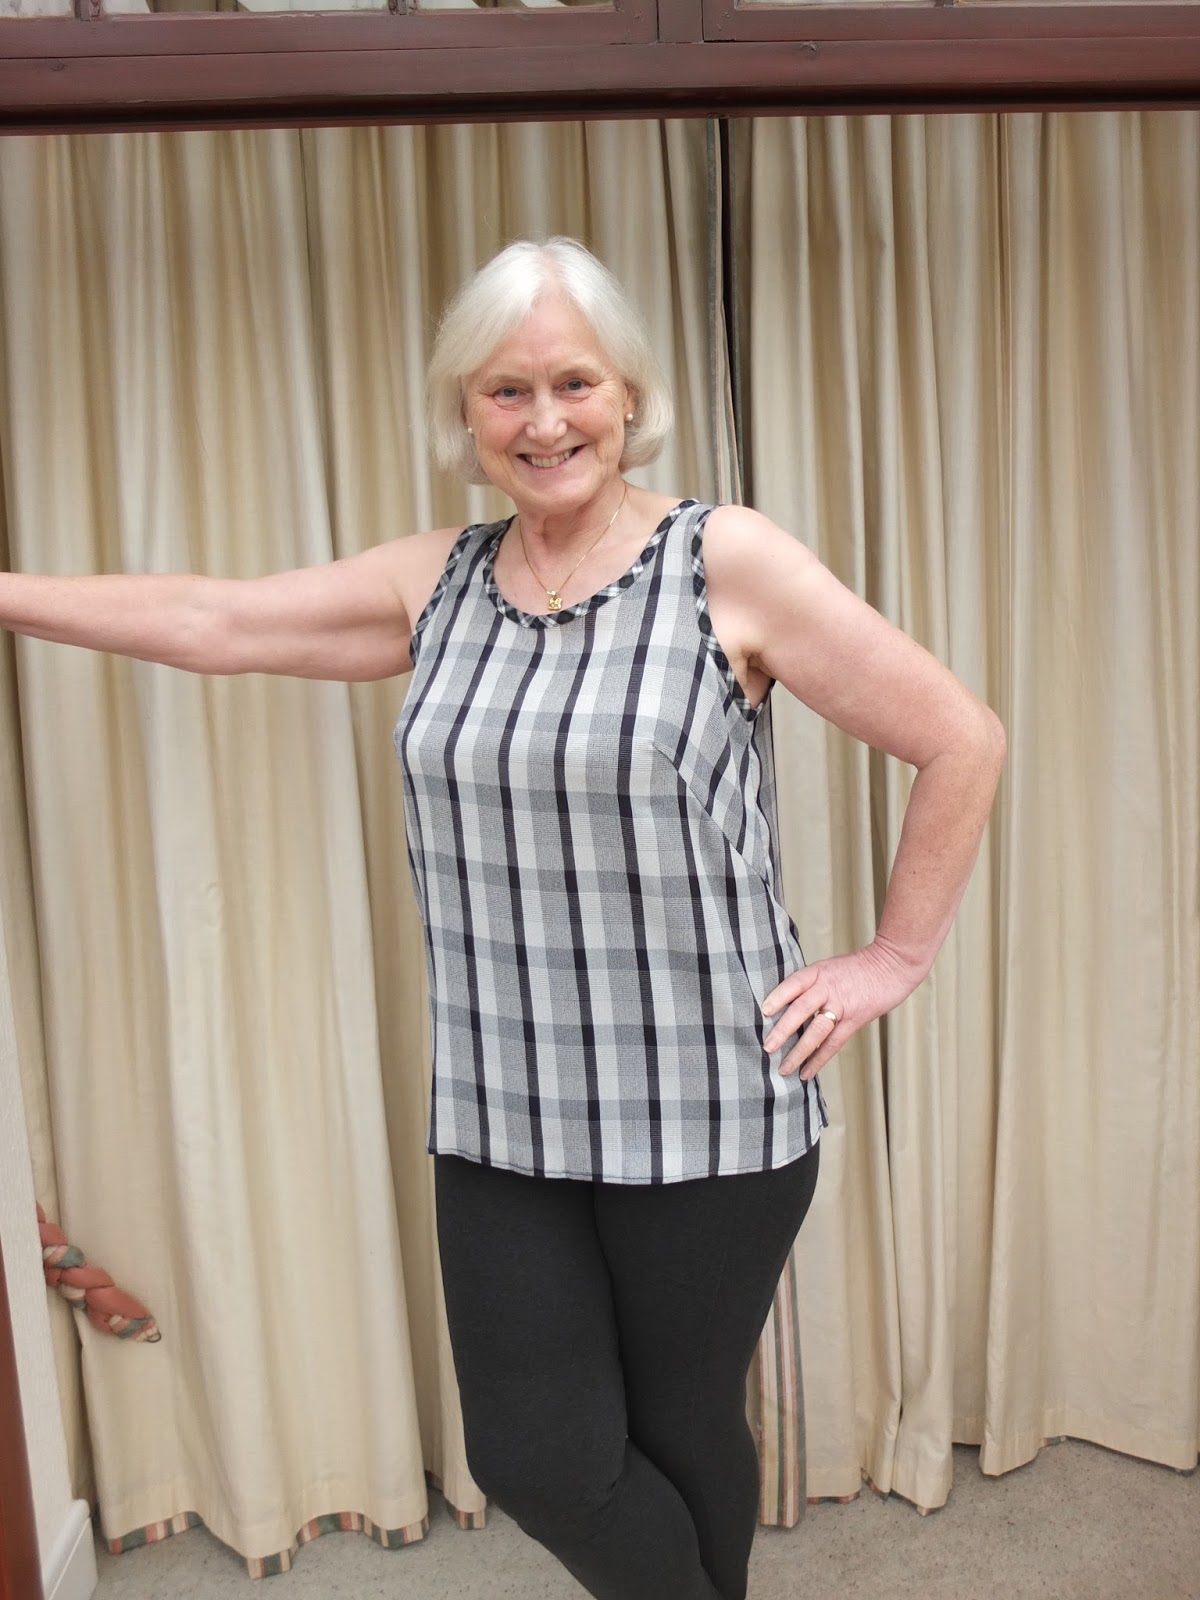
2 Check self-drafted tank


In March, I made a simple sleeveless top using a block I had made. Armholes and neckline bound with contrasting, visible, bias binding.

I like this top and wear it regularly - but I would choose a different fabric next time around as this is a bit ‘spiky’. I would make it in a natural fabric - this is polyester.

I’ve included despite not being 100% happy with it as it looks good and taught me a lot. This was my first venture into using a print on a print (contrasting tartan bias strips). I loved the result.

Blogged here.

3 Nettie bodysuit


Nettie worn with trousers and a cardigan. Long sleeves next time.


In the summer, as part of my class on stretch fabrics, which ended in July, I made a very successful Nettie bodysuit. As this was done in class, I followed class instructions rather than pattern instructions and made a couple of modifications. I intend to make more but haven’t got around to it as yet. I would want to add sleeves to the next one.

Blogged here.

4 Murder Mystery weekend garments

Under this one heading, I’m going to include 3 separate garments, all of which were made for our murder mystery weekend in November

  • Yellow jeans for David (in photo below). David likes these and has worn them since and intends to go on doing so. I previously made him jeans from my own pattern (part of another course) but this was from a commercial pattern, which made it easier for me. I made a couple of tweaks and would alter more next time around. Blogged here.


  • My colourful jumpsuit (in photo above). My son-in-law loved this and I wore it again over Christmas, especially for him!! Actually, I love the jumpsuit - it’s just that there aren’t many places I can wear this bright a fabric! However, I will make up another more ‘sober’ one! I don't often wear my own handmade garments as I'm so critical about finish and fit. Blogged here.
  • My ‘flower power’ dress. I love it. I would make the smaller size next time, though. It was comfy, cosy and warm with plenty of space for Christmas pudding eating! I guess I would do the sleeves as per pattern though as these aren't very practical for working around the house! Blogged here (with better photos).


5 Red Silk Dress for Helen


I absolutely have to include Helen’s red silk dress even though it’s less than two weeks since I gave it to her!!  I know this will be worn and worn and worn, like its RTW predecessor. She loves it and it fits. This is, incidentally, my entry into Designin' December, conceived and run by Linda of Nice Dress Thanks I made It!. There is currently voting on her blog and on IG. Blogged here. This link is to the 5th of a 5 part blog! Previous posts were about developing the pattern, toiles etc.

Others
I have had a few successful makes, both garments and craft type makes but the ones above are my edit.
Top 5 Misses/Failures

1 Bias Cowl Top for my Mother


You can see that it's falling off the shoulders

The first has to be the bias cut top I made for my mother’s birthday in January 2017. I had made the same top for me for the PR Sewing Bee (but didn’t pass beyond the second round) and as my mother loves a cowl neck and I had some fabric that she gave me, I thought this would be a good idea. The fabric was fine.

My mother told me the top was lovely etc. Some months later, I had the opportunity to see her wearing it - what a disaster! She told me she hadn’t wanted to say…
The fit was awful. I recently suggested I remodel/remake but I think she has got rid of the top.

I should say, my mother has lost a considerable amount of weight (weight that she can’t afford to lose) so that has contributed. Also, she has a marked ‘dowager’s hump’ (I hate that term!), which I did try to take into account when I made the top.

So it’s not the pattern, or the fabric but fit that’s the problem here. Issue - fit. Blogged here - but obviously needs updated to reflect the fact that it didn't actually fit her!

2 Two UFOs which I completed but which aren't a success:


The first is the lace cardigan I made in February 2017, photo above. I just don’t like it. It had been a UFO and perhaps should have stayed that way! I modified the pattern from the original so can’t really comment on the pattern.  Issue - simple dislike. I find it too 'floppy' and insubstantial. Blogged here.


The next was also in February, above - another UFO. This time a cotton skirt. It just doesn’t work as it clings.  I did try to wear it as I like the fabric and felt the skirt fitted but was put off by the clinging. It isn’t lined but needs to be because of this. Again, the pattern is fine, fabric fine, but lining needed and probably fit tweaked further. Issue - need lining with this fabric. I may well get around to doing this as summer approaches. blogged here.

3 My Merry May MAGAM Top, sadly


I loved the pattern on the fabric. I wear a lot of cardigan type jackets.

In June, I made a top from the same pattern as my successful sleeveless tank. The fabric choice was poor, however much I loved the pattern. Snags and runs appeared in the fabric (rips that is, not colour runs)  and despite trying hard to ignore them, I couldn’t. It was binned. Issue - fabric choice. Blogged here. You can see it without the cardigan on the blog.

4 A checked skirt which gave me migraine


My eyes crossed as I tried to sew with this fabric. I gave away what I had left (quite a bit)


In April, I made a skirt. It was finished but I didn’t like the fit and tried to modify. I also didn’t like the fabric. Never worn - and not just because summer was coming up. Issues - fabric choice (the pattern on the fabric even more than the fabric though it was too heavyweight) and fit. Blogged here. There are much better photos on the post

5 Grainline Morris Blazer


My Grainline Morris blazer. Least said the better!! I will, however, try again as I think the biggest issue here was fabric choice. Issues - fit and I think I would like to line it. Blogged here

There are other failures, too, some of which didn't get to the stage of taking a photo and certainly weren't blogged. Forget about them, Anne!

Others - UFOs or WIPs

  1. I have a Linton tweed Chanel-type jacket almost completed. I just have the lining to hand sew. I might do this as we catch up with the Star Wars series. David got movies 1 - 6 for Christmas. We have previously seen them, starting when the first came out in 1977 but it will be useful to see in story chronological order. This is certainly a WIP - and nearly finished.
  2. I started but didn't complete culottes for myself. I may or may not complete them - I do like the fabric but culottes might well be out again. Issue - time available. This is a UFO.
  3. My interminable trouser toiles did get to block stage but I haven’t made them up as yet. I plan to make up in navy wool and navy gaberdine (?)
  4. My bodice and skirt/dress  toiles were not completed to my fit satisfaction. Lots of work here! I will tackle again in the new year.
  5. I have another jacket at toile stage ready to make up. It’s definitely on the back burner. UFO.
  6. I plan to make up a Grainline Morris blazer in lightweight boiled wool. I think this could be a useful and versatile jacket - if I get the fit right.
  7. There are others….
2018 Plans

I will be putting up my 2018 plans in a separate post

Sunday, 6 August 2017

I love my Nettie bodysuit!

I'm pretty late to the game with the Nettie bodysuit by Closet Case Patterns - a pattern I seem to have had for ever! However, I finally took the plunge. I decided on this pattern as my project in my sewing with stretch fabrics class at Centre Front Studio, which has just finished. Other items sewn in class were pretty panties with lace waistband and lace edges round the legs, a Lycra leotard pant, a simple tee and of course several practice samples.


I downloaded the Nettie pattern and printed and stuck together with no issues, though this will never be one of my favourite pastimes! I also downloaded the sew-a-long. The pattern comes as a bodysuit and a dress (very short indeed for me!!) with sleeve and neckline  variations. I decided to make the bodysuit with long sleeves and high back and front necklines. I decided against the bra insert for my first bodysuit (there will be more!). I had the pattern in my stash for a long time and I noticed that the sizing had changed slightly after a certain date - trouble is I had no idea when I actually bought mine though I thought it was probably before the date given. I therefore decided to make the bodysuit using the  larger allowances on the basis that I could always take in if required. I made up to the size given for my measurements and it was just perfect! I won't need to change this for the next bodysuit, unless of course I use a fabric with less stretch.


As I’m 5” taller than the person the pattern was designed for, I increased the pattern length - but later had to shorten it again after making a toile. I ended up with the front longer than the original for my size but tapered to no increase at the sides and the back a little shorter in the centre, to accommodate my very curved back (a bit like a sway back I suppose), tapering to no reduction at the sides. These are not unusual changes for me but I was surprised at how long the pattern was. In addition, my tutor suggested adding quite a bit extra fabric to the back of the bodysuit at the bottom to provide more coverage there as the bodysuit narrowed quite quickly. I also had to lengthen the crotch extensions (?) - the sections that fasten between the legs. My lower torso is very long, however. I'm long from shoulder to bust, short from bust to waist due to a high waist and very long from waist down.


I mentioned that this was my class project, which I was doing in class, so I followed my tutor’s instructions rather than the sew-a-long instructions (which were very good). This meant that I sewed things in a different order and used different techniques. The main difference was to the finish at armhole and legs. Oh, and I then decided to miss out the sleeves as I thought the fabric pattern was too much to have sleeves as well - and I reckoned that as I’ve had so many sleeve problems recently I’d leave them off! So I had to finish the armhole edges too. My tutor recommended the same technique for all of these. I cut a binding, on the cross grain, the stretchiest direction, and attached this on the round to the neckline by sewing right sides together. Once I was happy with the length and stretch etc, I overlocked the edge with a wide stitch. This overlock stitch was then used as a guide to fold over the fabric to the inside where I pinned it. The edge was not turned in (almost a little like a Hong Kong finish at this point). I then used a zigzag stitch on top of the binding, the bottom edge of the zigzag stitch just touching the junction between binding and bodysuit. My stitching may not be perfect but it’s fine. Then the excess fabric in the inside was trimmed away - I got to use my nice sharp duck bill applique scissors for this. The armholes got exactly the same. The legs were slightly different as they were sewn open but also because they required different amounts of stretch at different bits of the leg. There is no elastic in any of these but the fabric is beautifully stretchy. I don’t have a coverstitch machine so that didn’t come into the equation.


I started writing this before I had quite finished the bodysuit - I still had to put the fastenings at the crotch. As I used high neck front and back, I didn't get away with just sewing a seam here though i did try! Having looked at the various options, I hoped to use a bra fastening - I didn’t have one handy which is why it took so long to be finished. I had to slightly modify the crotch extensions as one was wider than the other, so I unpicked and narrowed that one. I couldn't get a suitable bra fastener - I needed one with 3 hooks and eyes and I could only find 2 locally - too narrow. I tried corset fastening but that didn't work for me. In the end I used fabric extensions. I tried to use poppets (the kind you hammer in) but that didn't work either and in the end I resorted to hand sewing on poppets, which I preferred to hooks and eyes. It has worked okay but next time, I would slightly shorten the crotch extensions and I feel there is a bit of looseness.


I love this bodysuit and will make more. Perhaps with long sleeves as I originally intended next time. I love the height of the neckline so will probably stick to that but I won’t be making the dress. I think I would cut away the front legs a bit too.


In the class I was also making a simple top from stretch jersey, using a commercial block. This wasn’t really very successful - I didn’t like the fit and was going to have to make lot of changes. I wasn't inspired. The Nettie was a much better fit and Rory, my tutor, suggested that all I needed to do was to shorten the Nettie pattern and I’d have the pattern for a perfectly fitting tee. I may need a little extra ease if I use a less stretchy and more medium weight fabric. So that’s also in my plans.

Rory, btw, doesn’t feel I should have abandoned my Cashmerette Concord tee (also taken to class) so that has been resuscitated and is only nearly dead! I have a couple of changes to make but am doing so to the tee I made rather than starting again. The fabric is nice and if I can manage to salvage something that will be a bonus. I was having big issues with the sleeves - but it seems that may be salvageable. I had considered a sleeveless version but the armholes are too baggy for that. Sleeve problems have haunted me for months now - you’d have thought I’d have sorted this but regrettably not.


How Do You Read Blogs?

It's a while since I've posted a blog,  lots of reasons. I'm thinking of starting again. However,  I used to read the blogs I fo...