Friday 30 March 2018

New Look 6481 top times 3


I finished the Blackwood cardigan from Helen's Closet and found that a lot of the tops I had to wear under it were not quite right. Many had too big a contrast for me - my style palette isn't high contrast. Neither white not black are my preferred colours. I had a couple of suitable patterned tops but didn't like them with the variegated cardigan. I had loads of the fabric left over from the cardigan - you guessed it! Enough to make a top (see photo at bottom of post)


This is the second top. it of numbers one and two are very similar as they are sister fabrics.


One possibility was to use my Nettie bodysuit and add sleeves to the pattern. The original pattern comes with sleeves. I'd need to alter them. However, I realised that the Nettie uses 2 way (4 way) stretch fabric with a lot of stretch and the fabric I want to use didn't have as much as that and had very little longitudinal stretch.


Although I have quite a lot of patterns (understatement) I had difficulty finding a suitable pattern for a stretch fabric. I did find this New Look pattern 6481 which includes a top, skirt, jacket and trousers. I love the jacket too. This was the only top pattern I could find that I already owned that was both for stretch fabric and in my size. I originally had two copies of this pattern (it came with two different magazines) and gave one to a fellow sewer, R, who had made several successful tops from the pattern. So that was a positive review, worth quite a few more. On Pattern Review, I found reviews for the jacket but not the top.


I lengthened the body by 2” as I am tall.

I have large biceps and did a standard large biceps adjustment to add 1”. I had originally traced the sleeve cap shape and height and because the biceps adjustment lowers that, brought it up to the original. 

Sleeves are my bĂȘte noire.

The sleeve is set in in the round, which I prefer. I set this one in and noticed there was a LOT of easing required but I managed. However, when I tried on the top (no problems making up to this point; directions were fine) the sleeves looked awful. A mess of wrinkles.

Fortunately, I was doing this in my sewing bee and I sought advice from Rory. She pinned out a huge amount from the back sleeve and we realised this is ALWAYS required. Much less was removed at the front - practically nothing. She also slightly rotated the sleeve cap so that it would fall straight - less than ¼” and it made all the difference! She also lowered the sleeve at the underarm seam. These changes made the sleeve shorter, so I slightly lengthened to make up for this. The higher sleeve cap also compensates.

Anyway, I adjusted the sleeve, made up the top and finished it after checking that the sleeves were okay. I transferred the changes to the paper pattern.

I had already started a second version of this top so also had to alter those sleeves. The fabric was a similar grey rib, with less contrast and variegation. The degree of stretch was very similar and the two tops are virtually interchangeable as far as fit is concerned.

Back to the sleeve pattern.
I need in my sleeve
  • Extra sleeve cap height - many sleeve caps just don't reach
  • Extra biceps room
  • Extra length both above and below elbow; these are short sleeves, elbow length.
I don't need
  • Extra fabric at sleeve cap back (or front indeed)
The standard adjustment where a cross shaped cut is made
  • Also widens sleeve cap (not required) and arm of sleeve (that's fine)
  • Also lowers sleeve cap and lowers it more the bigger the adjustment (bad news for me)
  • Shortens sleeve length
I wanted to know if there was another way to make changes.

Don't tell anyone but I had altered my sleeve directly on the pattern piece!! I traced around and made a proper final version (fortunately I had stopped myself before cutting off redundant portions). I then painstakingly put the sleeve pattern back to the original shape - except it's all taped up. Note to self - you would have been quicker tracing in the first place!

I then traced an original sleeve pattern too. So now I had the original and what I wanted it to be ie the final garment sleeve. Rory had briefly commented on cutting off the cap and working on the rest so I asked her to explore that with me.

The sleeve cap was cut off and put aside.
A vertical cut was made down the sleeve, stopping at bottom SA. This part of the pattern was then pulled apart by 1”, the same adjustment made originally.
This widened the biceps area which is good and also lowered the underarm area - which had been done on the modified pattern. The sleeve cap was then placed at the original cap height. There was a significant gap - this was filled in. I drew in the gap in the armscye shape making a suitable shape but NOT widening it at all.

Did this work? Not entirely. Comparing this version to the required version showed that the back sleeve still had too much. It's a better starting point (as well as easier to do!). Rory said that I needed to recognise my back armscye shape and modify.

An interesting exercise. I was going to post photos of the pattern pieces but decided that's probably not relevent to others.

Nevertheless, I think I have a TNT pattern and have already cut out a third using the final sleeve pattern. All these tops are in shades of grey as I was originally planning to enter Pattern Review's wardrobe contest and that was one of my key colours.

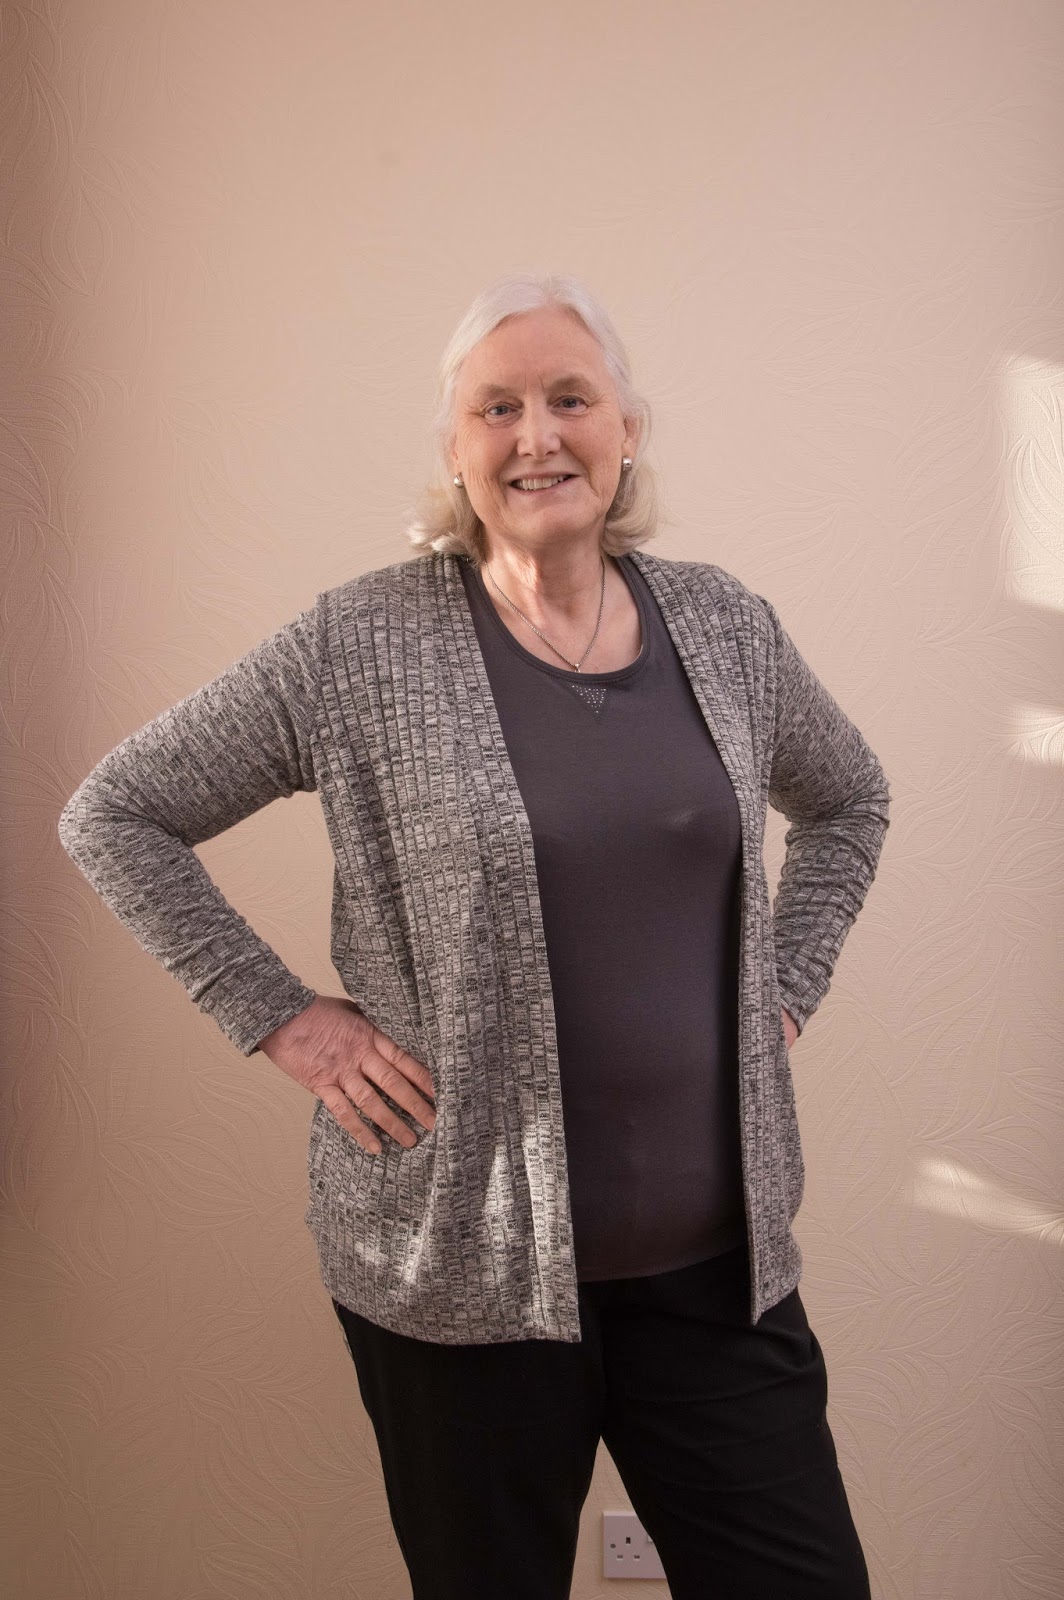
Anyway, I decided to wear my first top and the Blackwood cardigan together, which I thought was  sensible. I didn't wear my pearls as I thought that would lead to adverse comments in some quarters! However R in class who is young, slim and beautiful dared me to, suggesting this would be an ironical statement. I suggested, sadly, that at my age it would not be - though it might be on her. She agreed but of course these finished items are much too large for her.
On my bridge weekend on my hotel balcony, Morcambe Bay in the background It was windy and very cold.
This is my first top and Blackwood cardigan as a 'twin set'. The first top is my favourite of the three.

Conclusion
Two wearable tops. Third cut out. A TNT pattern for stretch fabric. I think I could easily change this top up but don't feel the need to as yet. I have been told it's a good idea to make things multiple times so that's what I'm doing.

I wore the set at the first night of my bridge weekend and felt very comfortable both with the cardigan on and off. I didn't feel people were looking at my outfit and criticising it as I often feel - in fact I was quite clear that the RTW trousers were the poorest part of the outfit. (I still need to conquer trousers)

I've worn the first two tops quite a number of times now.

Postscript
I finished the third top and it's too tight! Less stretch, sadly. I failed to take that into account. I used a fine plain grey jersey and it was both less stretchy and more difficult to use. I think it's easier to use wovens than to take all the different stretches into account! It's not too far off though and I'm supposed to be losing weight….
First top at front (my favourite), third top in middle and second top at back


Thursday 8 March 2018

Blackwood cardigan from Helen's Closet - it's a winner!

Unusually, I’ve actually finished the garment before I start writing a blog post! Also, unusually, I have no problems to report!


I decided to make the Blackwood cardigan from Helen’s Closet based on all the excellent reviews and so bought the PDF. No problems with purchase or with download. No problems taping together – though this will never be something I enjoy! I read the excellent sew-a-long and tutorial and used the excellent information to make a ‘cheater’ FBA and to enlarge the biceps width. I’ve never actually done this type of FBA so the instructions were very helpful. I usually have to widen for my biceps so I had done that before – but I still need to refer to instructions. In case. I also gave a little extra in the hip area because I usually need that.


I had bought some interesting jersey fabric but found it was seriously off grain so I decided not to use it for this.

After finishing the Jasper sweatshirt and being stuck in the house because of the snow and bad driving conditions, I wanted to do more sewing. I chose a different fabric - Variegated Thread Stretch Jersey Knit Rib Dress Fabric in grey from Minerva Crafts, which I bought on their club 20% off day recently – it was also a sale fabric, so this was a very good buy. Originally, I hadn’t considered using it for the Blackwood because I thought it didn’t have enough vertical stretch, though I’m not clear why this cardigan needs any vertical stretch – but 20% stretch was asked for, and 40% across the width.

I hadn’t quite decided which version of the cardigan to do – there is a short version, no pockets (above right) and a longer, mid thigh or longer version with pockets (above, left). Both have a bottom band and sleeve bands. The sleeves are very long, to keep hands warm.  I didn’t want the pockets. I read that a lot of people were shortening the longer length and even though I’m 5’11”, I would also have shortened it. However, in the end I decided to go for the short version, lengthened. Maybe there’s not much difference as it’s the same pattern pieces. Please note that I did NOT lengthen the sleeves and they are still a bit on the long side for an old fogey like me!


I had to do a little bit of calculation to work out what length to cut the front band and what width to cut the bottom band. I’m glad to say my calculations worked out. I added 3” to the cardigan length, so added 3” to each side of the front band – not exactly rocket science!  I used the bottom band from the longer cardigan ready to trim if necessary. I was happy to have a little extra as I wanted to match the rib – that was the trickiest part. Only a small amount of trimming was required.


I had no problems laying out the pattern or cutting the fabric. I did that on Saturday and started sewing up the cardigan following the excellent instructions. No problems – so I have nothing to say here, really! I overlocked all the inside seams, so it looks nice inside as well as outside. The bit that took the longest was actually trying to match my ribs at shoulder and at bands on sleeves and bottom hem.


The only issue I had was mine and not the pattern’s. I sewed on my band with a smaller seam allowance than recommended – partly for pattern matching reasons and partly because I hoped for just a little more cover though of course I was aware that this cardigan isn’t designed to close. My band was just  a little wider than in the pattern – this because it was easier to cut out using the vertical ribs. Anyway, this was my last step in the construction. I overlocked the front band seam – but was then unable to top stitch as in the instructions. My machine said ‘no!’.  I think the overlocked area was the issue.  I tried a few times using different methods but then decided it wasn’t really necessary. I hand sewed junctions to keep them from flipping,though I don't think they would.


In conclusion, this was an easy to make cardigan and the instructions were good. I like it and think I’ll get a lot of use from it.

This is version B, slightly lengthened in body for height and personal preference. No change to sleeve length.

It’s a winner.


Saturday 3 March 2018

Jasper Sweatshirt with collar fastening with epaulet and button

I had admired the styling of  both versions of the Jasper sweatshirt/dress from Paprika Patterns for a long time and finally decided I’d make the sweatshirt length with the collar and epaulet with button - view B but at view A's length.

Should I go outside to take photo?
Probably not at the moment!

I like the hood too, but would have less use for that version. Originally I was thinking of Pattern Review’s wardrobe contest but I had already abandoned that idea by the time I started.  I’d had the pattern for a long time – in fact, I discovered I had 2 copies – one from a Perfect Patterns Parcel (remember the bundles of Indies?) and one I had bought from Pattern Review. There were loads of positive reviews. I didn't read every review but it seems I should have as even some of the highly positive reviews mention some of the problems I experienced. Too late for me, though.


I bought lovely grey ‘Boucle Sweatshirt Knit Dress Fabric’ from Minerva Fabrics. I love the fabric and it sews nicely but I was thinking that perhaps it was too bulky for this design, despite fitting the criteria given in the pattern instructions. I say that because my seams are very bulky. However, I have had communication from a number of people who gave up on this pattern because of that very issue – two of them broke overlocker needles.

The pattern, in PDF form, comes in two sizes 1- 7 with B cup fitting and 7 – 10 with C cup fitting. I made size 8 on top, grading out on the hips to 9. I also made a small FBA following Paprika’s excellent online instructions for both a small and a large FBA. The top is described as close fitting and I wanted to keep that.

The pattern pieces taped together well. I had no issues with this.

I then cut out the fabric with no problem. (It’s lovely fabric!). I found the fabric quite difficult to mark and I think I could have done better in that area. I accidentally missed/lost a couple of important points and had to redo at a later point.

I quickly machine basted the main pieces (front, sides, back, sleeves) together to test for fit. At this stage, I inserted the sleeves in the round. It was fine, though too short in the body, but there is a band which could be increased if necessary.

The very first task given in the pattern instructions - well second, the first is to stay stitch neckline – is to create the welt pockets – the welt lies  between the front and the side in a princess seam and connecting tube pocket. I had rather hoped to build up to that! I’ll cut the story short and say I messed the welts up as I cut in the wrong direction and couldn’t rescue the hole or raw exposed fabric. Inexperience.
The pencil is pointing to the raw hole

My welts are also rather bowed

I was in class but tried to do this myself as the tutor was busy. Later, she tried to help me rescue it. At home, I decided I had to redo. This time I followed Paprika’s online tutorial on the welt pocket and managed okay.

Much better!

I don’t have experience of these but apparently the method is rather unusual, according to some experienced reviewers. I guess my tutor thought that, too, as she said she’d like to have another go at it. No class this week because of snow but I’ll take along the finished version for her to see – and the abandoned sweatshirt front.

The pockets work and are at nice length for me
The sweatshirt is lovely and cosy

My tutor and I both thought that there was a mistake in the pattern as the pocket pieces were much larger horizontally than the piece they were attaching to – at that stage I hadn't seen anyone mention this. However, I cut a bit off the pocket lining and this worked – but I retained the full size of the pocket self fabric. At the end the seams need graded. There are quite a few layers!

Since than,  I read a 5 star review by a reviewer who contacted Paprika about this and learned it was a mistake in the pattern in the larger sizes.  It's possible that this may have been corrected in the latest version of the pattern which came out last week.  That same person made the same observations about the pocket bottom as I did. I learned that it's not always my mistake!

I think that was the only really tricky part, really. Next was attaching sides to front – no problem – the fabric eased in beautifully. Then shoulders, then I attached sleeves flat. I had made a small increase to the biceps earlier, by the way. It was fairly straightforward after this – sides seams and sleeves joined; collar inserted (double thickness) in the round; bands (double thickness) added to sleeves and hemline in the round. Then epaulet and button. The button took me the longest as I mislaid it and took a long time to find it - right next to where it should have been all along. I had looked there several times so it must have been caught up in something. 


What did cause me problems/what don't I like?

Firstly – the seams are very bulky. Very very bulky in parts. Grading only helps a bit. In one part, I’m convinced I was told to grade in the wrong way as the fabric wants to lie with the graded layers exposed. Unfortunately, I carried out the instructions as advised.  I have seen now online a number of people complaining about this and some who have abandoned the project after breaking overlocker needles.

On a side note – this is why I talk about my failures and like to read reviews both positive and negative – if I had read that, I might not have made this sweatshirt. It’s only as I’ve mentioned on IG or FB or via DM that others have said – oh that happened to me too etc. Apparently, there are many better patterns around – I saw Jalie mentioned a lot.

There is some mention in the pattern instructions of topstitching the seams flat but a warning that this might make the fabric too stiff. I didn’t but may have to. I’ll see what happens in the wearing.

The other bit that caused me a problem was that the pocket lining and pocket, which extends across the front as a tube from princess seam to princess seam, is longer than the sweatshirt body.
This is the tube pocket from the inside
Tube pocket from inside - bottom covers the start of the band


There is no mention at all in the instructions as to what you should do with this. I chose to ignore it and carry on attaching the band. Others cut to the same length (shortening pocket – I need the length) – but I’m not sure whether they then sewed in or left loose. If loose, it might as well have been the same length as mine. If sewn in – oh the bulk!!!! What I’ve ended up with is a loose tube across the inside of the sweatshirt. I reckon it will be unnoticeable in wear though I might find it a bit tricky to put on. Only time will tell! I don’t think I’ll really use the pocket, in any case


Looking inside a pocket


Overall

Okay – I love the appearance of the finished garment. I rather like the slimmer fit and don’t think it’s too short. The pattern is for 5’7” and I’m 5’11” but no lengthening of sleeves or body was required. I’m sure it will be worn, and I think it is a little more stylish than some of the other sweatshirts I have. I’m concerned as to how well it will last. My clothes generally last a long time. This though?

I don’t love the inside finish. That might not be too important to some but it is to me – especially when I show to my sewing tutor! I’m concerned, though, that the sweatshirt might wear less well. The biggest issue is really with the bands - I feel they might have been attached differently to avoid this issue. There are 3 layers of fabric here and it becomes quite thick. This is where I thought I had chosen my fabric unwisely (even though it seemed to match criteria perfectly) – however, two others who made this, and who had used thinner fabric than advised, still had problems and broken overlocker needles.

I don’t think I’ll sew this again. I’d have to find a better way of making the pockets and attaching the bands. Maybe the bands need to be in a different, finer fabric - or I could just have hems.

I'm hoping to get this photographed tomorrow. It's bright enough in all the snow. The sweatshirt is warm and cosy

Sorry, I copped out of an outdoor shot today. It's still snowing on and off .
I took the bulk of the photos on the other side of this glass, inside the conservatory


How Do You Read Blogs?

It's a while since I've posted a blog,  lots of reasons. I'm thinking of starting again. However,  I used to read the blogs I fo...