I decided to make the Blackwood cardigan from Helen’s Closet based
on all the excellent reviews and so bought the PDF. No problems with purchase
or with download. No problems taping together – though this will never be
something I enjoy! I read the excellent sew-a-long and tutorial and used the
excellent information to make a ‘cheater’ FBA and to enlarge the biceps width. I’ve
never actually done this type of FBA so the instructions were very helpful. I usually
have to widen for my biceps so I had done that before – but I still need to
refer to instructions. In case. I also gave a little extra in the hip area
because I usually need that.


I had bought some interesting jersey fabric but found it was
seriously off grain so I decided not to use it for this.
After finishing the Jasper sweatshirt and being stuck in the
house because of the snow and bad driving conditions, I wanted to do more sewing. I chose a different fabric - Variegated Thread Stretch Jersey Knit Rib
Dress Fabric in grey from Minerva Crafts, which I bought on their club 20% off
day recently – it was also a sale fabric, so this was a very good buy. Originally,
I hadn’t considered using it for the Blackwood because I thought it didn’t have
enough vertical stretch, though I’m not clear why this cardigan needs any
vertical stretch – but 20% stretch was asked for, and 40% across the width.
I hadn’t quite decided which version of the cardigan to do –
there is a short version, no pockets (above right) and a longer, mid thigh or longer version
with pockets (above, left). Both have a bottom band and sleeve bands. The sleeves are very
long, to keep hands warm. I didn’t want
the pockets. I read that a lot of people were shortening the longer length and
even though I’m 5’11”, I would also have shortened it. However, in the end I
decided to go for the short version, lengthened. Maybe there’s not much
difference as it’s the same pattern pieces. Please note that I did NOT lengthen
the sleeves and they are still a bit on the long side for an old fogey like me!

I had to do a little bit of calculation to work out what
length to cut the front band and what width to cut the bottom band. I’m glad to
say my calculations worked out. I added 3” to the cardigan length, so added 3”
to each side of the front band – not exactly rocket science! I used the bottom band from the longer
cardigan ready to trim if necessary. I was happy to have a little extra as I
wanted to match the rib – that was the trickiest part. Only a small amount of
trimming was required.


I had no problems laying out the pattern or cutting the fabric.
I did that on Saturday and started sewing up the cardigan following
the excellent instructions. No problems – so I have nothing to say here, really!
I overlocked all the inside seams, so it looks nice inside as well as outside.
The bit that took the longest was actually trying to match my ribs at shoulder
and at bands on sleeves and bottom hem.


The only issue I had was mine and not the pattern’s. I sewed
on my band with a smaller seam allowance than recommended – partly for pattern matching reasons and partly because I hoped for just a
little more cover though of course I was aware that this cardigan isn’t
designed to close. My band was just a
little wider than in the pattern – this because it was easier to cut out using
the vertical ribs. Anyway, this was my last step in the construction. I
overlocked the front band seam – but was then unable to top stitch as in the
instructions. My machine said ‘no!’. I
think the overlocked area was the issue. I tried a few times using different methods
but then decided it wasn’t really necessary. I hand sewed junctions to keep
them from flipping,though I don't think they would.


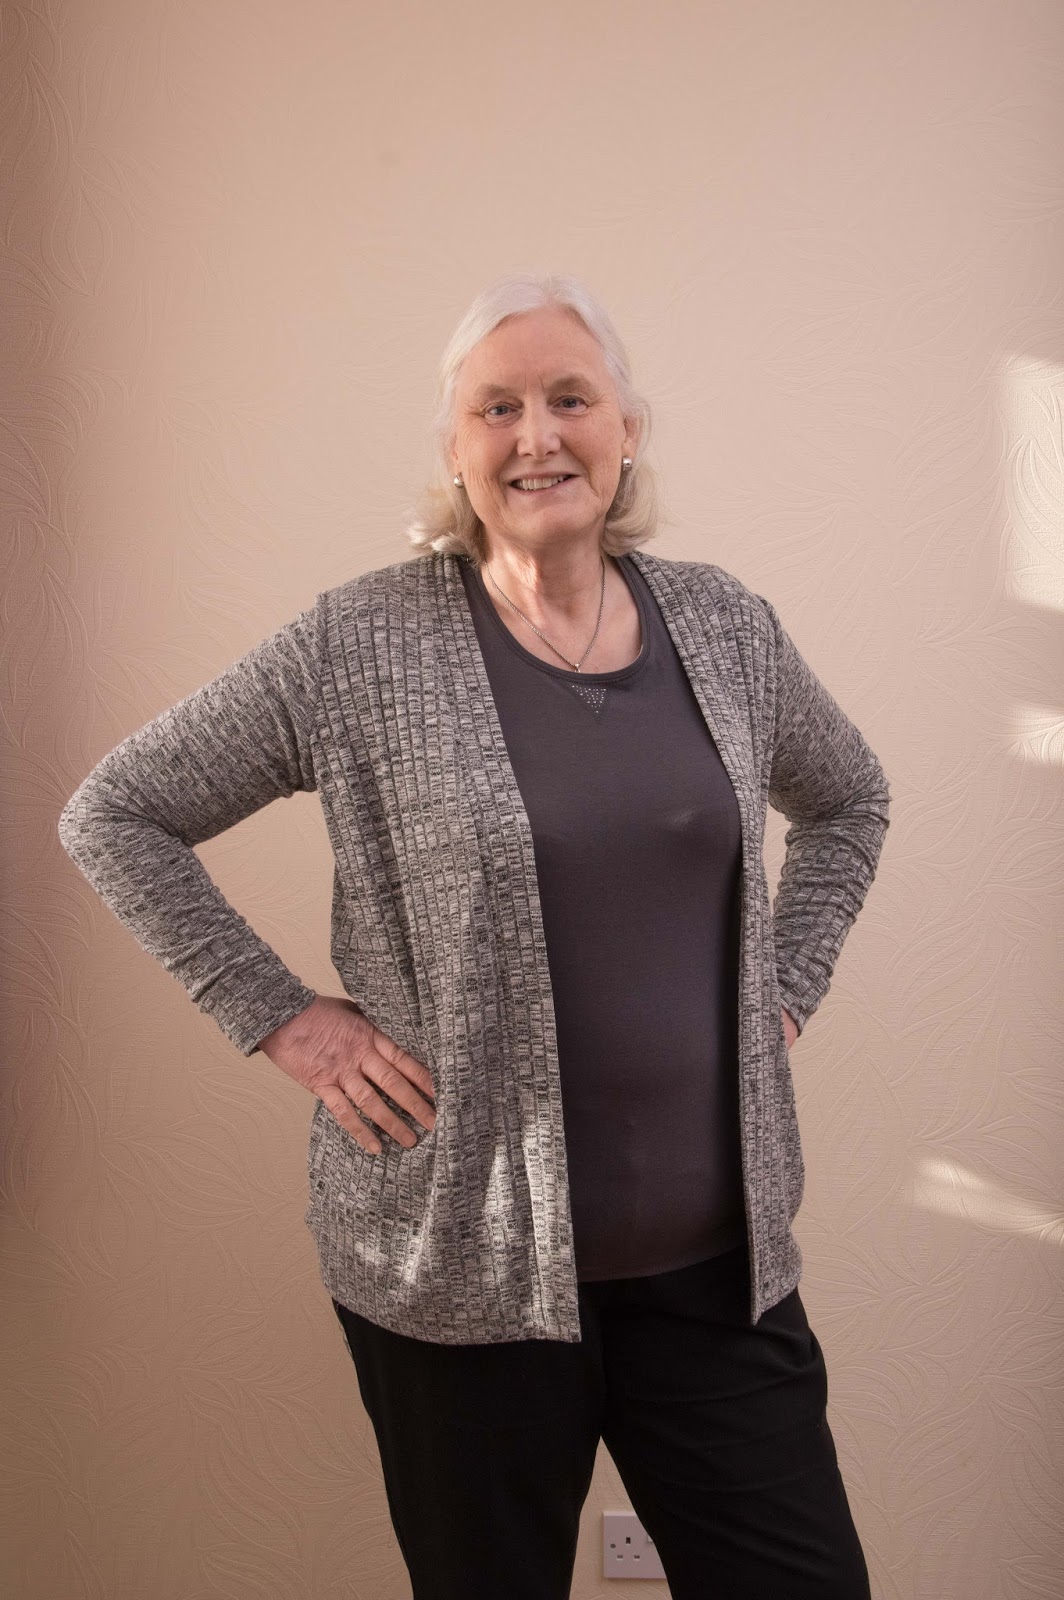
In conclusion, this was an easy to make cardigan and the
instructions were good. I like it and think I’ll get a lot of use from it.
This is version B, slightly lengthened in body for height
and personal preference. No change to sleeve length.
It’s a winner.


A God review of a pattern I'm not familiar with. It looks like a good wardrobe staple. Enjoy wearing it ��
ReplyDeleteThank you, Kim. There are lots of reviews of this at the moment. It was a pattern of the year on Pattern Review. I'll make more. They're not designed to close
DeleteI just recently discovered your blog and am loving your reviews!
ReplyDeleteThank you, Paulette!
DeleteSometimes machines do say no! One learns to go with what happens...The results are lovely and the cardigan certainly does make up nicely. Agree with you, taping PDF patterns is totally tedious...
ReplyDeleteThanks. Yes, that's true.
DeleteI loathe putting pdf patterns together -- if I can I usually take it to a shop for a large copy.
ReplyDeleteLove your cardigan!
Thanks, Annie. Sadly, we have a large A2 printer at home which I thought I could use for these but it's usually only A4 or A0 for copyshop and they're not adjustible.
Delete