Tuesday, 24 July 2018

Silks and Sheers Class at Centre Front Studio


I attended two 3 hour classes with Rory at Centre Front Studio, looking at choosing, cutting  and sewing silks and sheers.

First Session

In the first class, we got a number of samples and learned about fabric types. I have a useful set of notes and samples for the future. It's nice to feel and discuss samples. I have the Fabric for Fashion Swatch book which has that advantage too.

Then we cut out the pieces for French knickers. We used the technique of having the fabric sandwiched between two layers of paper and the pattern on top. I had read about it but realised that I hadn’t fully understood. I now understand that I am someone who learns best after seeing something demonstrated - then I like to read about it. We had to cut out singly, of course, so I ended up with a lot of ‘ghost’ paper patterns!
 
Patterns and Ghost Patterns


I was using floral vintage silk. I had to cut on the straight of grain as there was insufficient fabric to allow a bias cut. I didn’t have too much trouble cutting though would have preferred to use my rotary cutter. That wasn’t possible as there were six of us so space was limited.


After that, we sewed French seams. I had never actually done this other than for a sample in class. I can certainly see them being useful in the future. We used a microtex needle. I was able to get my knickers sewn together but I didn’t have time in class to sew the hems or create the waist treatment. I started doing a baby hem on the legs but really I didn't like that as my stitching was a bit wavy - I realise I rely a lot on guides to keep my stitching straight. My hem isn’t great and too chunky - not a baby hem at all! I didn’t get a chance to do any homework, to finish the knickers, which remain unfinished as I write. I don’t have much intention to finish tbh as they are not my size or that of any of my girls. Too small for me and too big for them and I don't wear them anyway. I will use as a practice piece for hems.
 
Wavy turned and trimmed hem on left but no final row of stitching; right hasn't been turned stitched or trimmed as yet.
Second session. More samples of silk and sheer fabrics.

This time, Rory had cut out the pieces for a camisole. We were using polyester georgette - as I will be doing for Joanne’s shorts as soon as I get back to garment sewing.

The first step was to sew and turn the rouleau straps for the camisole. I found keeping the same width, and avoiding stretching the bias strips, rather tricky but did manage to produce acceptable and matching straps in the end. We used a kirby grip to turn the loops as Rory finds them much better than proper loop turners. I think I agree! I do have a loop turner but haven’t found it useful.
 
The straps look better in real life!
Then we sewed ‘couture darts’ on the front of the camisole - that is, darts using the bobbin thread. I had read about this but quite simply didn’t understand the explanation. Now, having had it demonstrated and having sewn two myself I am fine with them. If you only have two darts to sew and the fabric is fine, I think I’d use these darts. However, if there were multiple darts, probably not as you have to rethread the machine for each dart. Importantly, you start sewing the dart at the tip - there are no ends. Rory detests darts with knotted tips! You can back stitch to properly secure at the wide part of the dart which will be in the seam allowance.
 
Tip of the dart is smooth with no ends or finishing
I quote from ‘The Dressmaker’s Handbook of Couture sewing Techniques’ by Lynda Maynard - a great book. She says that this is a wonderful method for sewing a dart which works well on all fabrics and is essential when working with sheers. ‘There are no unsightly thread ends at the tip of the dart… just a clean , graceful finish.’

Then we French seamed back to front. This time, I used my rotary cutter to cut off the frayed threads at the edges after I sewed the first seam. That made it much easier and I didn’t get bits of thread sticking out.

Okay - it couldn’t last. I tried and tried to get an acceptable rolled picot hem but failed. I had it demonstrated. I was using the rolled hem foot and a suitable stitch for the picot edge. Considering I haven't got to grips with using this foot with a straight stitch, on a straight piece of easy fabric, it was no wonder I struggled!! I also tried a rolled hem on the overlocker but wasn’t happy with the results. I should say, these were all sample pieces - I haven’t yet tackled the actual hem and neckline treatment on the camisole. One of the other ladies finished her camisole - she used a pin hem, bias binding on the side and back necks and lace on the front and I think I’ll do the same.

I can finish the camisole in sewing bee but again, it won’t fit me or the girls, so I think I’d prefer to get on with some other sewing. However, I will practice these techniques occasionally! One day, I might manage. As I don’t have another project that I can just pick up and take to sewing bee tomorrow, I might possibly take this.

I am using difficult fabrics in the near future

I have already cut out the two layers of georgette for Joanne’s lace edged shorts - the shorts are self lined and bagged and lace inserted in the hem. I’ve made these before but not I realise for 2 years so I will have to remind myself of the steps and take it slowly. As the shorts are double layered, I didn’t worry too much about finishing the seam edges last time but will have to think about that. I’d like to finish for her birthday in one month's time
 
I have more sandwashed silk to make Helen another dress like her red one, in green this time. Some of the techniques are tricky, and again I’ll need to take it slowly. I haven’t started that yet. That’s for her birthday in November.


Monday, 23 July 2018

Is this still sewing?

I've had to reformat this post as the lines weren't wrapping,a although they seemed to be when I posted it. Well, I've tried again! Please let me know if you read this and the lines are wonky again, thank you.


Gosh where has June - and now nearly July - gone? I haven't done much in the way of sewing as I've spent a while helping my mother move. She has moved into very sheltered accommodation where she will get her meals made for her and most importantly, there are no stairs. I say June but we’re nearly at the end of July as I add to this post. I will be visiting mum this coming week and hope that will be the last of these ‘crisis’ visits - just back to normal visiting. Fingers crossed!

I haven’t been sewing, though I did do a class on silks and sheers which I will post about separately. I've already started the post just need to take some photos maybe.

I did a little machine embroidery earlier in July. I made some pin cushions. A few in one design, which I loved , ‘the sweetest pincushion’, a free design from @sewcanshe via Craftsy and one in another, which I paid for but didn’t like nearly as much (I don't have a photo of that one either). I have given them all away apart from this one which I have earmarked for someone. This could be practice for a Frida Kahlo embroidered huipil! Kate@fabrickated is running a #dresslikefridakahlosal challenge but I won’t be joining in though I would quite like to make the top.

Because I’ve put on weight, I have very few clothes that work for me in this hot, for us, summer. I’ve never really felt the need to have a separate summer wardrobe as many items are all season with the addition of layers. Depends on your lifestyle of course! I don’t go on summer holidays abroad as I really don’t like heat. I would’ve liked to make some things but it wasn’t to be. I have plenty of tee shirts, it’s bottoms that are eluding me.

I had a number of garments waiting for alterations and repairs and concentrated on them rather than on sewing from scratch as I found I didn’t have the concentration and focus required for that.

I had a pair of blue linen trousers - casual, with gathered tie at waistband, that were comfy if not over smart but they developed a linear stress hole in the inside front leg. I was shocked but apparently linen doesn’t wear well. I didn’t know that. I had read it might not be a good idea to tumble dry (though the label on these said it was okay to do so) and I don’t. But a longitudinal hole appeared nevertheless. I put some fusible interfacing behind the rip and sewed over at the front. I should have used a blue and a white thread in the stitching but didn’t even have the right blue. They’ll do a turn. No photo

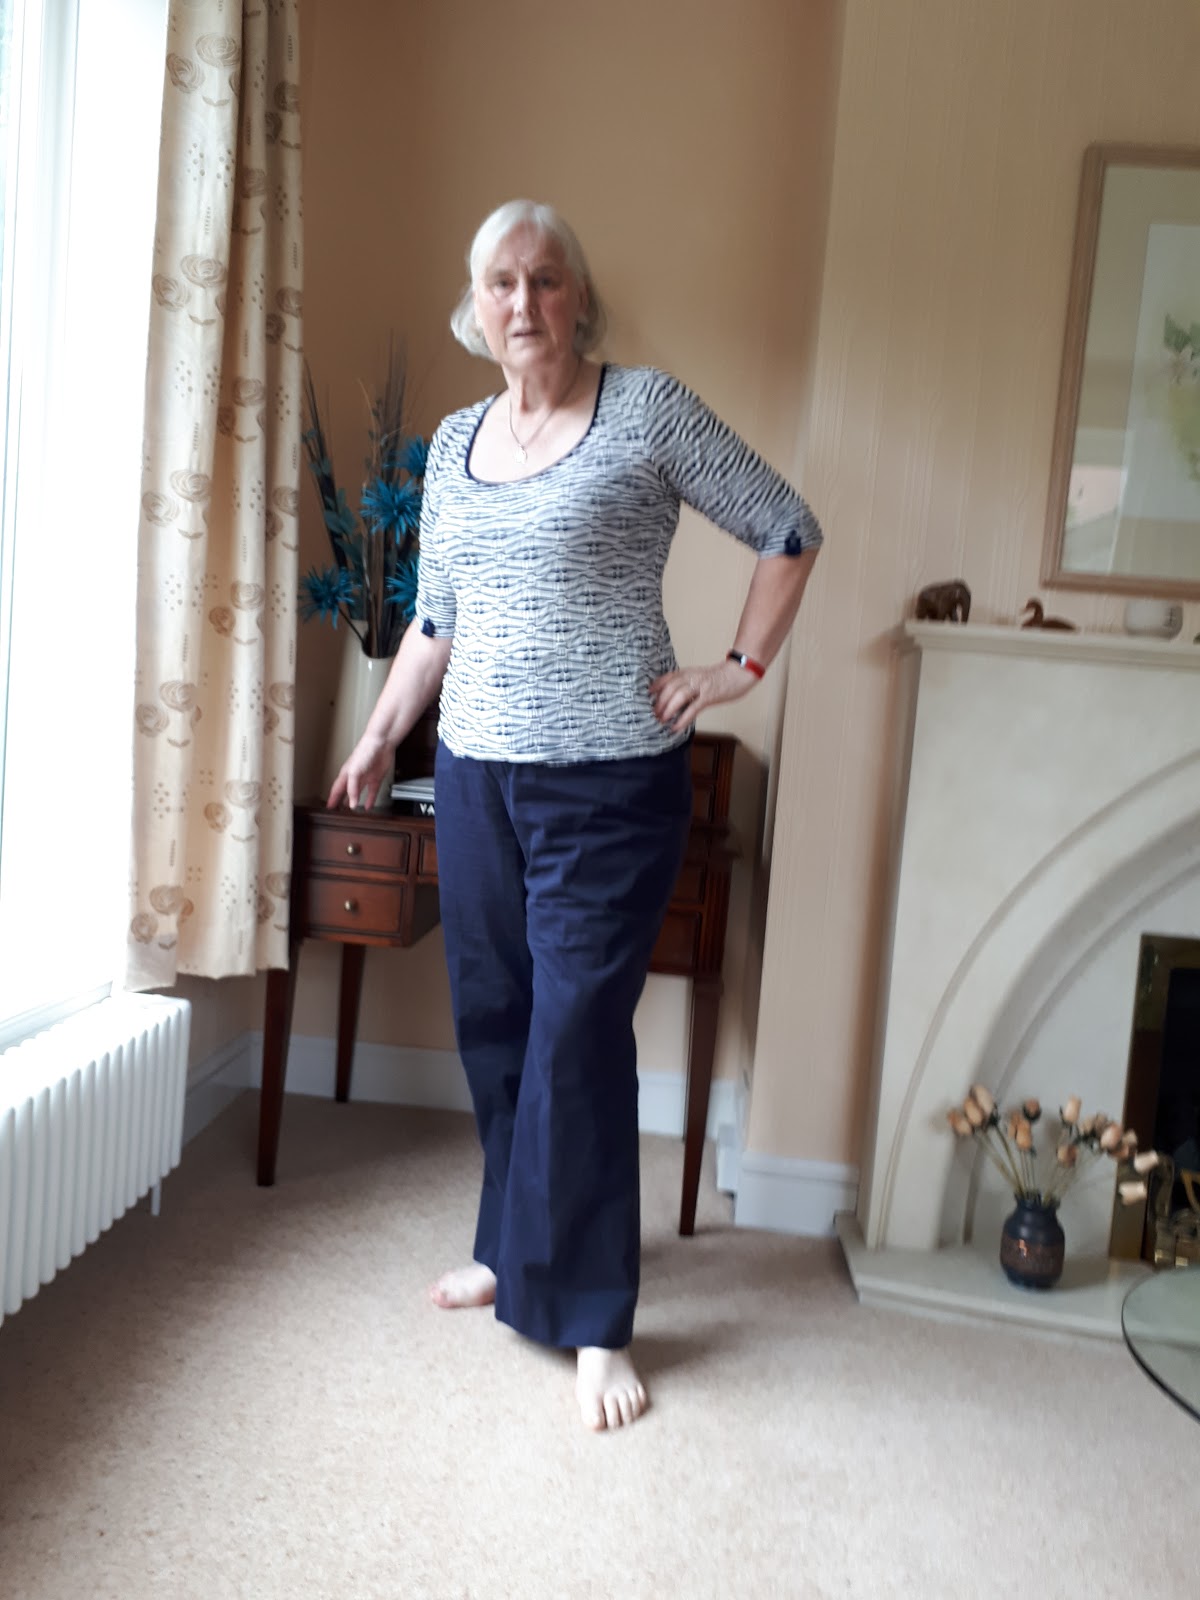
Next up was a sleeveless top with a peplum. I don't usually wear items with peplums but never say never! The underarm area stuck out in a most unattractive way and last term I took that area in. However, the right underarm was still loose and baggy and had to be taken in more. One tip by sewing tutor was to cut away the excess seam allowance before overlocking the seam allowances. That worked well and I then stitched the top of the seam allowance to the seam at the back. I had hoped to finish for my twp trips to London but it wasn’t to be - I finished it yesterday. I don’t actually like this top - I actually think it’s too big and could do with a reduction at the sides. I wore it today and it’s comfortable. I asked david to take a photo of me wearing it - his response was ‘Are you sure?’ Maybe you can see why!

Where I'm holding my hands on my hips is exactly where this top is too loose - I suppose that makes it cooler though!

Last term I started to alter a plain/striped top in grey and black. I liked the top but there were two issues. The first that the top was the wrong length for me - it is supposed to be a tunic but for me needs to be either longer or shorter. Secondly, the sleeves were too short. Solution - I cut a piece off the bottom and used this as a cuff on the sleeves. I used both straight stitching on my sewing machine for placement and the overlocker to finish. This meant I could use the finished edge of the bottom hem on the cuff bottoms. I don't have a coverstitch machine so used a pin hem and twin needle on the bottom. It looks fine and I’ll get a lot of wear out of it.

I can’t show you any of the steps - though they were so simple they weren’t worth photographing. I tried it on to get a photo and find that the cuffs are a little loose so I may have to take in further - I’ll see. The sleeves are lengthened by a lot and I guess I should have tapered as I went down rather than keeping the whole thing straight.

There is a lot of decorative stitching on the top - I couldn't recreate this

My twin needle hem on the bodice


Overall view. No longer an inbetween length tunic but a top. Sleeves have been lengthened by 2.5"

I have a tunic that had lost two of its buttons. One was lost completely. One was broken but I still had the front. A third button had losts its crystal.  I looked through my stock of buttons (as an aside I remember loving playing with my grandma’s button jar) and to my astonishment, found two identical buttons in a little bag. I hadn’t remembered about them. The loops around the buttons are not big enough to allow the buttons to be fastened so I had to sew these new ones in the same way. David kindly prized out the crystal from the broken button and replaced it (glued it in) in the crystal-less but otherwise intact button. Voila! A wearable tunic!


Next was a pair of golf shorts where the zip stitching had come loose. This is a fly zipper and I didn’t want to remove and replace completely especially since they don’t actually fit me at the moment! I pinned the loose part closed and stitched an extra line of stitching through all layers. Perhaps not the most authentic of solutions but it’s work for me, if they ever fit me gain, that is.

The second line of stitching isn't that obvious!
David mended my box that holds my Bernina feet and some spools. Again. He had mended it once before and I broke it again. I think it’s pretty  fragile and a poor design. I haven’t found anything better to hold my feet (these are on a shelf, hanging down, I had hoped for soft plastic holes/nests) so again, this will last for a while at least. I could buy a new one from Bernina but they are expensive and I don’t think very good.

I have a few other half-written posts from various times that I’ve started or written while  waiting to do other things and will gradually post them over the next couple of weeks.

Sunday, 1 July 2018

Meeting up in London with some fellow 7 Steppers

Sunday 1st July

I'm on the train on the way to London to meet up with some of the 7 steppers (7 Steps to Style) I have got to know online - and Imogen Lamport, the founder, who is here from Australia. Her blog is Inside Out Style. https://insideoutstyleblog.com
where you can get all the details of the different programs.


Last week, LNER took over the running of the trains on the previous Virgin East Coast line. I was a bit concerned that my booking made with Virgin might have gone wrong but I needn't have feared. I always do fear though! I booked first class advance for a bit of extra luxury - the only downside being that my train time is set rather than having an open ticket. That of course gave me another concern - getting to the train on time as David can't drive me. Again I needn't have worried - the taxi arrived in plenty of time and I was able to relax on the train for 20 minutes before it left. At weekends first class doesn't do the excellent weekday menu, sadly, but I am going for lunch so that's not an issue. Plenty of drinks available (no, I'm not referring to alcohol!). The train livery is still Virgin. Outside too though I think some have changed


I've been catching up on some posts and blogs as I haven't had time recently. That's calming my nerves. I'm both excited and nervous about the meetup! I'm looking forward to it. I think.

It's interesting that you can almost immediately tell who wants to talk and who doesn't. My first seat companions did but they got off at York - my new fellow traveller doesn't. I realise I'm glad about that. Generally, I like to find out about other people and am happy to talk - or to sit and write blog posts!

Down the carriage, I can hear some people playing bridge; I don't know how many of them there are. I’d like to join in. I won't of course.

I still haven't completed the personality style analysis as I'm humming and hawing over some of the questions. That and the fact that I have difficulty choosing from a menu (often regretting what I chose) and like to keep options open might suggest one direction but other aspects are firmly in a different direction. Now, however, I'm not sure how much of my need for decision making (yes!!) was to do with business need rather than my personal style. I find it fairly easy to be adaptable and have learned lots of ways of functioning over the years. Be interviewed on national radio? Sure! (Terrified inside and regretting acceptance). Give a talk? A lecture? Okay! (Help!!) Meet a group of people I've never met irl? No problem (only minor anxiety). Last year I accepted an invitation to a weekend sewing session in a small group and to stay overnight with the organiser - I didn't know any of them and only the organiser briefly online. That was fine, I enjoyed it and have made friends. My motto is ‘have car, will travel’ . Having said that I'm a ♋ cancerian (do any of you believe in that?) and a home lover (I'm always desperate to get home) and very soft centred, easily hurt but with a harder outer shell.

Our train is delayed as there is a broken down train ahead so that has caused delay. Fortunately I got an earlier train than necessary so this might work out well. We're near Newark.

We might be stopped for a while - they can't tell us yet how long. But I'll wait a while before putting on my makeup. Oh, we're moving!

What else will I say at the moment? I feel unprepared clothes-wise and style-wise for today's meetup. I've put on weight and have nothing that fits well. It's hot in London so I'm wearing a blue patterned summer dress. It's lined and a little less loose than I'd like! With being up at my mother's helping her move, I haven't had time to get my hair trimmed. Oh well! This is more the real me! Make up will help.

I've remembered to bring my colour swatches. We're shopping after lunch. I'm a RTW Faster so am not intending to buy anything but I would if I saw the ideal item! It would need to be at least a 9 out of 10. I'm sooo short of clothes and just haven't had time to make. I have fit issues and there is still no TNT on the horizon. Losing this extra weight is going to take a while - easy on, difficult to get off. I neeeed clothes!

We've just been told the delay cost us 30 minutes so that is pretty good timing to meet some of the others. There are still some FB messages going back and forth so I have been able to say that I will be at the meet point.

Last night we heard that one stepper coming from Austria had a problem due to her flight being cancelled. I hope she makes itIf everyone makes it, we will be 13 in number. Are you superstitious? I'm not, really.

I'll carry on with this post on the way home.

I'm on the train. On my way back home. I'm glad as I feel quite tired. I have a lovely seat. Just the right temperature and wi-fi.

There were 13 of us. Daniella made it from Austria. I met up with 4 others in King's Cross and we walked to the Granary Square Brasserie and bumped into Daniela on the way. Because it was such a hot and sunny day, they were going to seat us outside. However, we were in favour of sitting indoors with the air conditioning and plenty of cold drinks. One of our party, Alison, is in a wheelchair and needed suitable facilities

It was lovely to chat to people I ‘knew’ but had never met. I had never had my signature colours done because I felt my photos were of such poor quality. I took advantage of Imogen and had them done live; she also confirmed my colour and value contrast and body shape. I have quite a few signature colours - I'm very lucky. Not everyone has so many.


This is my swatch. They're not ask signature colours but there are quite a few!

A signature colour is one that enhances eyes, lips or skin. One of the pinks tones in with the lip gloss I wore today.


Because I have colour in my eyes and skin, I can wear two colours rather than the neutrals plus one colour I previously thought.

It was very interesting seeing the colour swatches of the others there and comparing and contrasting. Some shades overlap, of course.

There was a lot of talk of personality types. I'll work on mine next week. I have a better idea now. Imogen had previously said to contact her but I didn't have time and didn't want to take up more of her time today.

You won't be surprised to learn that by the time we had eaten and chatted and got the bill sorted (thanks Tracey) people were getting ready to return home or to their hotels. No shopping. Well it means I haven't broken my fast!!

Ruth and I had a bit of time to kill before our trains so we sat with a cold drink and poured over the latest issue of Burda and discussed sewing until it was time to leave for our trains.

It was a long and expensive day but worth it! I'm playing in a golf league match tomorrow (the last of the season) but I have time to settle, get to bed at a reasonable time and even have a long lie if the birds and sunshine allow! I will have to wear the golf trousers I showed on my last blog post but hopefully I'll manage to make a nice pair of trousers - I've set September as a target.

I've just moved coach as our air conditioning broke down. This coach is much cooler. I've decided to post this blog if I can - I've never done it entirely on my phone! I didn't ask permission of the others to post their photos.

Saturday, 30 June 2018

Golf trousers, de-toileing plus tips from Kenneth D King and Sandra Betzina


I originally was going to do a post on the completion of my long-in-the-creation trousers. However, we all know that the fit is the issue, not the construction. I don't have any good photos but decided to post today (a while after I started the post) to get it away. Too many of the photos are just a bit too personal to post on my blog but I have them for future reference! I don't have construction photos for some reason. 

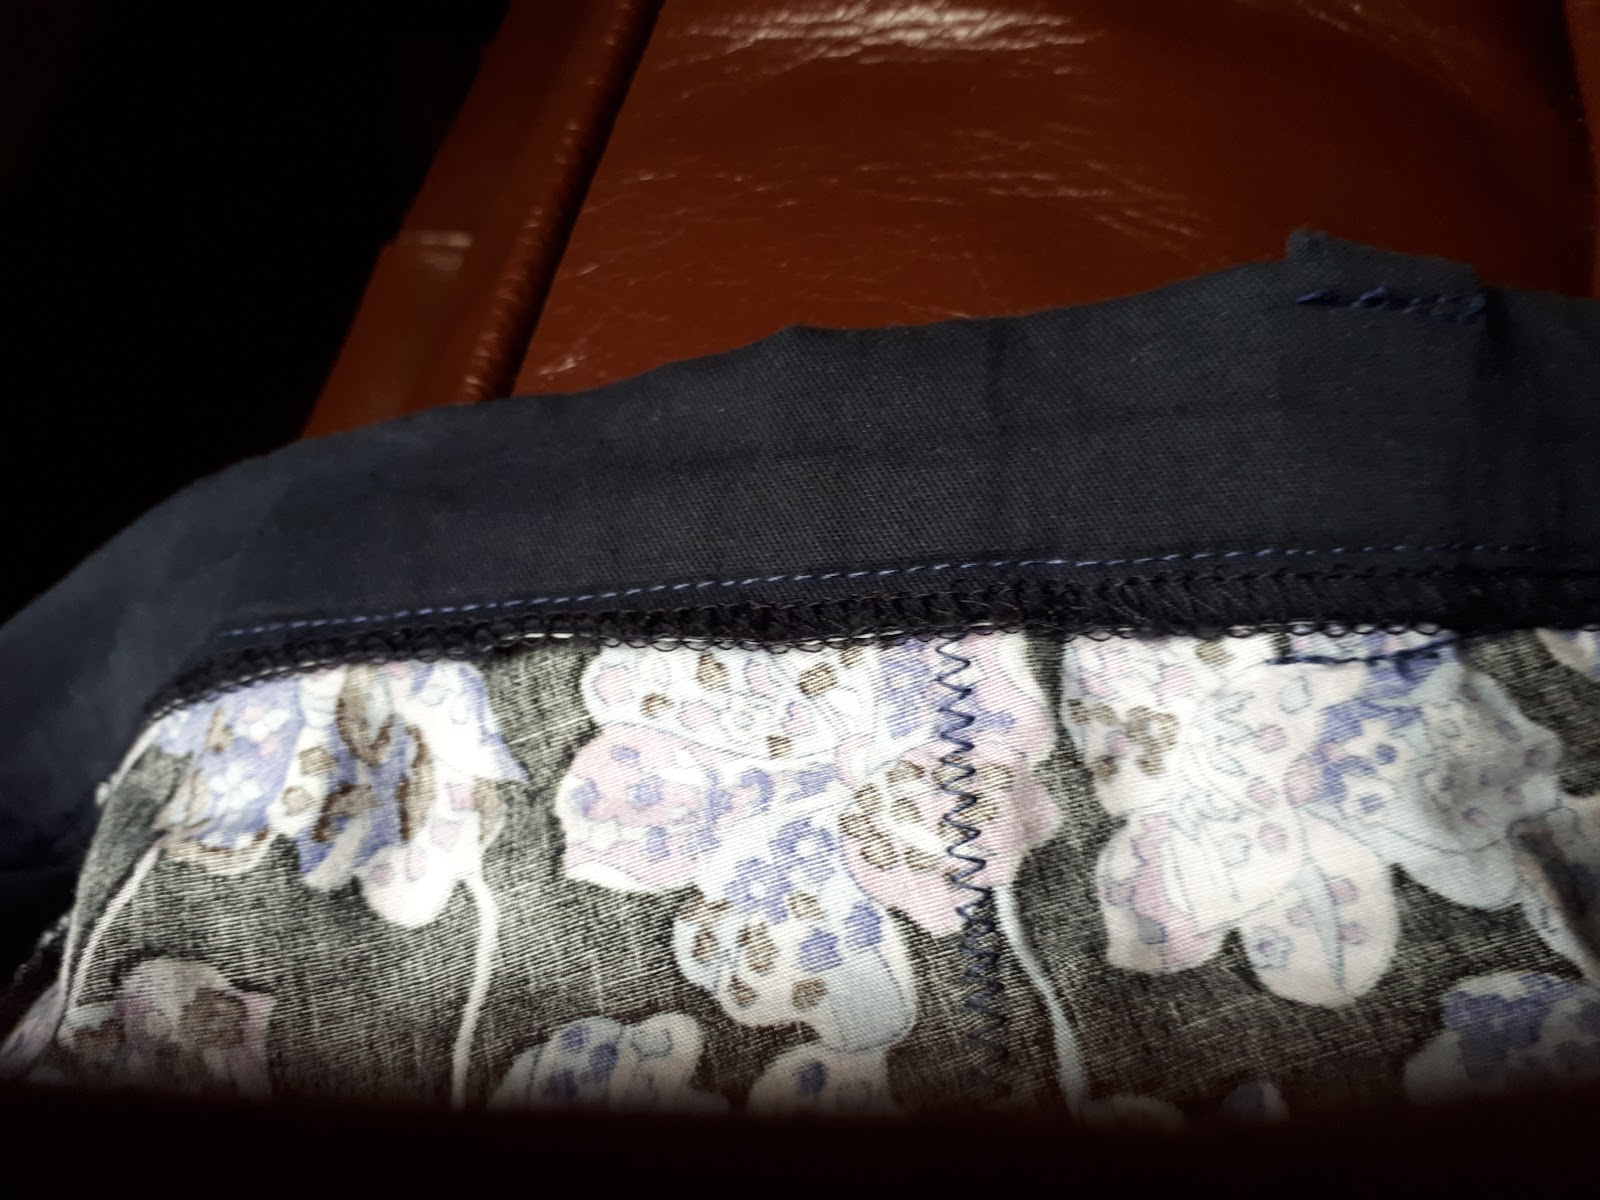
Briefly, I made up trousers in navy cotton, for golf,  using a heavy cotton fabric that I had bought to use for trouser toiles. The source was the trousers being fitted to me and of which I had made a satisfactory basic toile ie with no added zip etc. These had a fly zip with guard, front jeans-type pockets (but no back pocket as I don’t tend to use; in golf trousers, this is a pocket for the score card but I use my trolley card holder)) faced and lined with purple floral cotton. There is a one inch waistband with seven belt loops. I had no problems with construction.

Not in golf attire but I have worn them a few times to golf- no photo of that though


A few points:
I made front ‘jeans type’ pockets. For the pocket itself I used some floral quilting cotton that had been sewn into a top which became a wadder.  I had an idea how to do them but followed my class instruction leaflet. I found it easier to understand than Closet Case’s e-jeans book. However, one thing that struck me was that Closet Case recommends sewing the fabric the other way around to the class and I can see the reason why. With a plain fabric, I would use the class method but with a pattern like mine it probably is better to see the bright cotton when you’ve opened the fly zipper rather than it being deep inside the pocket as it is.

Inside trouser as opened up. Wrong side of fabric shows. You can just see the fly


I used a Sandra Betzina tip with the pockets and pressed them round a ham to simulate the body which will hopefully make them lie flatter. I do believe that this worked rather well.

This is trying to simulate the pocket around the ham.


I then followed a Sandra Betzina fly zipper insertion tutorial. I thought it was straightforward. I completed it in class with advice from my tutor, who didn’t like the method, feeling it was rather old fashioned. However, this method gives a larger overlap than the method she would have used and is perhaps better for my over-large tummy. I previously found with the other method that there wasn’t quite enough overlap.

I was going to put some elastic in the waistband but decided in the end I wouldn’t. However, I decided to stitch the waistband with a seam at the back to make future alteration easier. Hopefully alteration to make them smaller!

Despite being 'relatively' pleased with the toile, I do have a number of issues with these trousers which I will rectify and which don’t stop me wearing them for golf.

The trousers pull slightly at the front thigh. I felt I didn’t want to further increase the front crotch point as they are already fairly loose in that area (but these are for golf not fashion). My tutor suggested I use twill with a bit of stretch so I’ll have look the next time I’m anywhere suitable. I didn’t find anything in my brief trip fabric shopping in London (see last post)

After wearing them for golf I had some thoughts
  • The front waistline is quite a bit too high due to my sloping waist
  • The side waist seam is a bit high
  • Back fine
  • The pockets are not the best shape, despite copying a RTW golf trouser
  • The fork point is too far forward.
  • The trouser legs are too wide and flappy but not in a nice wide legged trouser way!
  • I found too that the waistband irritated my bare skin. The solution to this was to tuck my top into my trousers - but that was particularly unattractive! Fortunately, when I played a match it was cool enough to wear a jumper. (I won my match on the last putt but, sadly, my team lost and we were knocked out of the competition). The inside was overlocked but clearly I’ll need to make a softer finish. I think this is likely to be a tape binding

  • I do have to wear a belt as otherwise the waist slips at front to its natural position. I see that the side seams are too long in addition. Even with the belt, the trousers slip a bit and there is a deal of excess fabric pouffing out on the front, on the top of the in seam and above the fork. I can wear them (until I get another pair!) but don’t find them comfortable.
  • I will change the zip closure to the 'female' side
Crushed after golf. This fabric crushes easily and I'll avoid it for that reason. I used it here as this was designed to be a wearable toile. It's wearable - just!

Changes to pattern
The fork point was too far forward. After testing the point on my body, we agreed that I needed to add to front crotch and subtract same from back and appropriately taper the adjustment to the legs. I did this on the pattern. I hope that might alter the pull across the front of the thighs as it added more to the front thigh. My tutor also pinned out an adjustment in the hem width and I adjusted the pattern to reflect that too. Interestingly, all of the excess came from the inseam, which probably reflects my knee angle

After these changes, I assumed I’d need to make a further toile. After washing the trousers, following golf, I found that I couldn’t hang them up to dry in my usual way, that is by using a clip hanger on the hems. The trousers were very twisted and just didn’t lie properly.

In sewing group, I asked about this and we found that the front crotch and back crotch points were not at the same level, by some way - this despite the seam lengths being the same. The leg cut edges were different shapes, too. I therefore decided to look again at the pattern. That will be a future post! I have started but won’t have time to do much until after the end of the month.

Tip
I bought Kenneth D King’s fitting book and quite like the way he has done it. There is nothing about trousers, though. Anyway, I’m not reviewing the book but rather passing on a tip. Prof King re-uses his muslins. When marking the fabric, he uses Frixion pens so that the marks disappear when he irons the deconstructed muslins, then he can re-use apparently fresh fabric.

One night before the current heatwave, I was rather cold as the temperature has dropped and it was rather dreich outside with a horrible drizzle which made you feel cold just looking at it. I have been trying to organise my sewing den. I have given away lots of fabric, ex-toiles, but found a whole lot more. I wasn’t sure what they all were as although I have labelled my patterns fairly reasonably, I haven’t done the same with the toiles. I know some are more recent trousers, some historical trousers, and there is a jacket, a dress etc. I spent time dismantling the toiles, picking out the thread and then pressing the pieces (made me feel lovely and warm!). Some of the pieces of fabric are marked - sadly with permanent marker, or pencil - but in future I will try the Frixion pen method. I feel this is much more environmentally friendly - and cheaper to boot. Other note to self; I must clearly label toiles and versions

This is just some of the fabric from the dismantled toiles taken on that dreich evening


Thoughts on clutter
I have to confess, I didn’t dismantle some of my course toiles - am I being sentimental? Or is this just practical as I have a finished piece to consult? I’m thinking a lot about practicality and sentiment as my mother prepares to downsize radically into a sheltered flat. We too had been going to move - south, closer to our daughters, though my mother being north was an issue. As we planned to downsize, we were decluttering. What a lot of stuff! However, having had a house valuation which is less than we had hoped for and given that prices further south are rising and the difference between our prices and theirs is increasing, we have decided to postpone a move for a few years. The decluttering will continue, however!


Saturday, 2 June 2018

Patternmaking Made Easy by Connie Amaden Crawford; balancing patterns


I bought a new old book.
That's no surprise to those of you who know of my book addiction, of course.
What might surprise you is how inspired this book makes me feel, despite feeling pretty gruesome at present.

The book is Pattern Making Made Easy by Connie Amaden Crawford, the original edition from 2005. The book is now on the third edition but postage costs ($65) and import duties from the US were too high to consider that option, even though the book itself was no more expensive. In fact, I ordered the second edition as advertised and this one has arrived incorrectly but the company I bought it from disputes that. (Don't tell them but I think I will keep this one anyway - maybe one day I'll get to the States and buy the 3rd edition.)


I've wanted the book for a while but it has taken ages to find one at a reasonable price. It is in spiral format with a hard cover. Mine is second hand but in excellent condition and the postage was good, with no duties. I don't know what the newer editions have that this one doesn't.

What do I like about it?

First of all, it does appear to make pattern making easy. Reading, I feel 'yes, I can do this'

Secondly it uses my measurements and not much in the way of ‘standard’ measurements.

Thirdly, there is a section for pant pattern making for the full mature woman. Yes, that's me these days, though I'm on the lower end of her size charts

Fourthly she takes into account that we don't all have perfect bodies and isn't judgemental. I feel that some of the systems I've tried try to shoehorn into a perfect shape and at the same time make me feel bad about my body.

Fifthly, she goes through all the different blocks and what each block might be used for. She will show the modifying that can be made e.g. in bodice style and say what block you must start with. I hadn't realised there were so many different blocks! I can now understand why some of my enthusiastic pattern manipulations were less successful than I'd hoped! I needed to start with the right block and I didn't.

Although I went to pattern cutting classes, I realise now that they really just skimmed the surface. I don't have that solid foundation of knowledge which is so essential to good results. Results for me and my family - you know of course that is the limit of my ambitions.

One thing she said was that you cannot balance a bodice pattern if there are bust darts from the side seam.  Balancing is done without any such darts but they can be moved later using dart manipulation. This was another 'ah ha!’ moment for me as I have lots of problems with such darts on side seams - twisted, not meeting nicely even though they were trued.

I read the pant section in greater detail as I intend to try this.

Balancing patterns

I really like her sections on balancing the pattern (indeed it was a question I asked on PR on balancing which led me towards this book - thanks to Kayl's recommendation.) As a result of reading this section, I am convinced that my patterns have not been balanced, though they may have been trued, and this has led to some of my problems. When I asked about balancing patterns in class, I was directed towards truing - not the same thing at all, though clearly there is overlap.

When I true the seam of my trousers, there is a fair bit of manipulation, shifting around; in these pants, they are matched at knee and ankle, lie beautifully, and any length change is made above that to ensure the seams lie on top of each other. That is balanced; if the pattern is not balanced, the fabric will twist.

I feel so inspired that I want to start straight away! I hope results will be as good as I'm hoping! I intend to draft the full mature woman's pant and then convert into a sport culotte for the summer. I have some suitable fabric.

I'm not going to get much time for sewing over the rest of June, though,  so my test of the book method won't be around for a while yet. Never mind. I feel in my bones that this book will be one of my top recommendations.

I'm missing a number of my classes over the next few weeks but I can go to Dan's Sew Club on Monday and move forward with making a suitable size FBA on my shirt dress toile


Friday, 1 June 2018

End of May Update


I was going to write one post but realise that it’s far too long despite not really feeling I’d achieved much! So I will do a separate post for my finished trousers. That will also give me a chance to get some photos!!


Me Made May 18

I decided not to sign up for Me Made May as I just don't have the variety of self made garments and don't want to post photos showing the same things on multiple occasions. The idea is to make your own challenge - and it should be a challenge, not something easy. I decided to use the time to try to wear more of my hand made garments, decide which I liked and wanted to keep (many are too small, sadly, with weight gain), cull more clothes and identify wardrobe gaps to contribute to a sensible sewing plan, including hopefully finishing my trousers!

So that was ongoing throughout May - and in fact is still continuing, as is decluttering in general.

The main gaps I have found are, not surprisingly, around trousers, shorts etc. The trousers that currently fit are too heavy for the hot weather we’ve been having. I don’t have any shorts that fit - and that includes my golf wear.

So, June plan - make a pair of shorts or trousers or preferably both with a cooler fabric. I have already made a pair of trousers that I can wear to golf. I need to see if I must make a pair of crops or whether I can still fit into a pair.

Garment alterations

The first task I completed in May was to lengthen a pair of trousers. I had two pairs of trousers, same size and style, in different colours. Last year I shortened these trousers! This is something that's practically unheard of. They were much too long and I shortened and cut off the excess. 

Unfortunately, they've shrunk in the wash and maybe my extra weight is pulling them up too. 

Anyway I took down the hem of one pair, attached bias binding right side to right side and created a false hem by folding, understitching and pressing bias to wrong side and hand sewing the hem. I didn't get much extra length but it is what it is. I was only able to do one pair as the hem line on the other pair was abraded and would have been too obvious. The fabric of both trousers is very soft and isn't wearing at all well. These are the best fitting trousers I have.

Pulls still present. Faced hem just seen in background


A few weeks back, I wore these trousers to a nice walk along Whittle Dene Burn, with a bit of a climb. Plenty of birds and flowers but we didn't see any animals. I think our group is too noisy! We had a lovely lunch in the garden of a local pub. During this we were treated to some ukulele music by members of our party. On my return home, I saw my trousers were a bit muddy in one place. Although the weather was dry, sunny and warm, there were still some left over muddy patches. Anyway, as I was brushing off the mud, I realised that these trousers are actually pretty disreputable - there are so many pulls in the fabric, not all due to holly bushes and hawthorn on the walk.  I’ll try to pull the threads through to the back but if that doesn’t work, I’ll use as a template for another pair, which will be by then all the more urgent!! (I wore them again today on a walk without having fixed them; they are far too warm for this sunny weather)

I had two main garment construction tasks at the start of May

Self drafted top further modified

I continued making my modified self drafted top. After I sewed up the sides with extra shaping, I noticed that the stripes on one side didn't match across the seamline at all while the other side was okay-ish. I had to take the mismatched side out and resew.

I decided to use self fabric bias binding (partly because I forgot to take the reel of commercial bias binding I was considering!!) and cut out the required pieces. After thinking about construction and the fabric, I went with my tutor’s recommendation to construct like a knit neckline, that is folding the bias strip in two and attaching. This isn't the way I would have chosen but the fabric was a bit difficult to handle.  She also demonstrated how I should be doing my side splits. I made up a template to ensure the stitching visible on the right side is identical on each side.

I finished the bias binding around the neck and armholes and I wasn't at all happy with it. I didn't like the finish and the band didn't lie properly. I think this technique simply didn’t work for this neckband; the same finish as the first would be better. No photos of this.

I thought the unfinished side splits and hem were fine. When I tried it on, David said he didn’t like the bust darts and I agreed as they were rather pointy despite careful sewing and pressing. I was going to abandon.

Side splits, back longer than front.

However, Lyn felt this top could still be salvaged. She agreed the bias strips sewn in this way didn't work and should be removed (and helped me by removing the overlocker thread, which I always find so difficult despite knowing the theory.)  I decided to redo in the standard way and ease the neckline and armscyes a bit more. You might have realised that my bias strips were a little narrower by this time as I had trimmed the earlier seam. Never mind, I still manage to make it work, though now, in order to get a neckband wide enough, I decided on top stitching on the band to finish rather than using stitch in the ditch. It worked out okay. I had to redo a couple of areas where I missed the back seam edge.

I  asked Lyn to look at the darts. She didn't find them that bad but steamed them over a ham which improved then considerably.

So, I finished the top. I’m ‘meh’ about it. I can probably wear it but won’t reach for it first out of my tops. I really don’t feel this design is my TNT and probably won’t make any more. I don’t feel it fits well enough but can’t put my finger on the issues. I'll try to get some better photos - I'm just not feeling well today and am not up to modelling!

Self drafted trousers - I’ll put these in a separate post.

Knitting
Many people can watch TV and knit. I'm not one of them. I have made more mistakes and had to rip back more rows. I'm not getting on very quickly as a result! Fortunately, my waistcoat is for cooler autumn days (well it was supposed to be for spring but that's gone now)

London Fabric shopping

I’ve just returned home after a few days in Cambridge, Essex and London. In London, my main fabric purchasing task was to get green sandwashed silk to make Helen another dress. I succeeded in this.


I also bought some lovely Hugo boss wool for trousers and some lovely silk for me. ‘When I was young, much younger than today’ (cue music - Help! by The Beatles which is playing in the background as I type), I had a beautiful grey patterned silk or silk effect shirtdress that I loved and thought flattered. It could have been silk as it was rather expensive. This was of course in the days before I sewed or had any knowledge whatsoever about fabrics. I saw a silk that slightly reminded me of this fabric so bought it. I plan eventually to make a shirtdress, though of a different style to the original, more suited to my current body shape.

Meantime, I also bought some lovely plum coloured crepe, thinking shirtdress (practice before using silk!) and some linen.


London Exhibitions
I visited two exhibitions

Design Museum - Azzedine Alaïa: The Couturier

He was small but loved tall models. A few of his photos emphasise height differential
“Conceived and co-curated with Monsieur Alaïa before his death in November 2017, the exhibition charts his incredible journey from sculptor to couturier, his nonconformist nature and his infectious energy for fashion, friendship and the female body.
Unlike many of his contemporaries, Alaïa personally constructed each garment by hand and refused to bowto the pressures of fashion week deadlines, instead working to his own schedule. His collaborative approach earned him an esteemed client list, including Greta Garbo, Grace Jones, Michelle Obama and Rihanna.
Rather than a retrospective, the show interlaces stories of his life and career alongside personally selected garments, ranging from the rare to the iconic and spanning the early 1980s to his most recent collection in 2017.” from Design Museum literature

I’ve seen a few posts about this exhibition, which is why I learned of it in fact, so I won’t say too much about it. I did take some photos but they didn’t come out very well. I enjoyed it. I particularly liked the juxtaposition of fashion and art.


The exhibition is on for a few months yet. October 2018, I think.

V&A - Fashioned from Nature

“The first UK exhibition to explore the complex relationship between fashion and nature from 1600 to the present day
This exhibition will present fashionable dress alongside natural history specimens, innovative new fabrics and dyeing processes, inviting visitors to think about the materials of fashion and the sources of their clothes.” From V&A literature

I haven’t seen any posts about this - though I haven’t been reading as much as usual so sorry if I missed yours. The exhibition is on until January next year and I really enjoyed it, though when you’re in London for a short time, there’s a tendency to try to cram too much in so I was tired with really painful legs (it’s an issue I struggle with) and perhaps didn’t get as much from it as I should have.

Again, I was able to take photos, again only with my mobile, and again they aren’t that great, sadly. David came with me to this exhibition and we found quite a lot to talk about afterwards. It is certainly thought provoking.

I’ll see if I have any photos worth posting.
 
Bark lace

June plans
I have started a toile of the shirtdress I plan to make. I need to make a FBA and haven’t got around to thinking about it yet.
My mother has decided to move back into sheltered accommodation so I’m rather busy with that, travelling back and forth and staying to help with paperwork in particular (my mother is registered blind) and don’t know how much sewing I’ll get done over the next month. Sadly, too, a friend from my university days died and I’ll be going to her funeral in the Leeds area next week. I clearly won’t manage to finish either shirtdress or wrap dress in time for the events they were planned for. Never mind.

How Do You Read Blogs?

It's a while since I've posted a blog,  lots of reasons. I'm thinking of starting again. However,  I used to read the blogs I fo...