Two years ago I made Joanne two pairs of culottes/shorts
from a double layer of double georgette. I blogged about them here
and here.
I have to remind myself that I really did make them and they were successful
given what follows!
 |
| This is how they should look. Photo from last time around. Side zip and pocket on left, right pocket and lace inserted between lining and outer fabric around legs. |
Joanne asked me to make her another pair as, wearing them a
lot as she does, these were wearing out. I'm not sure in what way. But as
they've lasted two years of heavy wear I don't think it's a huge issue related
to my sewing. At that time I made one pair in a nice double georgette but the
other in a much less nice fabric sourced locally. I don’t know which pair is
dying. Or maybe it’s both.
I still had the original pattern I made. Joanne had
commented that the back was slightly shorter (I had noticed it too - she has
sadly inherited her mother's butt!). She then said not to change it as the
shorts were perfect but I did add a bit anyway. Don't tell her!
I ordered more of the nice double georgette from Minerva. In
black of course. I had bought some patterned fabric but Joanne had no interest
in that
I cut out the fabric and then hit a total block. I just
couldn't remember how I made them previously. I re-read my notes but no joy. I
asked Rory's advice (again). I took notes listing each step - but still
couldn't do it! I immediately forgot even though the notes made perfect sense
at the time. What was going on?
I re-read my blog posts, the notes I'd made and the link I
recommend for the zip in the inseam pocket. I also reminded myself how to do an
ordinary in seam pocket. Yet I was still stuck.
What? I hadn’t even got to the tricky bagging out part.
I realised I'd have to overlock the edges as the fabric
frays so much. So I did that to all the pieces.
Pockets
Fortunately I still had my previous toile though it's one
layer only. It only had one pocket, the zipped one.
In Dan’s sewing club I got initial advice from Rory just
before she left about sewing a box for the pocket rather than simply clipping,
in view of the fabric fraying so readily - this was as she had recommended last
time. Dan helped me during the rest of the evening. She found the toile helpful
in helping me.
I started off not too badly. I decided to start with the
zipped side. The two sides are different. The unzipped side, the right, is a
traditional in seam pocket with the front part attached to the front and the
back attached to the back and undersewn before they are sewn together. (Note -
see later - it isn’t!!) On the left side, however, both pocket pieces are attached
to the front prior to the pocket pieces being sewn together, leaving a seam
allowance for the zip.
Unfortunately, I stitched the pocket pieces together wrongly
and left zero pocket space! I couldn't see how to do it, but Dan to the rescue
with the help of my toile. I had to unpick causing a bit of extra fraying on
the pocket edges.
It took a while but when I left at the end of the two-hour
sewing bee, I was clear about the way forward! At least, I thought that at the
time. One slight problem I have is that Dan and Rory approach things from a
different angle and that causes confusion for me.
I haven't put any photos of these steps because a)I did last time and b)I didn't take any!
.
A couple of issues I picked up
- My marks indicating the wrong side of the fabric had disappeared. I found it extremely difficult to tell one side from the other. Dan helped but also found it extremely tricky.
- I need to make the pocket of the next version deeper below the level of the pocket opening - I haven't left much space.
Well, I hang my head in shame! I got these all wrong,
despite Rory’s drawing. The thing is, because Rory advised the boxed method, I
couldn’t find an online tutorial or one in any of my books showing me what to
do. To cut a long story short, I wasted a back piece and a front piece and two
pocket pieces. In Rory’s sewing bee, she tried to sort out my errors (plural)
but was unable to do so in this fabric, particularly with small black stitches
and understitches on black! I felt quite upset as I had moved several steps
back and realised I wouldn’t be able to finish in time for Joanne's birthday,
sadly.
Whereas in the method in tutorials that I’ve seen the front
pocket piece gets attached to the front, the back to the back and then both
joined and folded to the front (and this is what Dan was advising, not
realising that I was doing the boxed method) - this is different as the fabric
can’t fold in that direction after a box (part of my problem was trying to make
it do so) With this pocket, it’s made in the same way as the left zipper pocket
- that is that both front and back are attached to the front. Trouble is, I had
also mistakenly boxed and understitched the back pocket...
The left side zipped pocket was much better. I had attached
the zip without any difficulty but then realised that the pocket opening was
rather baggy and some of the understitching was showing in the surface. I took
that side of the zip out, readjusted the pocket pieces and it looks better.
So then I had to re-do the right side pocket (I used the
lining pieces as it’s self-lining and I was able use the extra pocket pieces I
cut - the pockets are single layer not double as I was originally intending). I
added a further layer of interfacing behind the zip as some of it got torn off
when I was altering and unpicking the zip (one side of the zip only as I left
the other side).
I eventually managed to complete the two pockets and the
zip. That took me a long time. I’m not sure whether this fabric is harder to
work with than the last (I thought they were the same) but I’ve struggled with
the understitching of the pockets - the stitching slips away from where it
should be to the centre of the seam or even towards the right side of the skirt
part. The first time it happened, I thought I had forgotten to move the needle
but then I realised that wasn’t the problem; the fabric is shifty. I
ended up moving the needle further than usual to ensure the understitching was
in the correct place.
Next steps
I made up the lining shorts, remembering to have a gap where
the lining will eventually be sewn to the zip. Now I had two ‘shorts’, one in
lining and one for main, minus the waistband of course.
Here’s where I need your help!!
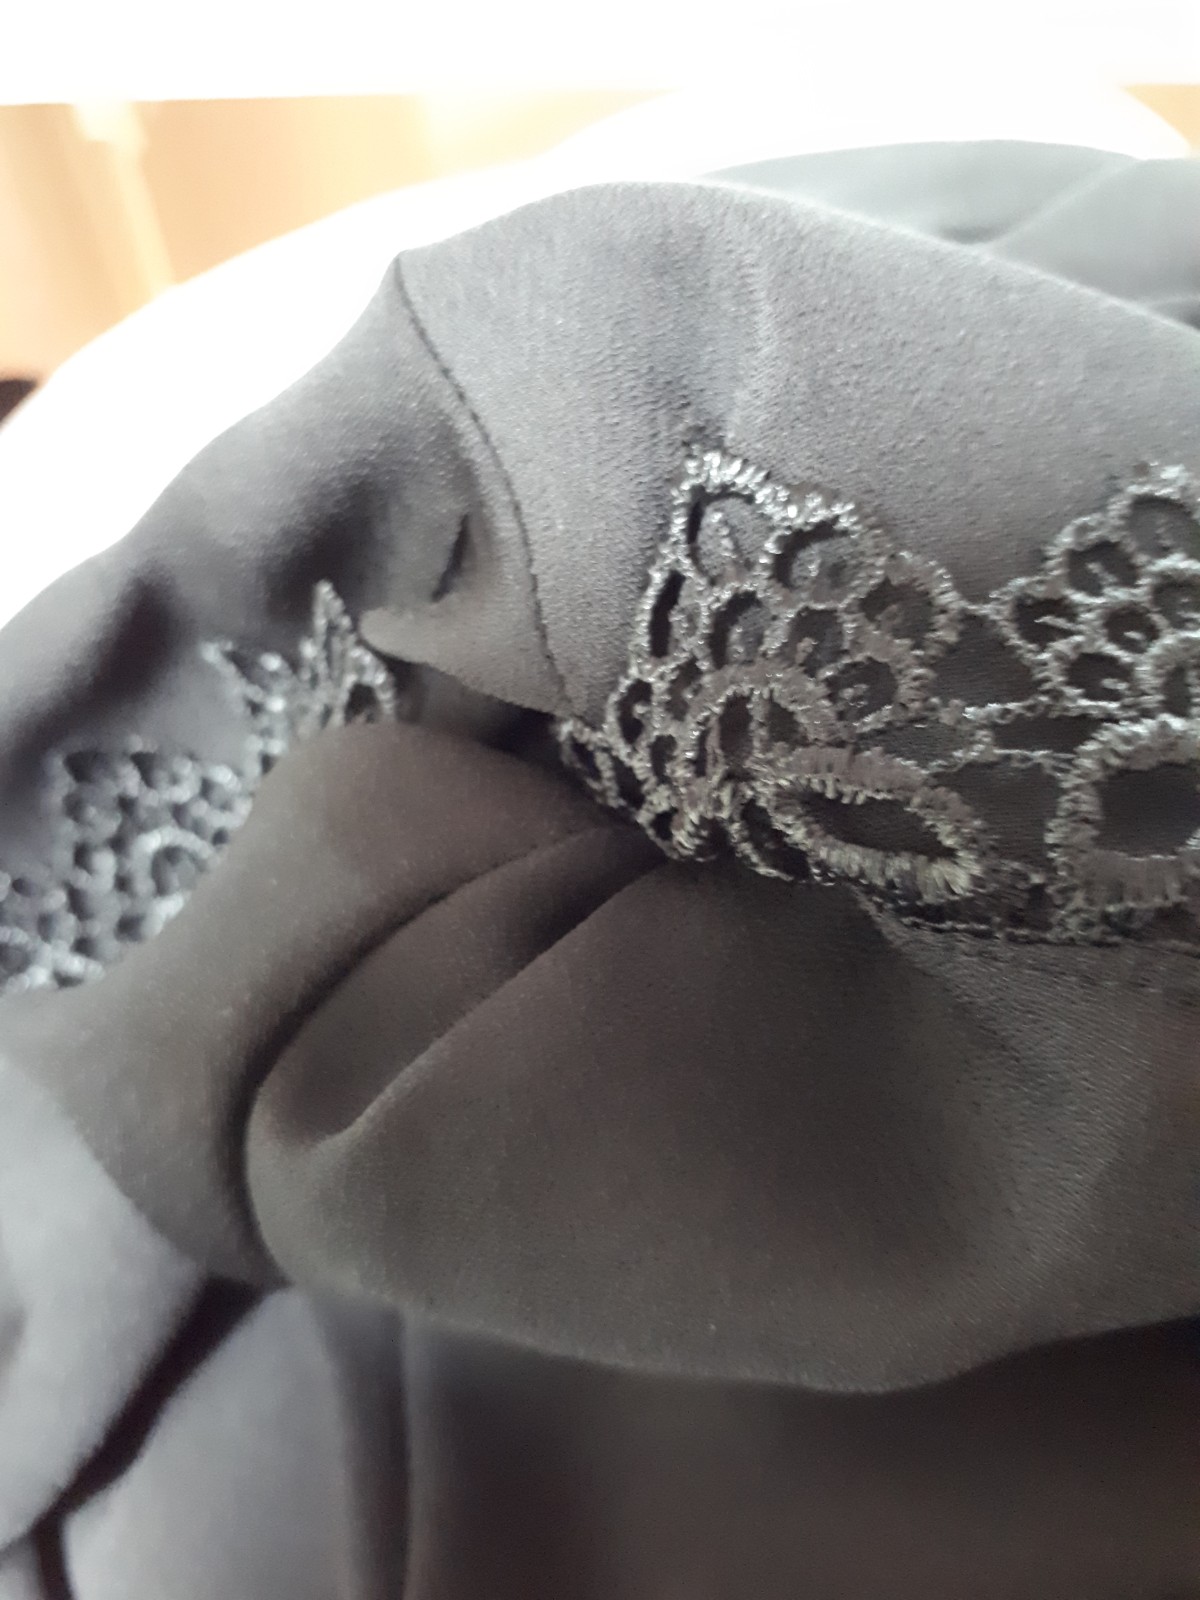
I attached the guipure lace to the right side of the outer
shorts. I then attached lining to shorts at the leg, sewing through the lace,
now sandwiched between the layers of fabric. I understitched the lace edge as
far as I was able to stop the lining showing.
 |
| I found my magnifying lens essential |
Then I tried to turn the shorts
through to the right side. I have tried and tried, no joy. I have asked Helen,
who is visiting to attend a wedding, and David, no joy. I have practised on two
pairs of knickers, now ex-knickers. No joy. I can’t remember how I did it previously.
 |
| The shorts are wrong way out. Lace attached between layers. You can see how I stitched the crotch and the lack of any inseam. |
 |
| When I try to turn, the lace disappears into the tunnel that is the crotch, but doesn't come out the correct way on the other side - I'm just back to where I started! |
 |
| Another view |
I asked advice on PR yesterday and have just had a reply so I'll consider the steps for that.
I have to do a bit more thinking about this as I’ve realised
that the way I had joined the toile crotch may not have been the same as last
time (see photo above). When I’m making trousers/pants, the two sides are made up separately and
then the back and front crotch seam are sewn in one continuous seam with one leg inside the other. In this
case, I joined the two sides at the front and at the back crotch seams, then I
stitched horizontally across the crotch to join back to front on each of the lining and short outside fabric. This is the way
the toile was done, for speed probably and Rory had suggested it might make it
easier to turn. Clearly it hasn’t. Is
this the reason? Is it impossible to turn given what I have created? I should
add that the ‘inseam’ is basically non-existent, so the lace is effectively
joined to the sides of the crotch piece.
I’m afraid of damaging the fabric further – there are
already a couple of clicks. It would be difficult but certainly not impossible
to take out again. I’m prepared to do that, even though the fabric may end up
unusable. I have enough fabric to make another pair but until this problem is
resolved, there is clearly no point in me doing so!
Can you offer advice, please?
Edited to say - the problem is solved!! David said if I had turned the legs before I sewed the crotch, then I wouldn't have had the problem. That combined with the suggestion from PR to turn through the crotch led me to take out the whole of the back and front crotch seams in the lining - and hey presto! I could indeed turn through. Then I had to re-sew those seams I had taken out - not much of a problem when there's no waistband - and then hand sew the last bit of crotch lining closed. I've had enough of these for now so will think about the waistband, which is the next step, later in the week.
Edited to say - the problem is solved!! David said if I had turned the legs before I sewed the crotch, then I wouldn't have had the problem. That combined with the suggestion from PR to turn through the crotch led me to take out the whole of the back and front crotch seams in the lining - and hey presto! I could indeed turn through. Then I had to re-sew those seams I had taken out - not much of a problem when there's no waistband - and then hand sew the last bit of crotch lining closed. I've had enough of these for now so will think about the waistband, which is the next step, later in the week.
 |
| Just needing a press and waistband |


Gosh, I'm exhausted just reading it! Well done for persevering, I'm sure they'll be lovely when they're finished :-)
ReplyDeleteI was so frustrated, Margaret! I can finish then now and Joanne will appreciate then (but not of course the with that goes into then)
ReplyDeletemercurae_ya Dale Vaughn https://www.npohtf.com/profile/Windows-Boot-Genius-Full-Version-Free-Download-Crackbfdcm/profile
ReplyDeleteadomlozleo