I’m making a jacket as part of my tailoring class but also because I have wanted one for a while - a well fitting one, that is.
Fortunately, it looks like the fit on my jacket will be better than that on my knit tee-shirt!


I had a number of jackets in my consideration list.
I chose a Palmer Pletsch blazer (McCall's 6172) for the jacket for a number of reasons.
- I feel it's less formal than the Vogue Claire Schaeffer jacket, which I love and will come later should this jacket work out well. In the meantime, though, I need to sew something that better suits my lifestyle
- PP has comprehensive fitting guides including lines for FBA etc.
- I bought a Craftsy class on interfacing jackets which uses this jacket, so it went to the top of my queue.
- It's a simpler make than the Vogue.
- It has all the bits I need to practice for my class, which perhaps Vogue jeans jacket might not have done . I will be doing that one too but I think it's slightly too informal for all the techniques I need to practice.
We worked in pairs in class to take our measurements. Rory took these in order to make up a trial block which we'd toile. There isn't time in class to do this. Everyone wants a jacket to fit themselves rather than just learning techniques on a standard size garment. I'm no different. The blocks we'd then create would be used to make up the jacket of our choice.
I'm going to miss next week's class, when I thought we'd start this process. However, I think we're running behind and next week is actually going to be about lining insertion. ‘Dropping in the lining’. I'm going to do that in Monday's sewing bee so I don't fall behind. I started making a toile of my jacket so I wouldn't fall behind.
I went along with the PP instructions, on the whole at least.
I chose my size based on high bust measurement. (I was borderline just to choose by full bust size). If between sizes, they instructed to take the smaller size, which I did. This was 40.5” so I went to 40". I used this size, as instructed, to choose the size 18, which is for a full bust 40”. The idea, of course, is to have a better fit across upper chest and shoulders. My full bust measurement is 42/43, depending who takes it and when! So clearly there will need to be a FBA. I knew that would be the case. But how much of a FBA?
I cut out the tissue for a size 18, including hips, even though my hips are larger. I reinforced and clipped the tissue as advised, pinned together and tried on (one side only). The instructions say that if you need a FBA, wait until you've done that before sorting hip size. I pinned the tissue from armscye to waist or a bit below and tried on (with help from David of course). I don't have any photos of this process but it's pretty well documented in the pattern instructions and in Fit for Real People.
I found it difficult to judge where my bust and waist points would be so decided to concentrate on the FBA.
First thing I had to do was to ensure I didn't need a broad back adjustment as that would affect what was required in the way of a FBA. I didn't need one. The tissue met at the centre back without strain and was pinned there onto my tee shirt.
I then had to see if the tissue jacket centre front line met my body centre front line. Of course, it didn't, as expected. I then had to measure the distance between tissue and body CF lines. 2.25”. This was the amount of FBA required (total 4.5”). I did this in inches, BTW, as pattern talked about those.
There was a choice of a standard or Y FBA. I choose the latter as they suggested this if you often had to build up the armscye at the front. All the lines were drawn on the tissue, so I had no problem doing this. My paper insertion was rather large! 2.25” at the pivot point but much wider lower down. At this point, there is still a side dart, which can be left or closed and rotated into the vertical dart. I choose to close and rotate. This, of course, meant that the original dart area was enormous. I thought I had got it wrong.
I took the tissue to class and tried on there. Rory felt that I was in the right ballpark but further adjustments would be easier in calico. She marked waist and bust point and roughly pinned out the rather large front dart.
I had also tried on the 2 piece sleeve and felt it was too tight so did a 4cm full biceps adjustment. This involved a slight building up to original of the sleeve cap. I didn't alter length.
This is where I deviated from the PP method as they then advocate moving directly onto the fashion fabric. I had too many things still to work out.
I went early to my tailoring class on Wednesday past and cut out and machine basted the pieces together for half a jacket only - the calico I'd taken turned out not to be big enough for a full jacket. When I say half a jacket, I'm excluding facings, collar etc of course. I went for the medium length. I don't like the long and while I love the short length, I feel the style is too young for me - and it doesn't have pockets, which are part of the course requirements.
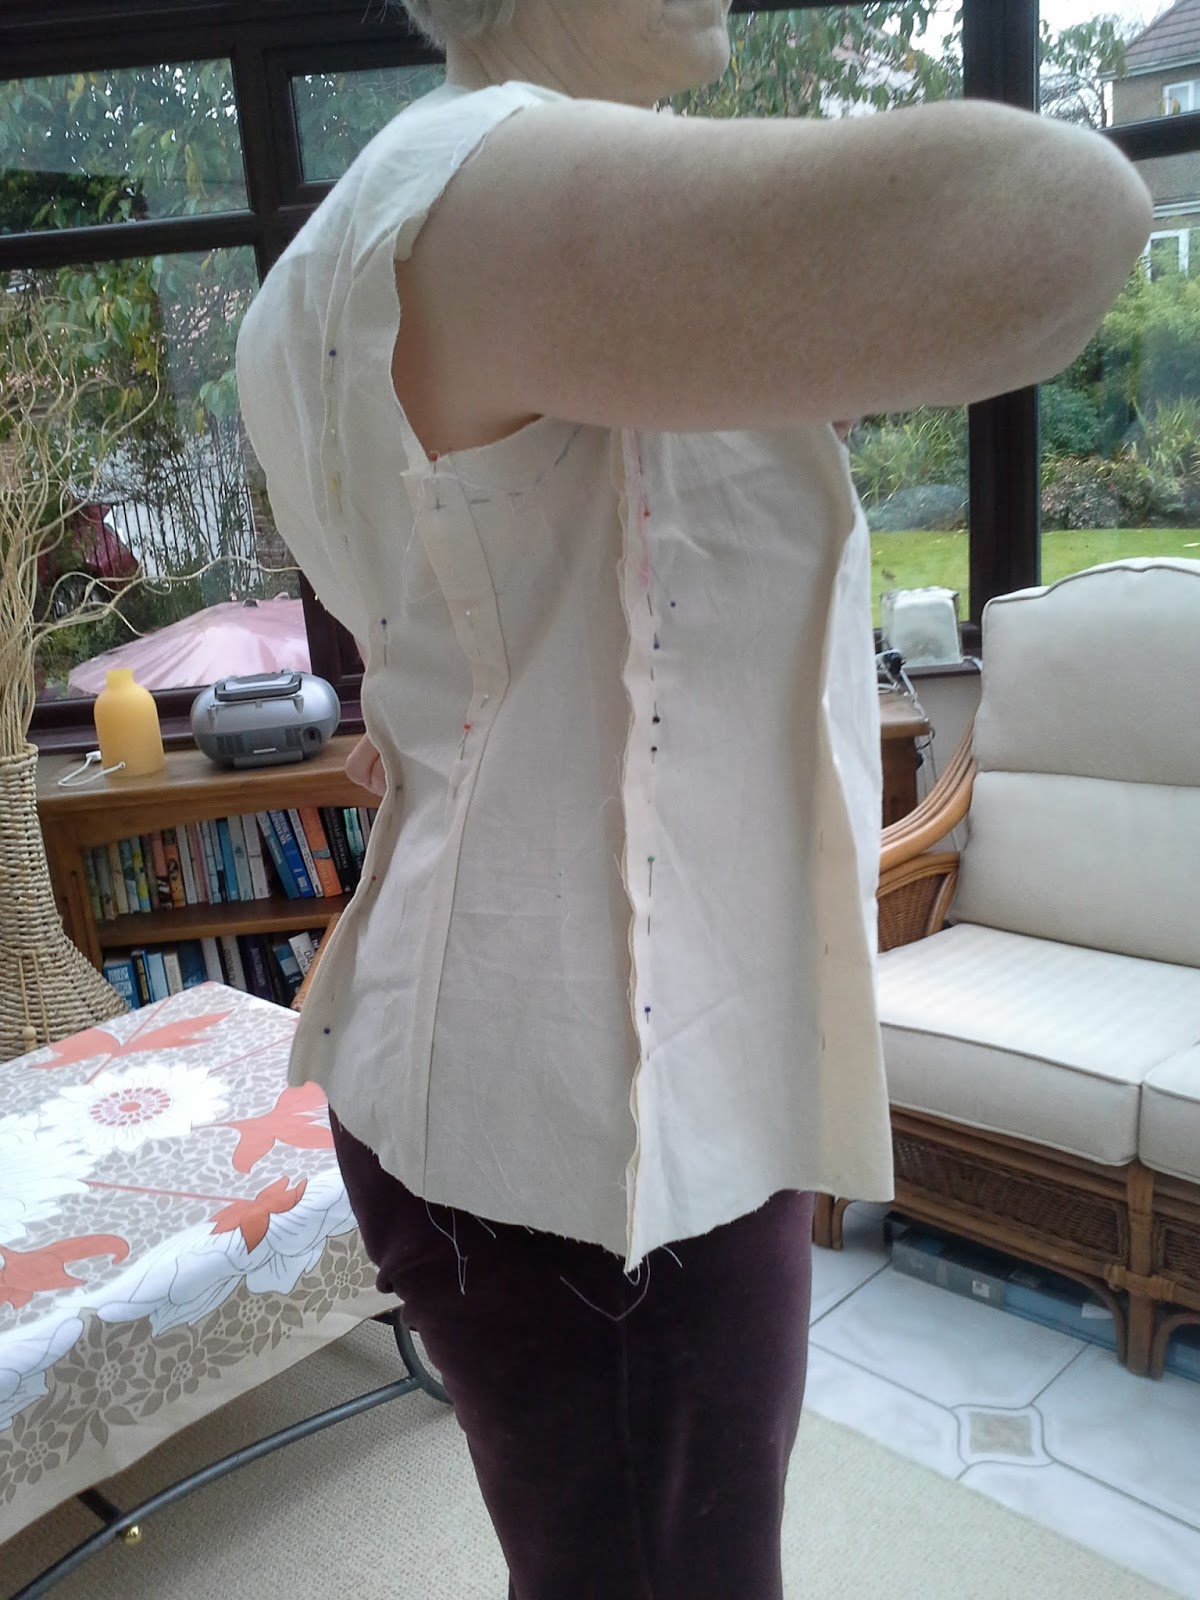
Rory fitted me. The front dart was big but will be cut away in the final jacket. I have a forward sloping waist, but she felt that the waist position at the side of my body was in the right place. She gave me the choice of keeping the shoulder width or narrowing slightly - I decided to keep. Seeing these photos, taken at home today, not at class, I'm less sure this was the correct decision. What do you think?
 |
| You can't quite see the roll line(pencilled in) - because the collar is pinned to make it lie better, the roll is not going all the way down. Do you think the shoulder is too wide? |
She repinned the back seams.

She then said I could miss out one of the seams at the side but there would then be less waist suppression possible there. I don't want too boxy so opted to retain it.
 |
| I thought you'd be able to see where the armhole needs dropped as the current is far too high but it's not showing up here. More pinning out. |
In addition, she pinned out a wedge across the collar towards the side to encourage the collar to lie properly. PP do this at tissue stage.
 |
| You can see the pencilled in roll line here - I need to true this |
I need to transfer these changes to the pattern tissue then I think I'll make up in a cheaper fabric first to check further on fit details.
I quite fancy the jacket in boiled wool - I bought some in Leeds at Sew Up North

I quite fancy the jacket in boiled wool - I bought some in Leeds at Sew Up North

As a postscript, I'm thinking this could be my early bird make for SWAP 2017. Add some navy...


I think I would fold the shoulders in and see what they look like narrower. McCalls, Vogue and Butterick are all wide in the shoulder. Perhaps even sew in the sleeve and get a good idea of the look. Good luck :)
ReplyDeleteThanks, Sarah Liz - good advice. I plan to make a whole toile using the adjustments I've already made so that will be the time to do it.The tailoring class has finished now and instead we have a sewing bee, where I can get help with fitting. I find it's the fitting not the sewing, on the whole, that gets me.
Delete